Going to the other side of the spectrum, from a vegetable garden to loaded with all things bad for you, but tastes so good cupcakes. You won’t think I am such a genius anymore once I tell you how these are done. It really is easy and makes for such a visually appealing way to dress up cupcakes, not that cupcakes need to be dressed up as the name itself is cute and enticing!
I pretty much use Paula Deen’s recipe, but with a few of my own tiny tweeks to the ingredients (see*) and then I pretty much follow the directions in Paula Deen’srecipe to make the batter and frosting, though I change it up a bit (time in the oven) when it comes to baking it.
Ingredients:
– 2 1/2 cups all-purpose flour
– 1 1/2 cups sugar
– 1 tsp baking soda
– 1 tsp salt
– *2 1/4 tsp cocoa powder
– *1 1/2 cup canola oil
– 1 cup buttermilk, room temperature
– 2 large eggs, room temperature
– 2 tbsp red food coloring
– 1 tsp white distilled vinegar
– *2 tsp vanilla extract
for the cream cheese frosting:
– 1 pound cream cheese, softened
– 2 sticks butter, softened
– *2 tsps vanilla extract
– 4 cups sifted powdered sugar
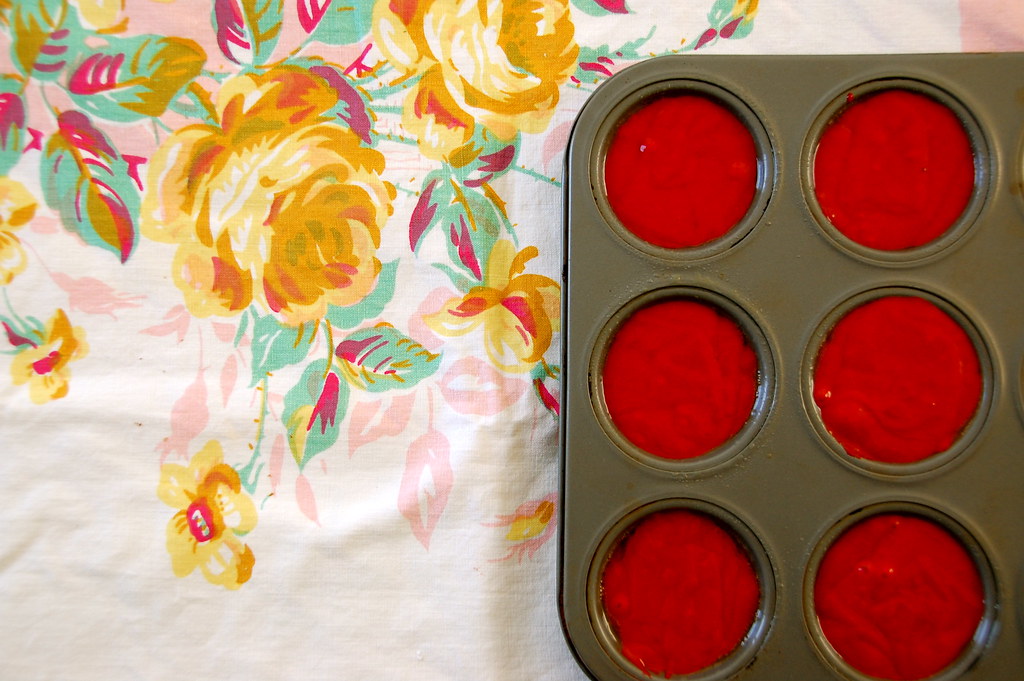
1. Batter is ready to be put in cupcake pan.
2. I spray the pan with pam and then fill each hole up 2/3 with the batter. Note: I do not use liners, but you could if you want, just pull them off before putting them in the jar. 3. Usually they are done after about 17 minutes in my oven at temperature of 350℉, and I take them out and put them on a wire rack to cool completely.
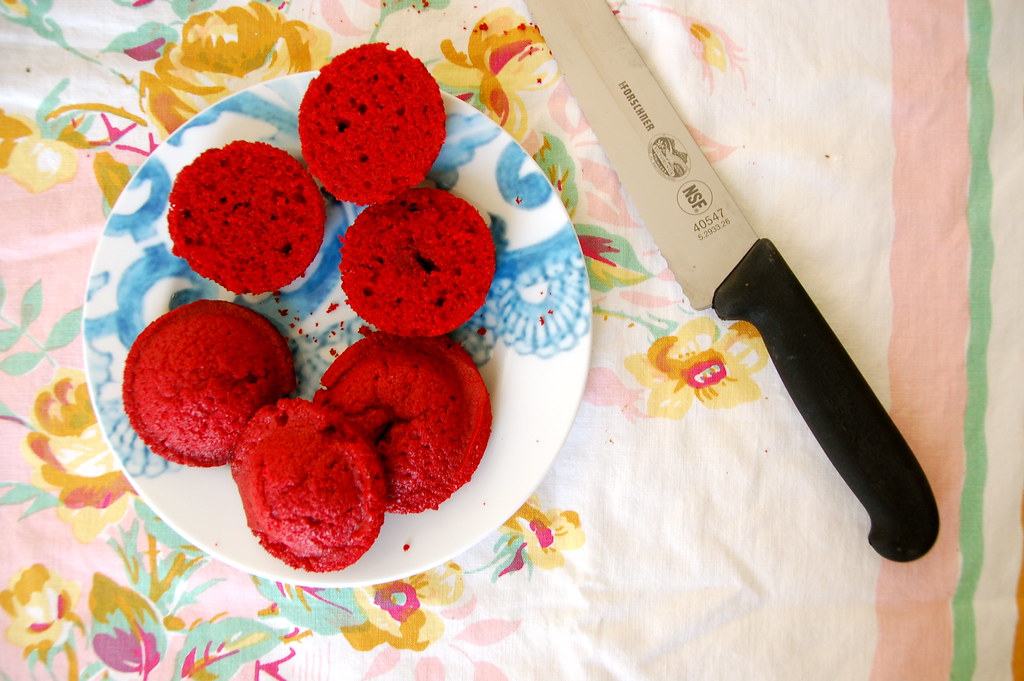
4. Once they are cool, I slice them in half. You will have a stack of tops and a stack of bottoms.
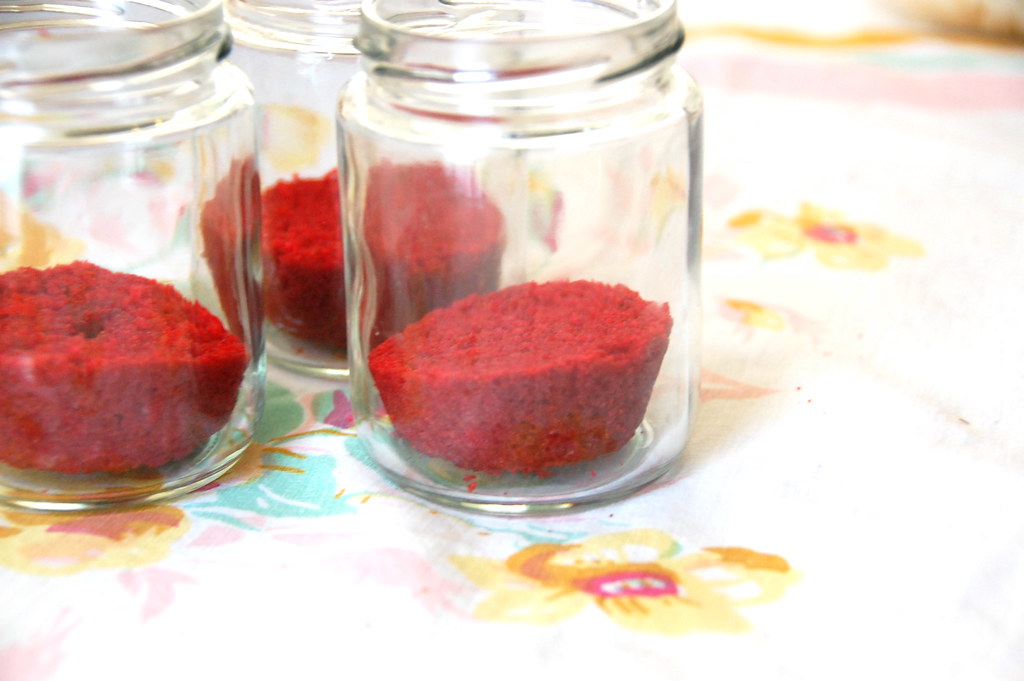
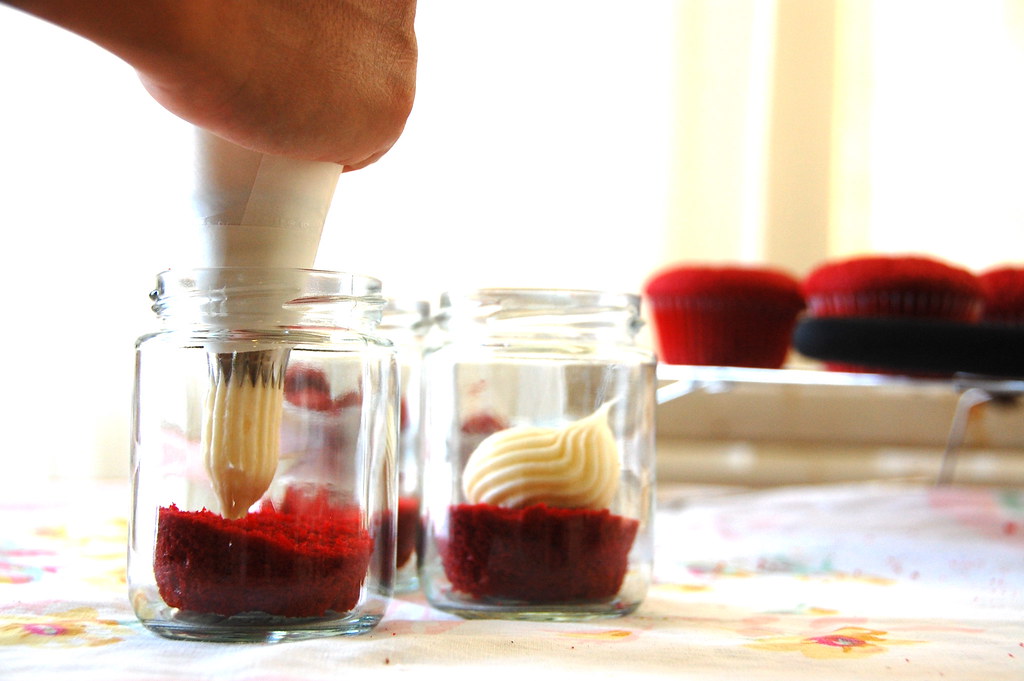
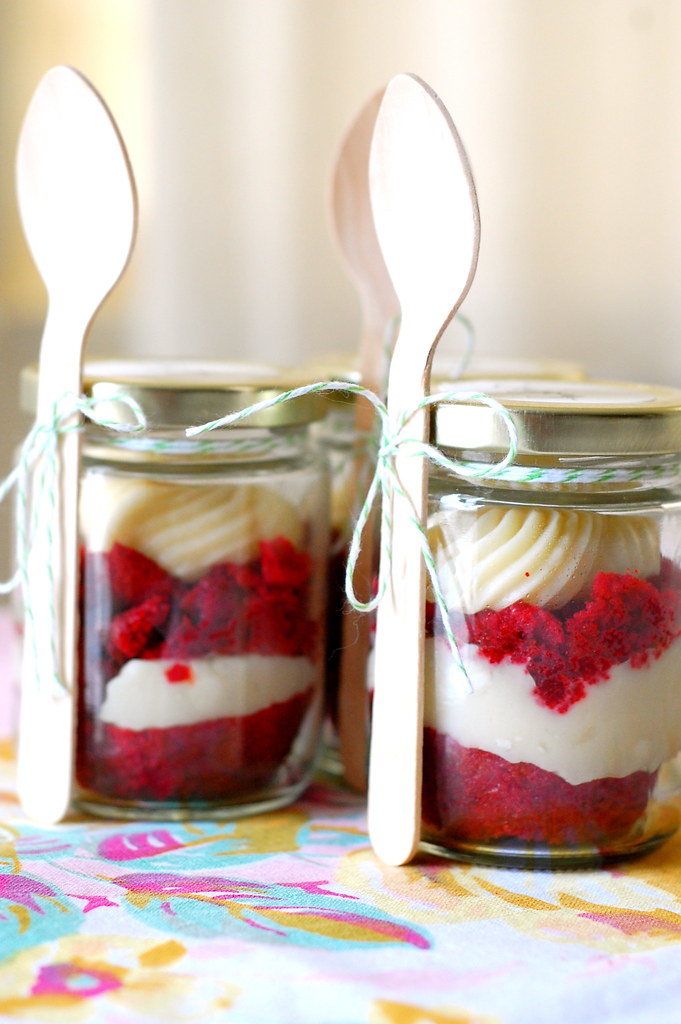
5. Place 1 bottom in each jar.
6. Put a layer of the frosting.
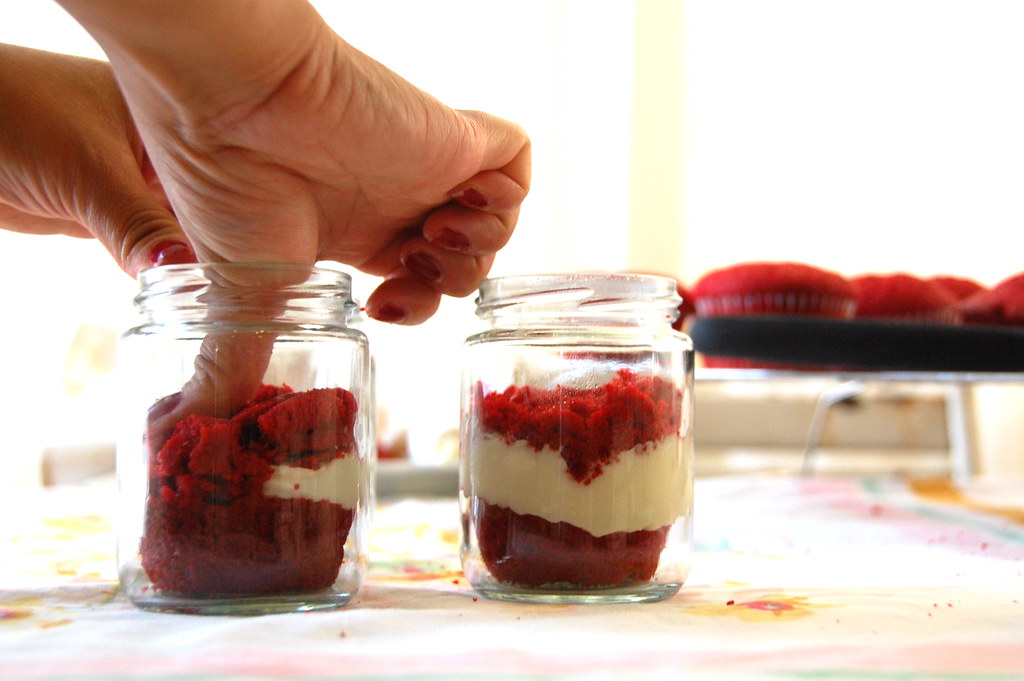
7. Take the top of the cupcake and place on top of the layer of frosting.
8. Flatten (gently smash) the top part of the cupcake inside the jar. You want to get the top sort of flat.
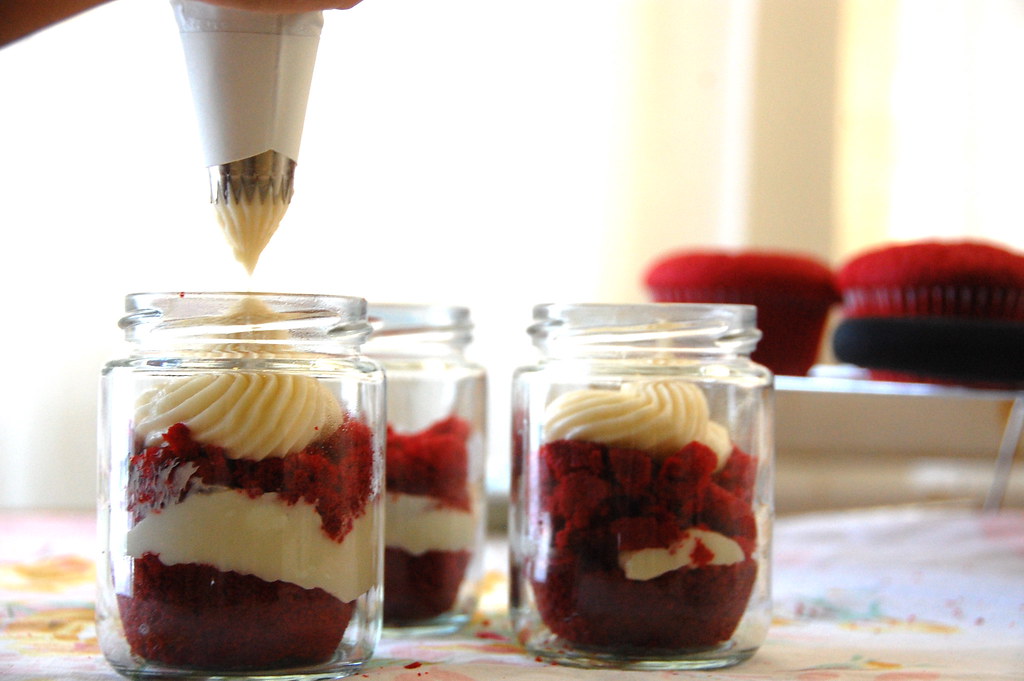
9. Beautifully frost the top of the cupcake.
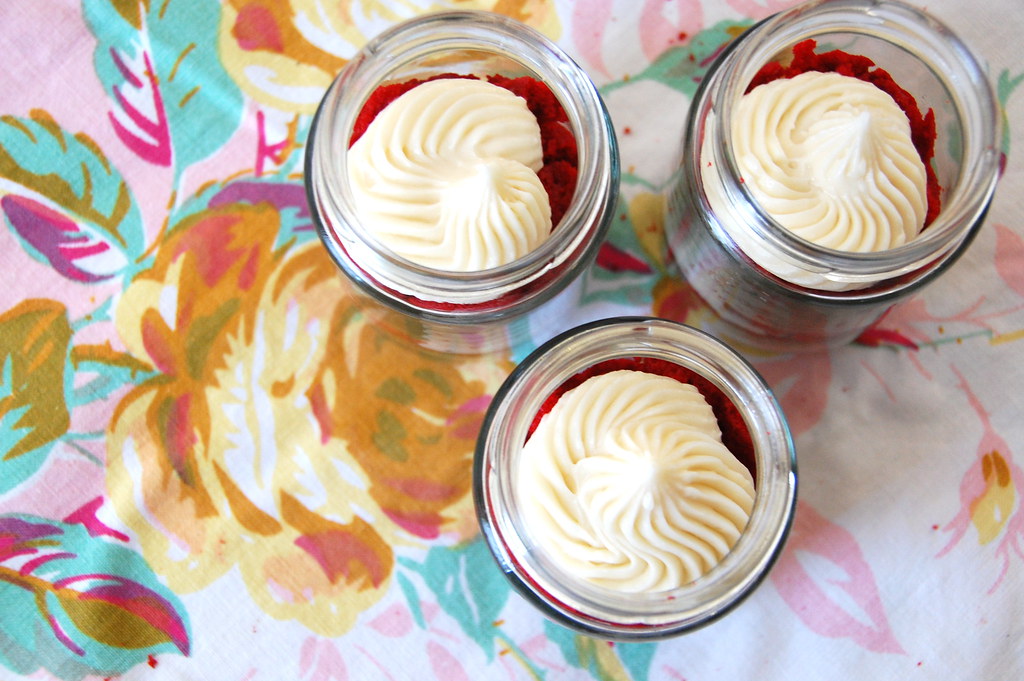
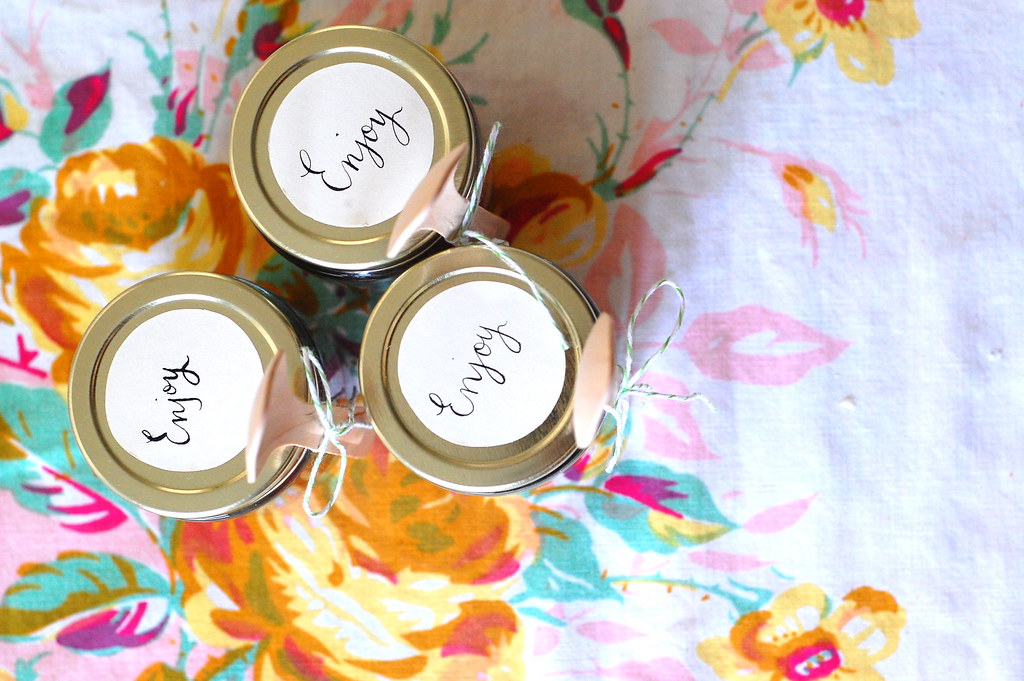
10. Cover with lids and package however you like! It will be heartbreaking to eat, as it is so pretty, but it is so yummy!
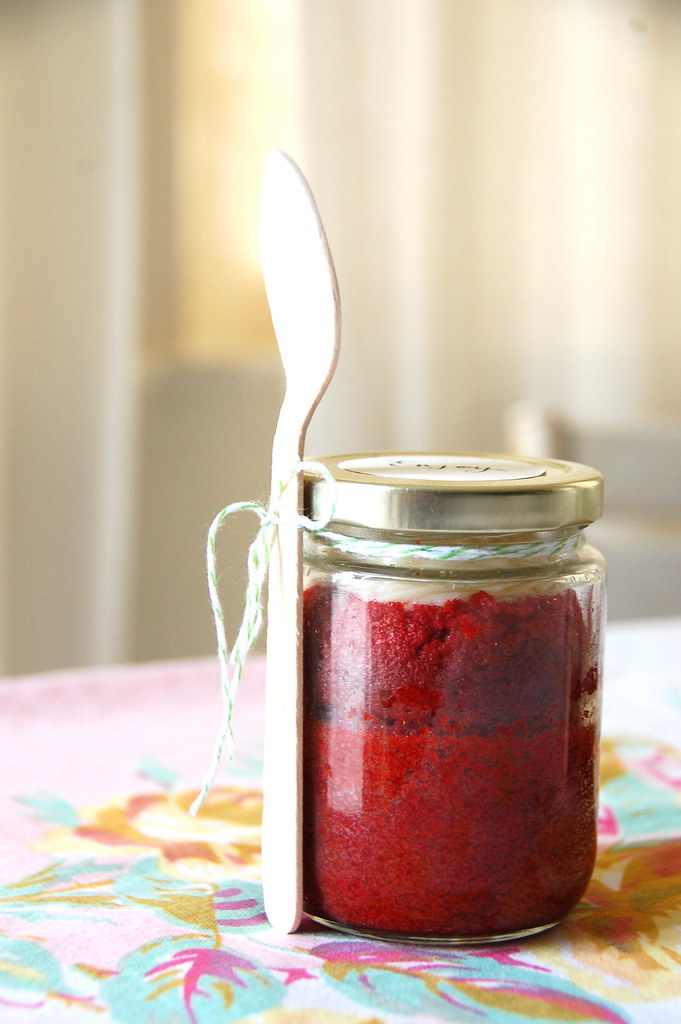
Easy, right? See, I told you I am not a genius. I did also want to give a crack at actually baking it in a jar (crossing my fingers that I wouldn’t shatter or explode in the oven) and it came out pretty good too. I followed these instructions, but the lid I boiled shrank, so I just ran it in piping hot water right before I put in on the jar. Also, I didn’t listen to the “ping” because knowing my ears I wouldn’t even hear it (I have small ears, so I have bad hearing! At least that is why I think I can’t hear well.) I let the whole jar cool completely, which was 2.5 hours. After it cooled, I opened the jar up, I scooped out a hole in the middle and then filled it with frosting. I finished it off by frosting the top too! Then, I sealed it again and packaged it to my liking. Something I would change next time I bake it in a jar, is to only fill it up a quarter of the way because it came up higher than I wanted it too.
Just as cute and delicious as the other way of making it!
Here is a little supplies list with a link to where I bought my goodies for packaging:
Now, go and enjoy as I am sure most of you will be itching to bake or make something (anything) in a jar! It is really darn cute that you have to give it a try! Don’t forget to listen to this song as you bake! Happy baking!!!
I made these for for the baby shower of my granddaughter and they were absolutely amazing, i even decorated the jars by making tutus to wrap around jars in the colors to match the princess theme of the shower…,
I buy baby bananas and diffirent fruits and sweet veggies to use in breads. I don’t always have ripe bananas when I want to make banana bread or want to cook sweet potatoes for bread but have a coup-le of large jars of baby food handy I always have puree whatever for breads. And I have jars for cupcake in a jar.
If you ever need to ripen your bananas, just put some on a cookie sheet and bake at 300 degrees until dark, usually 35 minutes or so. I do this all the time and it works perfectly!
thank you for aharing this awesome DIY! I most definitely will use this for future showers that i'll need to be involved in! It does not look too hard and is soo visually appealing! I love the pics you took of the process too!
I just made these for my co-workers and my boyfriend's family after you posted the photos from the shower. Thanks so much for the clever idea! Everyone loved them and I will be making them again… maybe with fun-fetti!
I don't think you need to bother with the boiling, because you are pretty much just using the jars as a short-term container that won't keep the cupcake and frosting edible for any longer than normal, maybe a few days, and if you WERE baking in the jar, trying to 'can' the cupcake, multiple studies have been done about how un-safe it is.
thanks for sharing! I love paula deen. my daughter and I hope to take a road trip to georgia sometime this summer from our home here in charlotte to visit her restaurant.
hey, you should make a badge for your blog than i can put it to my blog as well like you put your sponsors… i want to share your blog witm my visitors… your baby's photo is on my desktop!everytime i see her, i smile to her! thanks for that!
Duh! I just realized who you were!?? Whoops… I have visited you, just not in a long time and your design looks different. ha! We were both interviewed by Jenn @ Ambrosia Girl a while back. I'm loosing my brain:-) Have a great weekend!
that is sooo cute…also the small ear thing…they…a doctor told her that….she would always have bad hearing? i had never HEARD that before…loving your bloggy…
What a hit! Finally found a reason to make these delicious cupcakes in a jar! I made them for a surprise birthday party in the park. Basically, an excuse for adults to act like kids…tug-o-war, pinata, ring toss, and a water balloon toss. Perfect picnic dessert! I definitely eyed some of our friends taking 2nds and 3rds. Heads up, you need 2 bottles of red food coloring for the recipe…one will turn them a dingy pink…still delicious. Also, I added some fresh cut strawberries on top!
I'm going to do this for the fourth of july. However, I'm going to divide the cake batter into two different bowls. I'll add red food coloring to one. And blue food coloring to the other. Then I'll layer red cupcake, white frosting, blue cupcake top, frosting. Red, white and blue!
Another option is a parfait with yogurt. But this cupcake idea is so cute!
Wow, these are really cool!! My sister-in-law is doing a Dr. Seuss theme for the nursery for her first baby (YAY!!) and so I'm throwing her a Seuss shower too. These will be PERFECT with the red/white color scheme and I'll throw some turquoise ribbons on or even turquoise maribou around the jars (ala Thing One & Thing Two). Thanks for the great post & inspiration! 🙂
Love this so much! I've been looking around trying to decide what I could do for some party favors for my very small, family only wedding. These look so simple and perfect. Thank you!
My favorite bakery makes “cake in a cup” that is layered cake and frosting like this as a way to use leftover cake bits. It is always my favorite treat! Great idea to make them as gifts.
I love this! What a perfect party favor, and it looks soo yummy! Can't wait to share with my readers {www.rivernorthlove.blogspot.com}, thanks for sharing!
Hi I am Nicole from Colies Kitchen I found you on a Surfin’ Saturday blog hop and wanted to drop by and say hi. I really like your blog, and am now a new follower. I would love to have you stop by Colie’s Kitchen if you get a chance. http://www.colieskitchen.com
Hi, I just wanted to make you aware that someone who has an etsy cupcake store used your cupcake jar photo as her own in order to sell her product. her link is below.
i've already found 3 of her other photos on other peoples blogs and i just thought you should know.
Those are SO CUTE!! I have been scouring the internet looking for cheap, cute, DIY favors for my wedding in April! I think I might just have to do these! My colors are chocolate brown and cream – maybe I can try this with chocolate cupcakes? This would be a great girl's-day project! Thank you so much for coming up with this!!
OMG I absolutely LOVE this idea. I think I'm going to do this for my daughter's birthday party. I had planned to do cupcakes instead of a whole cake… this would be even better. Thanks for the tutorial and the links where you got your supplies. I'm definitely bookmarking this one. 😉
I love love love this idea. I'm a new follower. I actually found one of your pics on pinterest and tumblr without proper credit. I asked for the source and finally found you. I'm giving you full credit in an upcoming feature for DIY Thursday! It will be on the blog at fiftieswedding.com.
These look like a fun dessert, especially if you're on the go – no more crushed cupcakes! I'm going to feature these on Five Friday Finds tomorrow – please stop by and grab a button while you're visiting!
Love this! I saw your pictures over at The Daily Buzz and they didn't seem to mention anything about having permission to republish them. I'm new to blogging, and was wondering in general what is the etiquette for republishing pictures or linking to posts?
Made them tonight. And holy cow- so TIME CONSUMING. Haha. 4 hours. But they look super cute. Thanks for the ideas. Ky http://www.thebirdssay.blogspot.com
These look great! Question: how long do these cupcakes last in the jars if you bake them in it? I want to send cupcakes to my boyfriend in Afghanistan and this sounds perfect!
Would you have any cute suggestions for a non breakable container but still pretty? I would like to make some to ship to soldiers in Afghanistan. I think it would be a cherished treat for them!
hI….Would someone please share info on where to obtain those cute wooden spoons to include with a cake/dessert in a jar? Thank you, it is most appreciated!
Thanks for this marvelous idea. I am pinning it & will surely give it a try! I just love your beautiful family & your beautiful blog. I enjoyed my visit!
Warmly, Michelle
PS – Have you ever considered adding a “Pin-it” button?
Love this idea! I tried it for b-day picknik and everyone loved it. I added few rasberries between the cake and the frosting, yummy. The cake was a bit dry so maybe next time I’ll add few rasberries to the jar befor the batter as well. Yeah, there will definitely be a next time 😉
Pues desde luego la pinta es deliciosa, nunca te he dicho que me encantan tus presentaciones, tienes un gusto magnifico, bueno que el salmón de esta manera me ha encantado, tomo nota de la receta, besosSofÃamilideasmilproyectos.blogspot.com
I fall in love with this absolutely wonderful red velvet in jar recipe!!! Can you please please tell me which red food color I should use – everytime my red velvet sponge is turning brown after baking…and I cant find the right red food color 🙁 would be so greatful if you could tell me which one to use! thanks a lot!
These look absolutely delish!!!! Definitely going to make them…I’m also going to try using different flavors (choc van straw) and adding pudding and whipped cream minus the icing….thanks for the post!!!!
I’m trying to mail my boyfriend who lives in Germany a cake in a jar but I want to ice the cake before I see it and this it the only article I’ve seen written with the icing on them while sealed!!! So I have to ask, will they last awhile with the icing on them while sealed??
Frank has a great body. Football fans are SO wrong when they refer to him as ‘Fat Frank’. I think I would like to take Hugh to be this evening, though.VA:F [1.9.22_1171]
I love this idea but there seems to be a lack of instructions. You give all these ingredients and then you say, “batter is ready to put in the cupcake tins”. Some of the ingredients are not all for the batter, but a person who is not a great baker may think
you mix all the ingredients in one batter to make cupcakes,
So your recipe is misleading in the beginning of the instructions. You could also add to the instructions the order which
you should mix these ingredients.
I put them in jars to create for a party giveaway, so it wasn’t my intention to keep them in their long, but to be devoured quickly. I would say the shelf life is the same as a regular cupcake.
These look like they’d be fun teacher presents for Valentine’s day. Thanks for the cupcake in a jar idea! I love the presentation too with the spoon tied to the side.
Are you often too lazy to make salads?. Do you think it takes too much time? With our Salad Cutter known as Vegetable cutter Bowl, you’ll ditch it, only 60 seconds and your salad is ready!!! Our easy Vegetable Cutter Bowl allows you to save lots of time making healthy salads. It is easier and more convenient for you to form healthy salads a day. Finish within only 60 seconds!
click here for leafy cutter : https://bit.ly/2MwKZHU
Mason jars just make everything better.! At first from the photos, I just wanted that icing. Well I still kind of do, but I really love this idea and it would make a great gift idea!
We’ll be making some of these for our friends, thanks for sharing!
-Andrew
Comments are closed.
About Cakies
From crafts to parenting & everything else in between. Cakies celebrates family, style, abounding grace, and living life creatively.
I have a large growing pile of fabric scraps. I refuse to throw them away because I am sure they can be used for something. I have been seeing different types of interesting necklaces made of buttons, beads, and fabric. Then, I figured why not make one out of my scraps...
I think it made my white shirt a little less boring. This was so quick and easy to make.
How to make a recycled scraps necklace (which is very similar to the straps on my braided tablecloth bag):
1. Take your scrap fabric, I cut a .5''-1'' snip and tear the rest of the fabric down for a nice frayed edge. Used 3 different fabrics for each strand.
2. Take 3 of the torn pieces and tie the ends together with a rubber band.
3. Braid the 3 pieces together and tie ends together with rubber band when done.
4. Repeat steps 2 & 3 for more strands. Remember you can make the strands any length you want, if run out of fabric, just weave more into the braid.
5. Once all the strands you want are braided, gather one end of each strand together and straight stitch together with sewing machine. Repeat for the other ends of the strands. Snip off any excess.
6. Gather ends of the necklace and sew together (snip excess) or a ribbon can be sewn at the ends to be able to tie the necklace closed, but I just sewed both ends together.
7. Voila! A nice way to make use of all your lovely scraps.
Sorry if the directions get you a little lost, but it really is easy. I promise. Maybe I should put some in the shop. Please share any other good ideas you may have of things that can be made with scraps. I would love to hear (read) them!


 3. Usually they are done after about 17 minutes in my oven at temperature of 350℉, and I take them out and put them on a wire rack to cool completely.
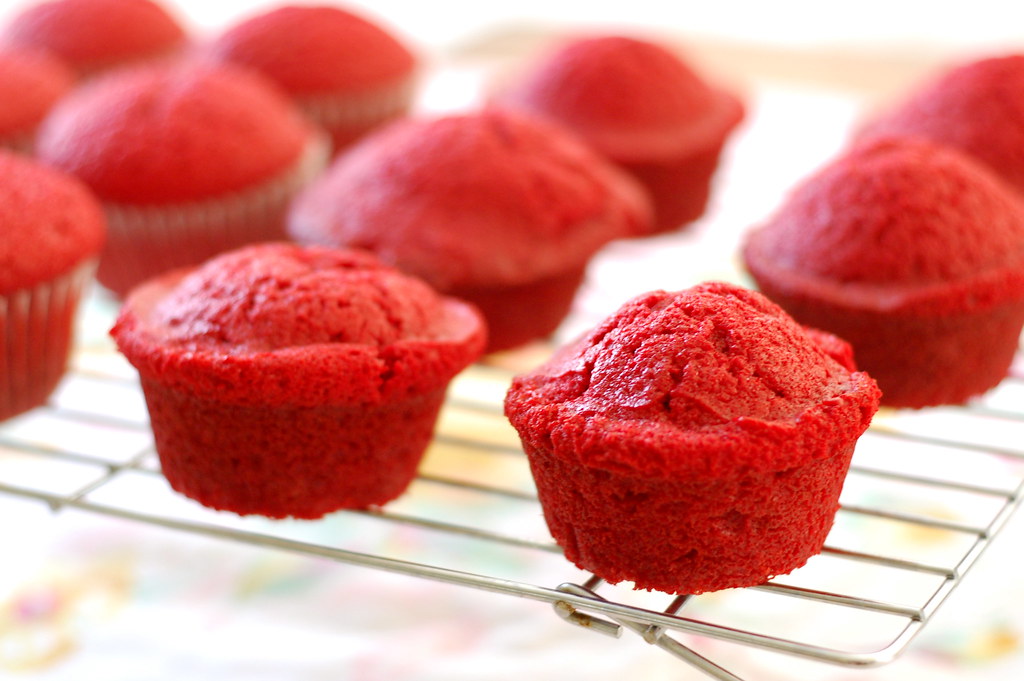


they look AWESOME! Yumm!
I made these for for the baby shower of my granddaughter and they were absolutely amazing, i even decorated the jars by making tutus to wrap around jars in the colors to match the princess theme of the shower…,
Yay! Glad it worked out for you!
Thank you so much! Can’t wait to make it!
Aww, those are so very cute. Oooh, what if you made them w/babyfood jars? I am tempted to buy babyfood just to try it. (I'll let you know if I do…)
I buy baby bananas and diffirent fruits and sweet veggies to use in breads. I don’t always have ripe bananas when I want to make banana bread or want to cook sweet potatoes for bread but have a coup-le of large jars of baby food handy I always have puree whatever for breads. And I have jars for cupcake in a jar.
If you ever need to ripen your bananas, just put some on a cookie sheet and bake at 300 degrees until dark, usually 35 minutes or so. I do this all the time and it works perfectly!
don’t buy baby food to waste it – just buy tiny mason jars they have them at giant eagle stores
Thank you for this! I am seriously thinking about forgoing a cake at my wedding and having these yummy looking cupcakes instead!
I LOVE these and am most definitely using this idea for a baby shower I'm planning! Thank you!!
Your such a clever gal. I am going to try this, it turned out so beautifully. xxx.
thank you for aharing this awesome DIY! I most definitely will use this for future showers that i'll need to be involved in! It does not look too hard and is soo visually appealing! I love the pics you took of the process too!
I just made these for my co-workers and my boyfriend's family after you posted the photos from the shower. Thanks so much for the clever idea! Everyone loved them and I will be making them again… maybe with fun-fetti!
I don't think you need to bother with the boiling, because you are pretty much just using the jars as a short-term container that won't keep the cupcake and frosting edible for any longer than normal, maybe a few days, and if you WERE baking in the jar, trying to 'can' the cupcake, multiple studies have been done about how un-safe it is.
So impressive – really love these! Do you deliver?
these are so cute!! i wish i had heard of it earlier, so i could have made them as favors for a bridal shower i'm throwing this weekend!!
adorable!!
can't wait to try them out!
thanks!!
nicole
mmm I can't wait to try those out!!
Love things in jars!
i love your garden but i was really looking forward to this post… i love it and i can't wait to try it out.
The red colour sure came out nicely!
Yeah, I just kind of fell in love with that red.
thanks for bringing these today for me and ang to eat! 🙂 we are enjoying every bite. (and the extra cupcakes you brought over, too!)
Yay! Thank you! I had been waiting for this recipe!
This looks wonderful-I might have to try it with chocolate though 😉
And -that is such a pretty tablecloth!
Thanks for the fun instructions and great photos! I know what I'll be making for my next party 🙂
thanks for sharing! I love paula deen. my daughter and I hope to take a road trip to georgia sometime this summer from our home here in charlotte to visit her restaurant.
blessings,
alely
the ones you brought home for us are gone…. and i didn't even try one. :'(
I can't wait to make these. What a beautiful gift they would make. I want to have a party just so I can make these nwo.
Thanks so much for posting this!
thanks for sharing the recipe 🙂 am posting it on my blog now many many thankssss
hey,
you should make a badge for your blog than i can put it to my blog as well like you put your sponsors… i want to share your blog witm my visitors…
your baby's photo is on my desktop!everytime i see her, i smile to her! thanks for that!
What a fun idea. I love cupcakes in an fashion!! I just came over from Remodeling this Life… don't know how I've missed your blog? It's fabulous!!
Hope you come visit me sometime:-)
Duh! I just realized who you were!?? Whoops… I have visited you, just not in a long time and your design looks different. ha! We were both interviewed by Jenn @ Ambrosia Girl a while back. I'm loosing my brain:-) Have a great weekend!
This is a brilliant idea. I have saved it to my favorites so that I can make them when I need an adorable and delicious party favor! Thanks!
I made a batch today (sans jar) and they turned out great! So moist with great flavor! Thank you for sharing! 🙂
What a fabulous, creative and gorgeous idea. Looks great.
Oohh! These look so good. You have such good ideas. I'm a new follower. Hop over for a visit sometime. Sandra @sawdustandpaperscraps
that is sooo cute…also the small ear thing…they…a doctor told her that….she would always have bad hearing? i had never HEARD that before…loving your bloggy…
Very creative! I love it.
http://booksonthehouse.com
http://booksonthehouse.com/kids
thanks for letting us know where you got those wooden spoons! i was looking ALL OVER for those at christmas and couldn't find them anywhere! 🙂
~jenni
Love, love LOVE this idea! But where DO you get the wooden spoons? And can you buy the 8oz jars in bulk somewhere like Walmart?
hi…where DID you find the spoons??
I could not find where she got the wooden spoons. Could you share with me where he bought the wooden spoons and bakers twine?
Thanks
Hi Rubyellen! Thanks for this cute idea. I did a variation of the jar and blogged about it today. 🙂 http://punkinandbean.blogspot.com/2010/04/cakes-in-cup.html
My pregger self wants to eat tons and I mean tons of these! So yummy! You're in the link luv roundup today! Come by for a peek! http://bit.ly/cQKk4F
Being from the south, Red Velvet is my JAM! And i have been in the mood for it lately!
This is such a pretty and different take on serving it!
I also just saw red velvet pancakes somewhere else and i'm definitely making those on a saturday soon!
must….have….red…velvet…haha.
OMG, delicious!! I heart red velvet the most!! So excited to try it out!
oomg this is the cutest idea!
LOVE this idea!
I love this idea soooo much! I can't wait to try this! I'll be linking.
this is killing me with cuteness! and @Heather w/ Dollar Store Crafts : Baby food jars! Awesomesauce!
What a hit! Finally found a reason to make these delicious cupcakes in a jar! I made them for a surprise birthday party in the park. Basically, an excuse for adults to act like kids…tug-o-war, pinata, ring toss, and a water balloon toss. Perfect picnic dessert! I definitely eyed some of our friends taking 2nds and 3rds. Heads up, you need 2 bottles of red food coloring for the recipe…one will turn them a dingy pink…still delicious. Also, I added some fresh cut strawberries on top!
This is such a great idea for bday parties, giveaways and recycling.. so beautiful
http://polwig.com
Got everything I need to make these…and a family reunion to try them out at!!! Thank you for sharing!
Carmen
carmencustommcreation.etsy.com
facebook page: Carmen's Custom Creations
I'm going to do this for the fourth of july. However, I'm going to divide the cake batter into two different bowls. I'll add red food coloring to one. And blue food coloring to the other. Then I'll layer red cupcake, white frosting, blue cupcake top, frosting. Red, white and blue!
Another option is a parfait with yogurt. But this cupcake idea is so cute!
I LOVE THIS!!!!!! Bookmarking now! Totally doing this for the 4th of July~
Ebony
sparklingeventdesigns.blogspot.com
I've been wanting to make these and now I have no excuse not to! Thanks so much for posting.
These look so delicious!!!!! 🙂
http://twitter.com/guurrrl/status/16303287366
These are so cute! I love this idea for favors at a shower or party! Thank you SO much for sharing — great tutorial!!
This is awesome! I've reposted at my blog, Urban Domestic
http://urban-domestic.blogspot.com/2010/06/cupcakes-in-jar.html
Wow, these are really cool!! My sister-in-law is doing a Dr. Seuss theme for the nursery for her first baby (YAY!!) and so I'm throwing her a Seuss shower too. These will be PERFECT with the red/white color scheme and I'll throw some turquoise ribbons on or even turquoise maribou around the jars (ala Thing One & Thing Two). Thanks for the great post & inspiration! 🙂
These are so cute! I'd love to feature these on my blog sometime soon!! Thanks for the inspiration!!
so i had to feature these on my blog post today… just adorable – thanks for the inspiration!
I love these! I'm trying to track my brain to figure out what I can make them for.
Great Delicious Idea ^_^
I love this idea!
Kelli
xoxo
That is such a great idea and they are really cute! I am going to try this soon!
Love this so much! I've been looking around trying to decide what I could do for some party favors for my very small, family only wedding. These look so simple and perfect. Thank you!
My favorite bakery makes “cake in a cup” that is layered cake and frosting like this as a way to use leftover cake bits. It is always my favorite treat! Great idea to make them as gifts.
I love this! What a perfect party favor, and it looks soo yummy! Can't wait to share with my readers {www.rivernorthlove.blogspot.com}, thanks for sharing!
Super fun and delicious! Thanks for sharing!
I love the colors and the look delish! Thanks for sharing. 🙂
Randomly found you on google and so grateful I did! Thanks for sharing this. I posted it on my facebook blog site page.
OMG, I am so excited to make these! I have a couple of birthdays coming up and this is what they're are getting! Love it!
http://dafoodieadventures.blogspot.com/
Thank you for the idea, I made 10 for my son's birthday as a souvenir and everyone love them. Too cute! Jesica from Argentina
These look so yummy…I'm going to post this on my blog to share with everyone and so I never lose this!
I can't wait to try this out! I think it'll be a big hit with my family.
Thanks for this lovely idea! – Kim
http://www.couponing102.blogspot.com
Hi I am Nicole from Colies Kitchen I found you on a Surfin’ Saturday blog hop and wanted to drop by and say hi. I really like your blog, and am now a new follower. I would love to have you stop by Colie’s Kitchen if you get a chance. http://www.colieskitchen.com
What a freaking great idea… heartbreaking to eat, not for me anyway.
These look delicious!
nice! twilaphotography.blogspot.com
yum! so so cute and i love red velvet.
I love this trend in food presentation – I think that jars just make every thing cuter! I am especially crushing on those little spoons! Very cute!
P.S. that cake song was adorable!
Hi,
I just wanted to make you aware that someone who has an etsy cupcake store used your cupcake jar photo as her own in order to sell her product. her link is below.
i've already found 3 of her other photos on other peoples blogs and i just thought you should know.
http://www.etsy.com/listing/58257221/cupcake-jars
Oh I LOVE this idea. How clever – and gorgeous (and eliminates the mess ;))
Those are SO CUTE!! I have been scouring the internet looking for cheap, cute, DIY favors for my wedding in April! I think I might just have to do these! My colors are chocolate brown and cream – maybe I can try this with chocolate cupcakes? This would be a great girl's-day project! Thank you so much for coming up with this!!
Yep. What Ashley said. Just as blatant as can be.
Hi,
I only just realized that the aforementioned shop is not the one I thought it was. You have yet another Etsy shop using your pics.
http://www.etsy.com/shop/KGSweets
and a sold listing:
http://www.etsy.com/transaction/40106557
What a great idea, these cupcakes in a jar. Fantastic presentation! 🙂
Such a great idea. SO cute and so glad I found your blog.
OMG I absolutely LOVE this idea. I think I'm going to do this for my daughter's birthday party. I had planned to do cupcakes instead of a whole cake… this would be even better. Thanks for the tutorial and the links where you got your supplies. I'm definitely bookmarking this one. 😉
This is a very pretty idea! I like this one so much. This is going to be a nice giveaway to parties.
dining table
Lovely presentation! What size jars did you use? Something you had saved, or able to buy by the case? lol
mary
how many cupcakes can the ingredients make?
xiang- i don't remember. maybe 24. sorry. when i make this again, i will try to remember!
Yummy! I featured these on my facebook wall. Thanks for inspiring
Yum! Looking good!
~Heidi
This looks so delicious and so CUTE!
So neat! Found you from kojo today =) New follower.
I love love love this idea. I'm a new follower. I actually found one of your pics on pinterest and tumblr without proper credit. I asked for the source and finally found you. I'm giving you full credit in an upcoming feature for DIY Thursday! It will be on the blog at fiftieswedding.com.
hiii… i love your blog, what an inspiration…
i hope you don't mind, me having your link at my blog… all the way from Indonesia… 🙂
thank youuu
Too pretty to eat!!!! I absolutely love these : ) Red velvet is my FAVORITE
Thank you for the in depth instructions! I referred this DIY to my client. YUM!!
Since you inspired me so much and my client, I have put you up on my Bright Idea Thursday blog post. Come visit at: http://simplysavannahevents.blogspot.com/2011/08/bright-idea-thursday-cupcakes-in-jar.html
These are so cute! I am totally using them as a welcome gift for all of my suite mates at school. Thank You so much!
Here is my post: SimplySavannahEvents: {Bright Idea Thursday} Cupcakes In A Jar http://bit.ly/qMNtXU
I love this! I'm going to make these for my friends for Christmas! You are so creative.
These are so beautiful, I love them! I'm going to make these for my friends for Christmas.
These look like a fun dessert, especially if you're on the go – no more crushed cupcakes! I'm going to feature these on Five Friday Finds tomorrow – please stop by and grab a button while you're visiting!
sorry – I left the wrong link in an earlier comment – Here's the right one – http://morselsoflife.blogspot.com/2011/08/five-friday-finds_26.html
O, YUM! These are so awesome!
Is this your website too…http://gettingthere.typepad.com/.a/6a01310ff5c36d970c0148c83ab4ed970c-500wi
I see your cupcakes in the top left corner of the page and I was wondering if you make the stuff her too. Beautiful Cupcakes!
What kind and size of jar did you use?
Can't wait to make these
Love this idea! I see Christmas gifts in the making! Thanks for sharing!
Love this!
I saw your pictures over at The Daily Buzz and they didn't seem to mention anything about having permission to republish them. I'm new to blogging, and was wondering in general what is the etiquette for republishing pictures or linking to posts?
My mom used to make red velvet cake for Valentine's Day. What a fun little idea! Thanks for the great tutorial!
I made this for my Church preschool committee and it was a big hit!! Thanks for the great idea!! I linked up to you!!
http://www.216grant.blogspot.com
Love these !!
Thanks for writing up the tutorial.
I have featured it…along with some other gifts for teachers here….
http://allysonadeney.wordpress.com/2011/12/06/17-handmade-gift-ideas-for-babies-teachers-with-tutorials/
….if you would like to take a look.
Thanks again for a super cute idea.
Ally on harrysdesk
Oh my my, this seem sooo delicious! thank you for the recipe1
Made them tonight.
And holy cow- so TIME CONSUMING. Haha.
4 hours.
But they look super cute.
Thanks for the ideas.
Ky
http://www.thebirdssay.blogspot.com
Do I boil jars to seal them??
Do I need to seal the jars by boiling???
Thanks for sharing such a great idea!!
Becky
http://bucketofbuttons.blogspot.com
love this guide! great blog too 🙂
These look great! Question: how long do these cupcakes last in the jars if you bake them in it? I want to send cupcakes to my boyfriend in Afghanistan and this sounds perfect!
These look heavenly!! I can't wait to try them! YUM!!
Wow, this look so good, thanks for the recipe.
YUMMMYYY!!! 😀 I will definitely try this one day!!!
OMG thanks for this! I tried one but the jar was too big (4 cupcakes in a jar? dangerous). So happy i stumbled upon this!!
http://www.bolubyrima.com
This looks just devine. A very clever idea that looks incredible impressive. Thanks for sharing it.
Would you have any cute suggestions for a non breakable container but still pretty? I would like to make some to ship to soldiers in Afghanistan. I think it would be a cherished treat for them!
Hey bakes, MY name is Gillian and I do graphic and website design specifically for you talented bakers out there, I even do trade for cupcakes. I've done bakeries from Dubai to NYC. I'm a huge fan of cake art. Bakery boxes & things – http://www.phrizbie-design.com/bakery_logo_designs.html & cupcakes – http://www.phrizbie-design.com/cupcake_logo_design.html
interesting! do you also have a post about baby jogger stroller ?
We featured this recipe in our weekly Food Trend blog post. You can find it here:
http://blog.recipelion.com/food-trend-dessert-recipes-in-a-jar/
Thanks for the great recipe!
Great idea! Thanks for helping me with Christmas gifts for co-workers! Merry Christmas 🙂
Making these for youth group bake sale tomorrow!
i love it because in my job I can see it rather often.
hI….Would someone please share info on where to obtain those cute wooden spoons to include with a cake/dessert in a jar? Thank you, it is most appreciated!
Hi,
If you read through the post and see the bottom, there are links to all the things I used and where they’re from. The link to the spoons are there!
Thanks!
Hii!! great idea! just one question. Do you use american or britisch cooking units?
Greetz,
Thanks for this marvelous idea. I am pinning it & will surely give it a try! I just love your beautiful family & your beautiful blog. I enjoyed my visit!
Warmly, Michelle
PS – Have you ever considered adding a “Pin-it” button?
Love this idea! I tried it for b-day picknik and everyone loved it. I added few rasberries between the cake and the frosting, yummy. The cake was a bit dry so maybe next time I’ll add few rasberries to the jar befor the batter as well. Yeah, there will definitely be a next time 😉
hai, may i ask how much 2 sticks of butter if we measure with grams? thank you
cheers ~
hi may i know what number is ur tip for frosting?and how long will it keep in my refrigerator?
How would you preserve these until the next day? Would you refrigerate or can they just sit? And is that with the lid on or off?
Pues desde luego la pinta es deliciosa, nunca te he dicho que me encantan tus presentaciones, tienes un gusto magnifico, bueno que el salmón de esta manera me ha encantado, tomo nota de la receta, besosSofÃamilideasmilproyectos.blogspot.com
I fall in love with this absolutely wonderful red velvet in jar recipe!!! Can you please please tell me which red food color I should use – everytime my red velvet sponge is turning brown after baking…and I cant find the right red food color 🙁 would be so greatful if you could tell me which one to use! thanks a lot!
These look absolutely delish!!!! Definitely going to make them…I’m also going to try using different flavors (choc van straw) and adding pudding and whipped cream minus the icing….thanks for the post!!!!
does this recipe work? i’ve been making a food (search up some recipes in internet) and ended up making a shit…. i reaally want to make a cupcake
This looks just devine. A very clever idea that looks incredible impressive. Thanks for sharing it.
Thank you!
What a fun idea!! Can’t wait for the pound cake recipe too – so much better than another boring store gift!!
I’m trying to mail my boyfriend who lives in Germany a cake in a jar but I want to ice the cake before I see it and this it the only article I’ve seen written with the icing on them while sealed!!! So I have to ask, will they last awhile with the icing on them while sealed??
I think so!
Frank has a great body. Football fans are SO wrong when they refer to him as ‘Fat Frank’. I think I would like to take Hugh to be this evening, though.VA:F [1.9.22_1171]
So creative! They are brilliant! Thx 4 sharing!
I love these.
LOOKS GOOD! DOING THIS FOR PROJECT. CANT WAIT TO EAT THEM! XD
Do these have to be refrigerated?
Depending how soon it will be served, if day of or next day, probably not.
no baking soda?
I will make it. Thank you!
These are just beautiful! I can’t wait to make these!
This is a very pretty idea! I like this one so much. This is going to be a nice giveaway to parties. Thank you.
I would love to have pinned this to Pinterest, but sadly you have it protected from that. Sorry.
If you hover over the image, a pin it button pops up.
Thank you.
How lovely! How did you print enjoy on the lids?
I did calligraphy on each one!
I love this idea but there seems to be a lack of instructions. You give all these ingredients and then you say, “batter is ready to put in the cupcake tins”. Some of the ingredients are not all for the batter, but a person who is not a great baker may think
you mix all the ingredients in one batter to make cupcakes,
So your recipe is misleading in the beginning of the instructions. You could also add to the instructions the order which
you should mix these ingredients.
Chocolate dipped spoons in a cute mitten. Thank you
What is the shelf-life of cupcakes in the jars? Is there a special jarring method needed to seal for food safety?
Thanks,
I put them in jars to create for a party giveaway, so it wasn’t my intention to keep them in their long, but to be devoured quickly. I would say the shelf life is the same as a regular cupcake.
Love these! I have a buddy who loves red velvet ~ he’s getting some of these for Christmas!!!
I like this one so much. thanks for your idea!
lovely! thanks so much!
Thanks for the ideas. So cute!
I made this for my girlfriend last night and she loved it. Thank you so much -Joe
YAY!
Awesome and nice cookies!
can I prepare cakes without egg?
Cupcakes in a jar?Just delicious,thanks.Will try the recipe this weekend.
Saved this on Pinterest! Yay!!!
It looks very cute, very meaningful if I give it to my girlfriend, thank you for sharing this recipe.
These look like they’d be fun teacher presents for Valentine’s day. Thanks for the cupcake in a jar idea! I love the presentation too with the spoon tied to the side.
Thanks for sharing this interesting article.
RED!!! Awesome!
The ultimate snackaholic care package, this gift box is full to the brim with a mix of sweet and salty snack food and candy.
https://thegiftconcept.com/gift-sets-for-women/
What ingredients do you need if you only need 1 serving? Please reply soon and please tell them to me.
these are so good the cream cheese frosting is my favorite
Pingback: https://www.shoploverspoint.com/police-graduation-gifts/
Are you often too lazy to make salads?. Do you think it takes too much time? With our Salad Cutter known as Vegetable cutter Bowl, you’ll ditch it, only 60 seconds and your salad is ready!!! Our easy Vegetable Cutter Bowl allows you to save lots of time making healthy salads. It is easier and more convenient for you to form healthy salads a day. Finish within only 60 seconds!
click here for leafy cutter : https://bit.ly/2MwKZHU
Mason jars just make everything better.! At first from the photos, I just wanted that icing. Well I still kind of do, but I really love this idea and it would make a great gift idea!
We’ll be making some of these for our friends, thanks for sharing!
-Andrew