


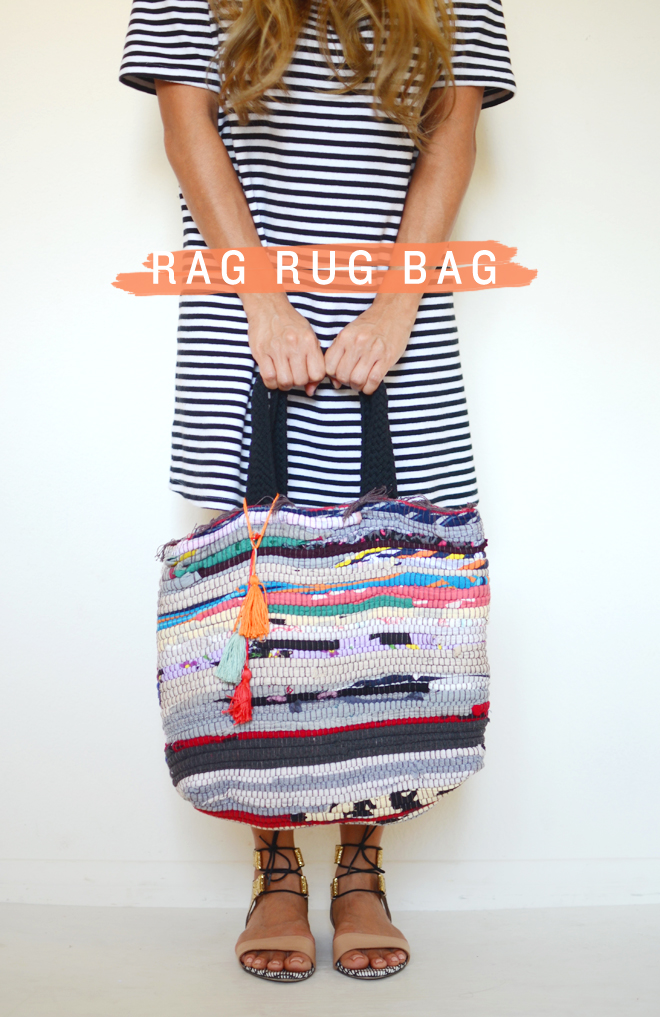
 Rag Rug Bag
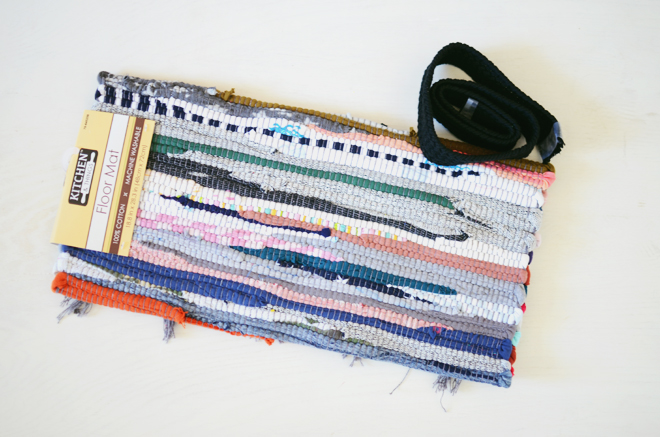
Supplies:
Rag rug (this rug is similar to the one I used)
1 yard of braided fabric, cut into two 16″ pieces (I found this at the ribbon section of Joann’s and can be purchased by the yard)
Scissor
Coordinating thread
Sewing machine
Fabric pencil
Ruler
Embroidery floss (optional)
 Directions:
1. Fold the rug in half width-wise, and sew along the entire length of both sides.
 2. Box the corners by pinching each corner with the right sides together and aligning the sides seams with the bottom seam. With a fabric pencil and ruler mark a line perpendicular to the side seam that is about 1 1/2″ from the corner and 3″ long. Pin and sew along that line. Repeat for the opposite corner.
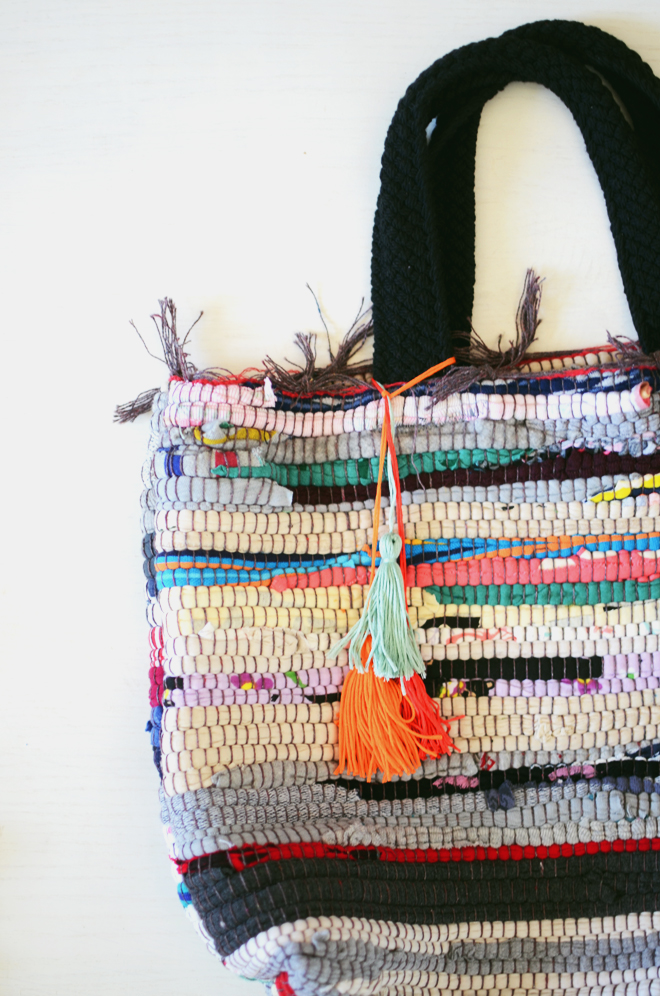
 3. Turn the bag right side out and decide the placement for the handles. I placed mine about 5″ in from each side and 1″ down from the top. Fold each handle end in about 1/2″, pin in place, the folded end of the bag handle facing the inside fabric of the bag (the handle will twist as pictured). Machine stitch the handles to the bag using 2 horizontal stitches, 1/4″ and 3/4″ from the folded edge. Make sure to backstitch to secure.
 4. Optional: Using embroidery floss, make some small tassels and tie around one of the handles. In total, I think the project took me less than 30 minutes.
 I had pinned this bag from Zara last spring, and had been wanting to make my own version of it with a rag rug, but I’m only getting around to it now. A couple weeks ago, I saw these rag rugs at the 99 cent store (they had tons, but make sure to choose one that is woven tightly), I knew it would be perfect for a quick bag project. I’m not sure about the name “rag rug bag,” I think sounds funny, but I couldn’t think of anything else, so oh well.


I just discovered your blog, love this project, and am excited to read more!
brilliant!!! thank you for the inspiration!!!
Love this. Off to Joann’s
It reminds me of my first own (girls-)room fourty (it seems shorter in letters) years ago.
I had such a rug and still love it!
What a inspiration, thanks!
oh my gosh I love this bag! I’m going to have to go make a rag rug (:
I LOVE this! I’m such a Mary Poppins bag hoarder. When I learn to sew, this’ll definitely be on my list.
Circus & Bloom
♥♥♥
this is adorable!
xx nikki
http://www.dream-in-neon.com
oh my goodness, this is sooo clever! thanks so much for sharing!
this is spectacular!!!
Great idea. Never thought it was possible. Now I know what to do with old rugs.
I love this bag and also your outfit! Where’d you get those cute shoes and did you make that dress? 🙂
Wow, what a brilliant idea! I see these rugs all the time at the dollar store. I sometimes think about picking some up cuz of the colours but stop myself because there’s no grip and i don’t like when my rugs slip and slide all over the place. I am definitely going to try this project . Gosh you are so creative!!!
The movie “Fast and Furious” producers decided to film the sixth part of a police officer Brian O’Connor roles in reproduction entrust recently tragically deceased actor Paul Walker brother Cody, reports TMZ.com.
http://blogs.formulatv.com/amsdo/watch-fast-and-furious-7-online-2015-free-putlocker/
i’m am dying! i totally love this. i must find this rug! off to the $ store. hope they have something like that in canada!
Check out Dollarama
Such a simple but brilliant idea!
Wouaah it is a very good idea !!
oh clever lady, nice job. Look at those beautiful feet of yours 🙂
Hi! I was just wondering how big of a rug you used to make this bag. Thanks!
I purchased a rug to try this & the fabric folded over wouldn’t fit under the normal foot of my sewing machine. Did you sew this by hand?
No, I just sewed it with my machine.
merci !!! c’est extra !
Thank you for this tutorial. I make my own rag rugs on my 1920′
s loom and can not wait to make this bag. Thank you!
Hi what size rug do you use for the larger big I’m not sure what size as don’t want to have to cut any of it thanks in advance Elizabeth
It’s similar size to these rugs: http://www.ikea.com/us/en/catalog/products/00297360/
Fun tote! Thanks for sharing your creativity.
Thank you!
I hope my sewing machine can handle the thickness.