Clarity. That word has been speaking to me this week. Clarity on how I want our family to be, clarity in how money and time is spent, and my moments of clarity list can go on. If you aren’t keeping your goal clearly in mind, life will pass you by, and you’ll spend a whole lot of regret later. At least that’s what I think for me. I’ve asked the girls this week what they like and what they think should be happening at home. They said, “We want to hang out!” I thought their response was hilarious and so honest, so we’re working on more hanging out. I mean we’re always together, but I feel like I’m always doing something for them from cooking to teaching to changing to cleaning to chauffeuring that I really do need to just hang out with them. I want to see clearly what my goals are and what my girls want, so that in the midst of the blur of our days, they’re getting what they need most from me, which is me.
I’ve felt my heart tugged in lots of different directions (distractions) this week, but I need to remember all the girls want and need is me. I’ve got to give them that while they still want it. The truth is one day they’ll probably be over me (I’ll totally be yesterday’s news), so I better enjoy it now or I’ll be kicking myself in the rear end later.
I’m guessing my thoughts have just been relating to my word for the year of focus.
Ingredients:
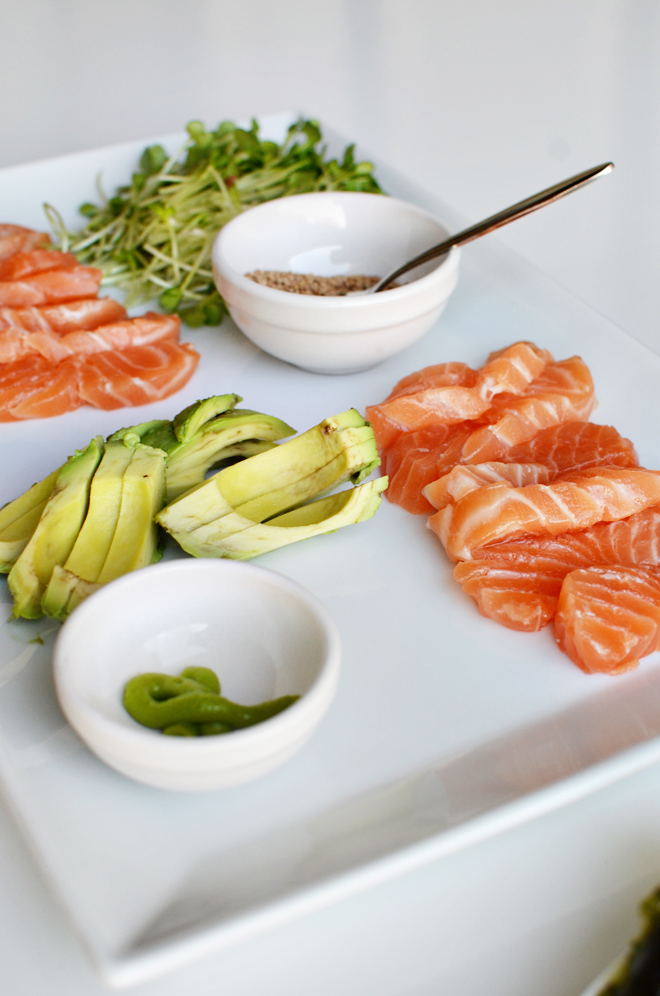
1 lb. sashimi grade salmon
Avocado, sliced
1 bundle of radish sprouts
2 cups of cooked brown rice
1/4 cup of toasted sesame seeds
Seasoned roasted nori sheets, cut in half crosswise
Soy sauce
Wasabi
Directions:
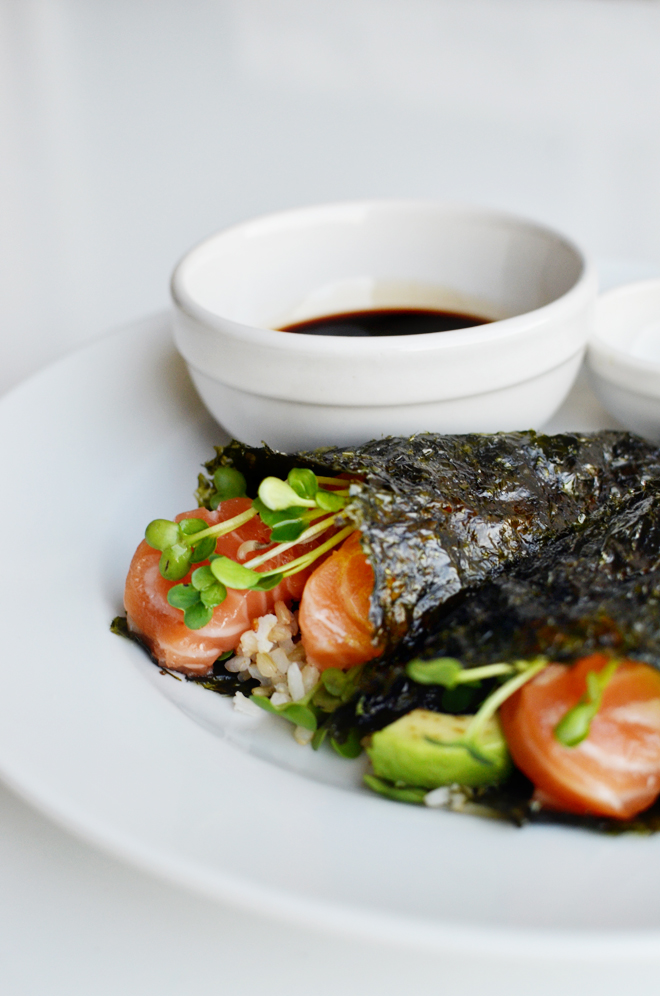
Lay out your nori, place a couple spoonfuls of rice diagonally on the right third of the nori, sprinkle on some sesame seed, add a layer of radish sprouts, a couple slices of avocado, and layer on top a couple pieces of salmon. Fold near corner of nori over into a cone shape and enjoy! This isn’t your traditional sushi because we use plain brown rice, instead of making sushi rice, and also we love to use seasoned roasted nori sheets. That bit of flavoring on the nori makes it extra delicious. I’m not that great at folding my hand rolls, so I’m sure I wouldn’t win in a hand roll folding contest, but it’s good enough to go in my mouth then down to my tummy. If you love sushi, this will totally hit the spot. Those radish sprouts also give the rolls an extra zing and it’s just not the same without it, at least for me. I love having wasabi and soy sauce with my hand rolls too.
My BFF taught us how to do sushi this way (she teaches me a lot of cooking stuff actually). When she made it for us, it was with tilapia, daikon, kimchi, and egg as fillers. We’ve modified the ingredients a bit, and since salmon is our favorite fish that’s what we use. If you don’t do the raw fish thing (or sashimi grade fish isn’t easily accessible to you), this would certainly be equally delicious with some crab inside (or shrimp tempura with a drizzle of teriyaki sauce). On our sushi date nights in, this would be my vote on what sushi recipe to have for dinner, but salmon grade sashimi costs more, so it’s more a once a month kind of thing. Thus, we mix up the weeks with the coconut serrano ceviche, tilapia cevichce on crispy won tons, and tuna poke.
We totally devour our dinner once the girls are in bed and we have some peace of quiet. I love our little date nights in together. Those times are very special to me.
Supplies:
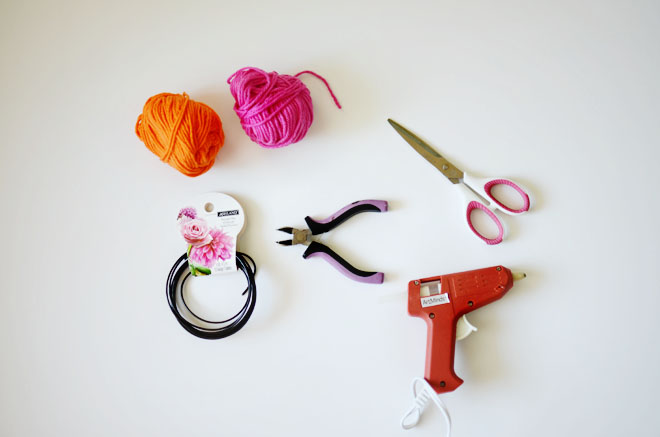
Yarn in various colors
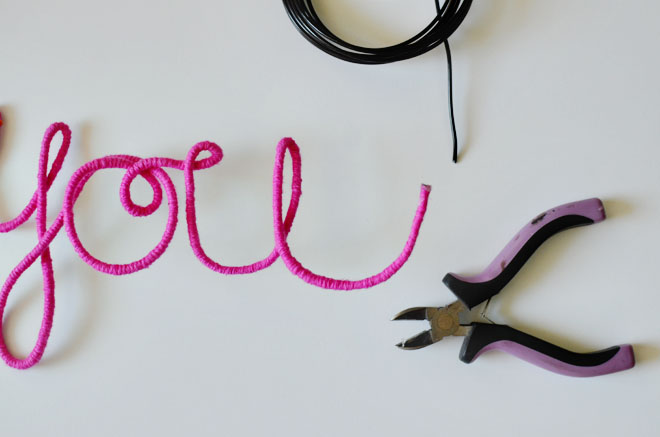
12 gauge decorative wire (I found a roll of 5 yards in the floral section of the craft store)
Wire cutter
Scissors
Glue gun & glue stick
Directions:
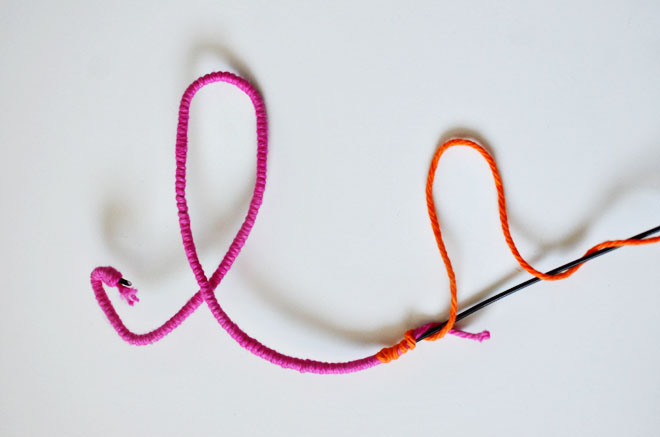
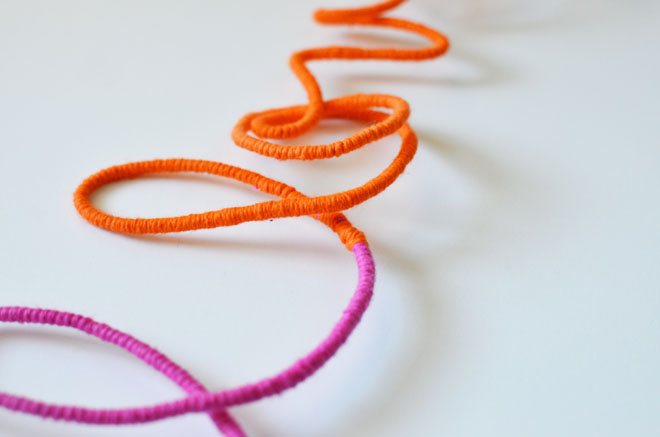
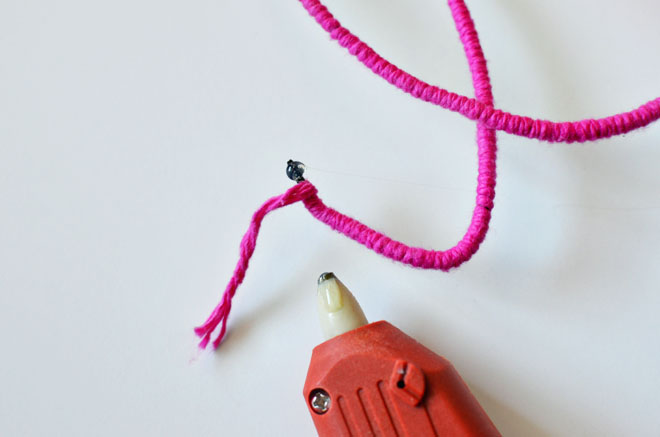
Using your glue gun, add a dollop of glue to the wire end (where the yarn begins), and start wrapping the yarn end tightly where the glue is, so it’s glued to the wire and stays in place. This helps keep the yarn secure as you wrap your wire. Continue wrapping your yarn snugly around the wire, forming the letters and words as you go. When/if you want to add in another color, just add another dollop of glue, then wrap the new color around the glue, and continue on wrapping in your new color (repeat again for another color change). Continue until you have completely formed your phrase. At the end, add another dollop of glue to finish wrapping up the end.
I found it best to form my words as I wrapped. I would complete about a 10″ section of wrapped wire, then form the letter. You most certainly could form the entire phrase first, then wrap the yarn around. Do whatever feels more natural to you… either way will work!
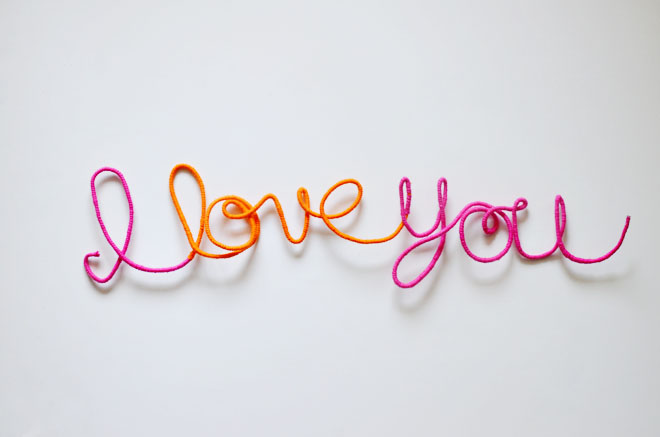
This “I love you” sign is currently sitting on top of our mantle. It’s the start of our February and Valentine’s Day decorating, which I can’t believe is already right around the corner. The girls are all about celebrating and decorating for those celebrations, so I try to think of simple little things we can do to get the house a little bit more festive.
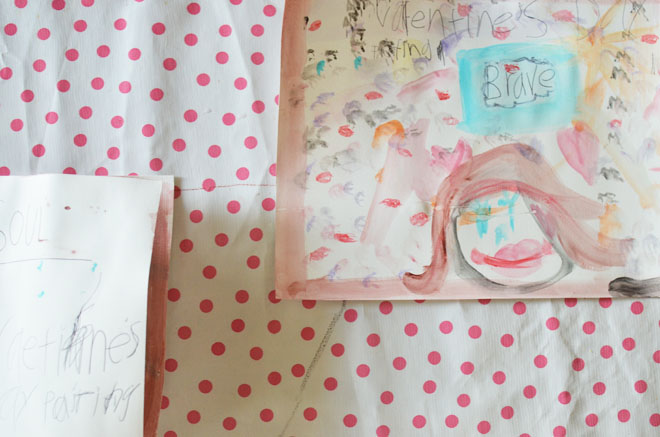
We made a “BOO” sign awhile back for Halloween (using chenille stems) and this is play on that, but using stronger wire really helps keep its shape better, especially with the fancy little curly q’s in the letters I did. I have a few more sayings in the my head that would look really cute wrapped up in yarn. Maybe “be brave and true” for the big girls’ rooms or “let your light shine” for the little girls’ room, or maybe that will be yarn wrapped sign overboard!
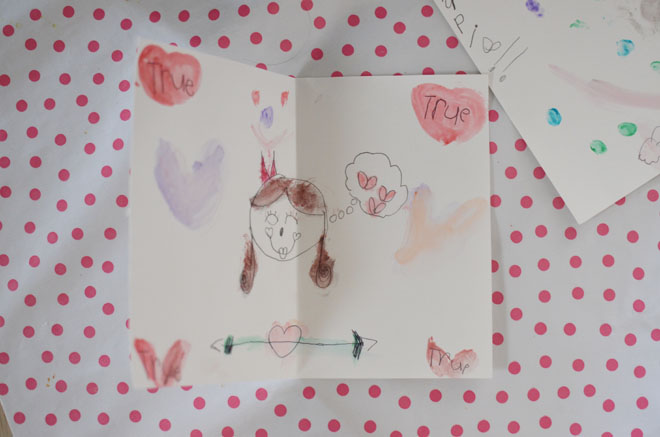
I actually first made a larger “I love you” sign in the black wire and left it unwrapped and it looks pretty cute that way too. I wanted just a little more color though, so I decided to make a smaller yarn wrapped one. The sign would also make a really cute Valentine gift/message for someone you love! If Ben hadn’t already seen it, I might have hung it above his side of the bed for him to see when he woke up Valentine morning. It’s a simple gift with a sweet message. And even just looking at the first picture of this post, I think that would make cute Valentine Day cards or a sweet poster. Uh oh, I think I’m on a poster kick after making one from our rock collection.
Since this project involves handwriting of sorts, did you know tomorrow, January 23rd, is National Handwriting Day? I totally didn’t until I heard (via email) that expert calligrapher, Lauren Essl, will be doing a tweet chat with @MichaelsStores (#MeetLaurenEssl on 1/23 from 2-3pm CST) to celebrate the day. I want to join in to find out what her favorite calligraphy pen is. I took a class in high school and I try to brush up on my skills from time to time, but I’d love to know what pens she would recommend. Wouldn’t it be fun to make a wire phrase shaped into some fancy calligraphy? I’d love to try that. Sounds like a challenge, but I’m always up for it!
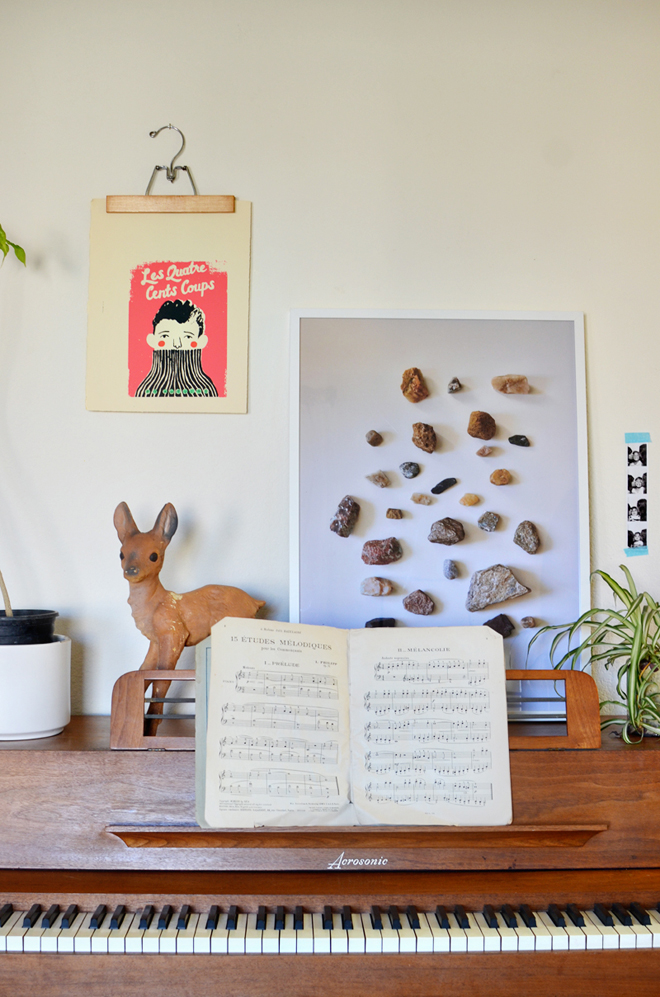
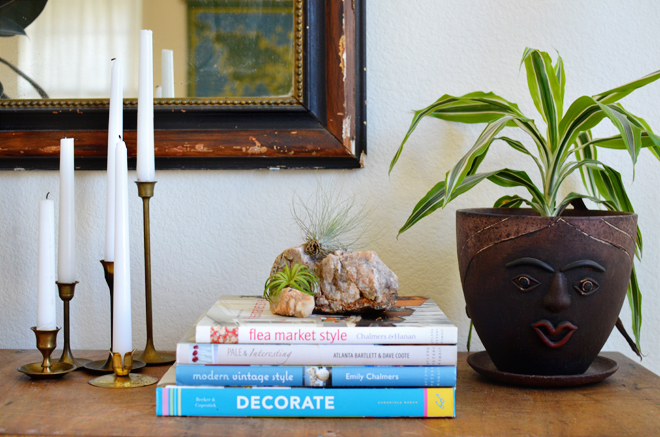
You might remember I blogged about our rock collection. Well, I printed out a poster of our rocks and have it displayed. I also talked about how making a poster is a simple way to get wall art and display a collection that might otherwise be taking up too much space! Read the post on A Beautiful Mess here.
If you want a rock collection poster of your own, you can download our poster (here), save the file, and take it to the print shop to get printed. The size of the poster is 19.75″ x 27.5″ and you can purchase this frame from IKEA and it will fit those dimensions perfectly! The poster is for personal use only and not for resale (and if you do share it on social media, would love a link back!)… thanks friends!
I’m getting freaked out that True turns 8 this year. That sounds so big! Then I start thinking about the years until puberty and I get really nervous, which typically leads me to mentioning it to Ben, and he gets extremely nervous! Thus, leading to an oh-crap-moment-time-is-flying-too-fast kind of thing. For us, once one hits puberty for one, they pretty much all go through it because they are so freakin’ close in age! It makes me so nervous to think about it…
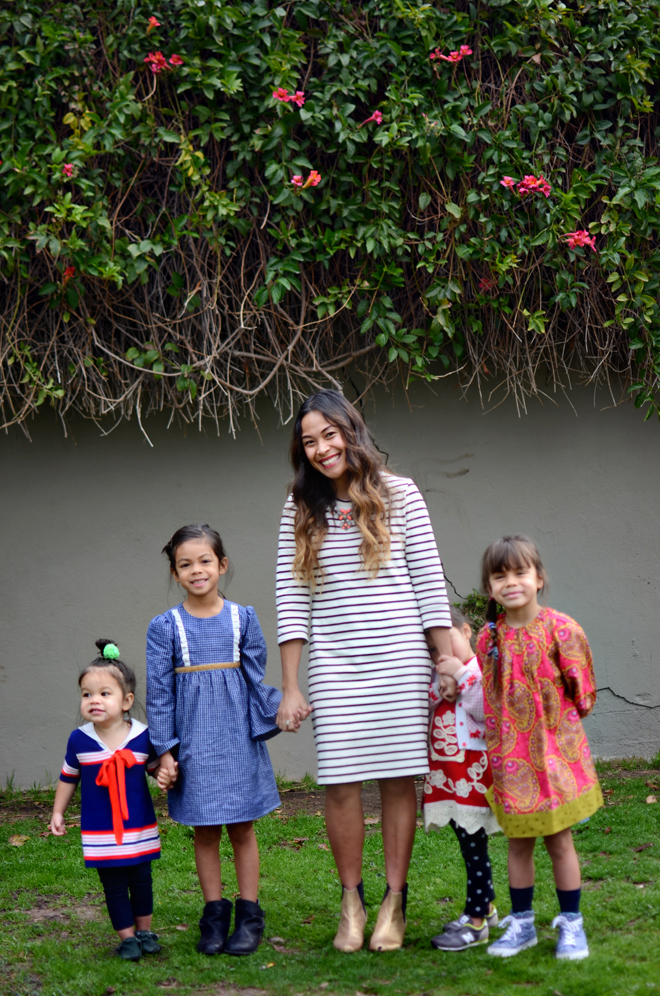
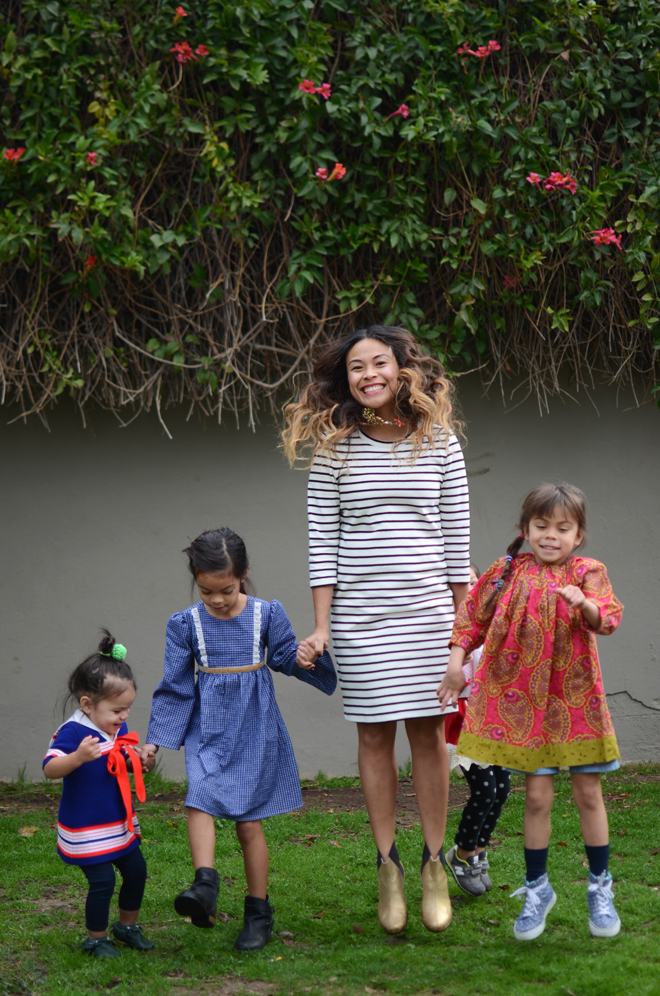
So much goes on in a day. I’m trying to teach them how to be loving, selfless, responsible, and feed them, guide their hearts, homeschool them (if you’re doing the homeschooling route, but doing homework with them takes a lot of time too), remind them to share, take them to this and that activity, and then feed them again, and the parenting list goes on and on. All this chaos makes it all go so fast. Next thing you know it’s a new year and you’re wondering how did that just happen?! I love my girls and my heart swells up with joy just looking at their smiling faces. I know I’m not a perfect mom, but I’m their mom, and I’m very glad to be able to mother them, chaos and all.
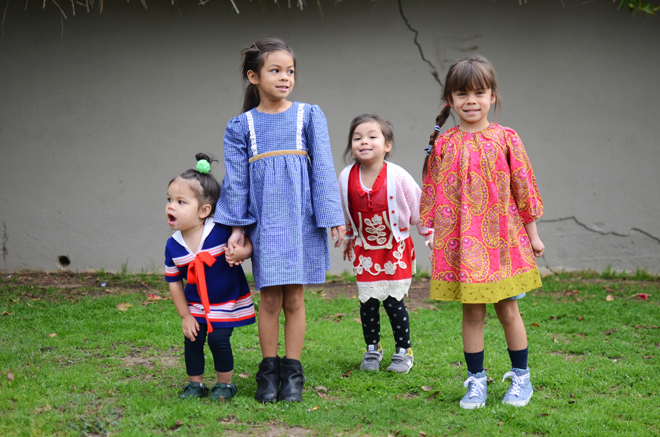
on me: dress, old navy. necklace, j.crew gifted from BFF, shoes, emerson fry (early last year on clearance). on true: dress, misha lulu. boots, old navy. on brave: dress, frankie & sue. shoes, old navy. on soul: dress, anthropologie (5 years ago). sweater, vintage. shoes, new balance (she loves sneakers!). on glow: dress, vintage. pants, old navy. shoes, freshly picked.
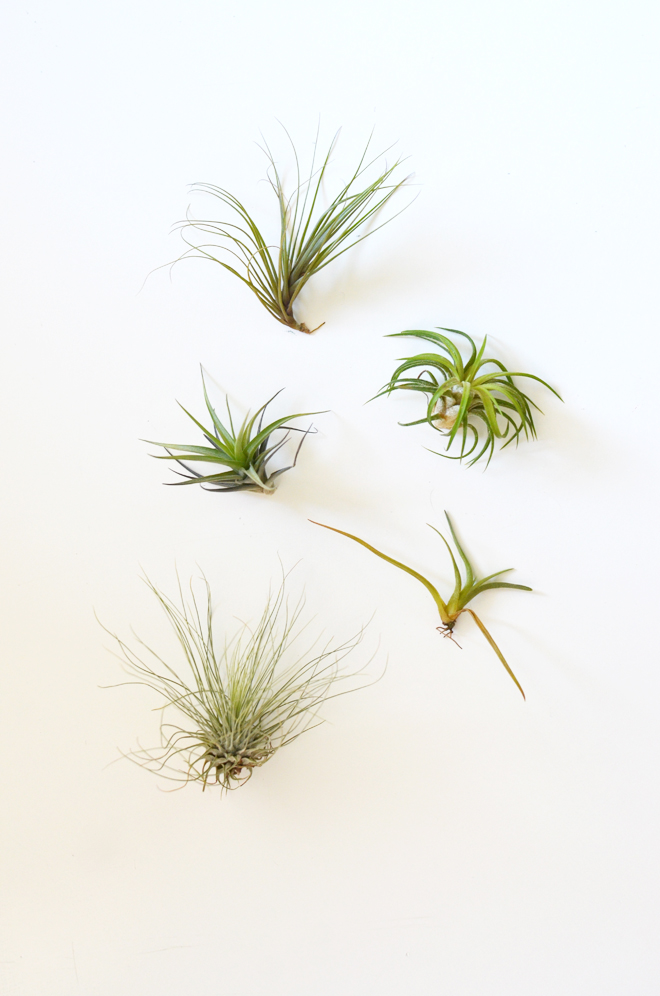
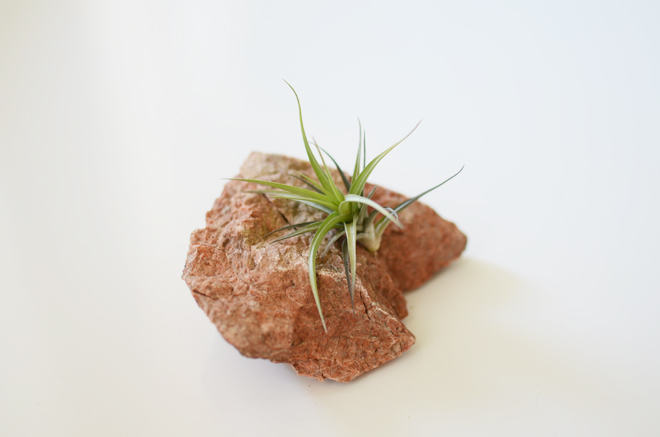
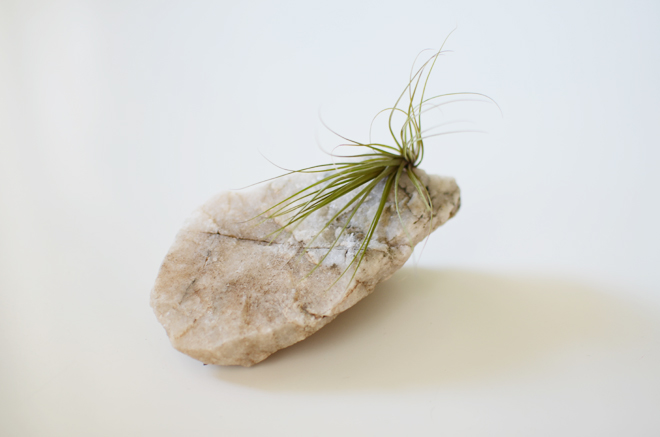
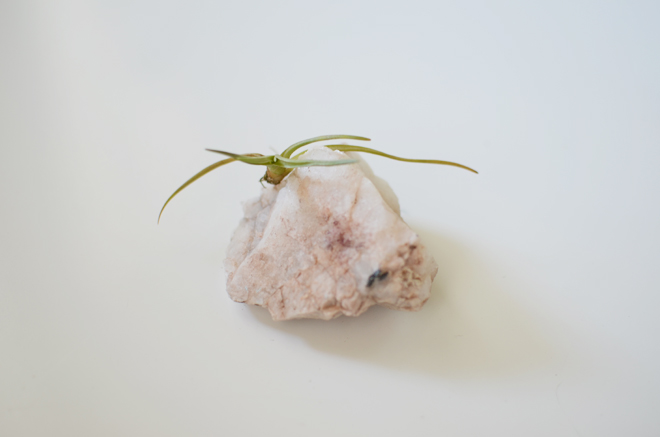
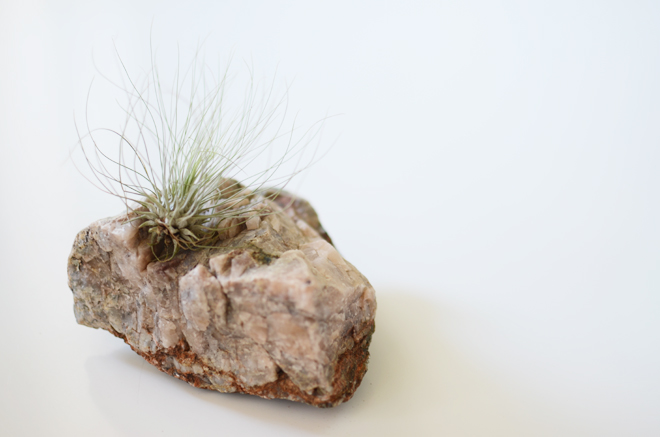
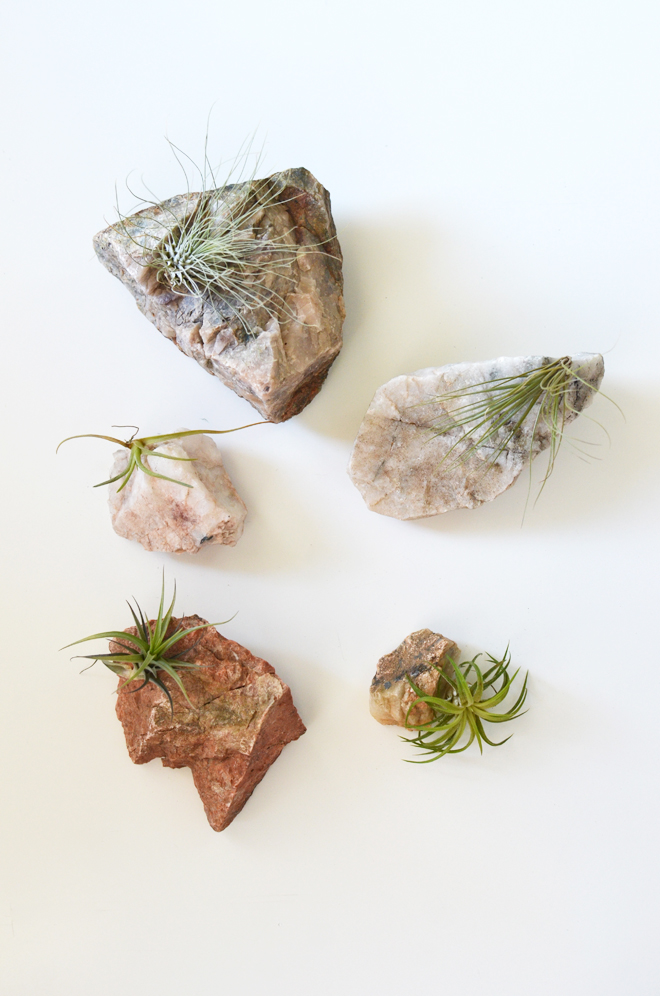
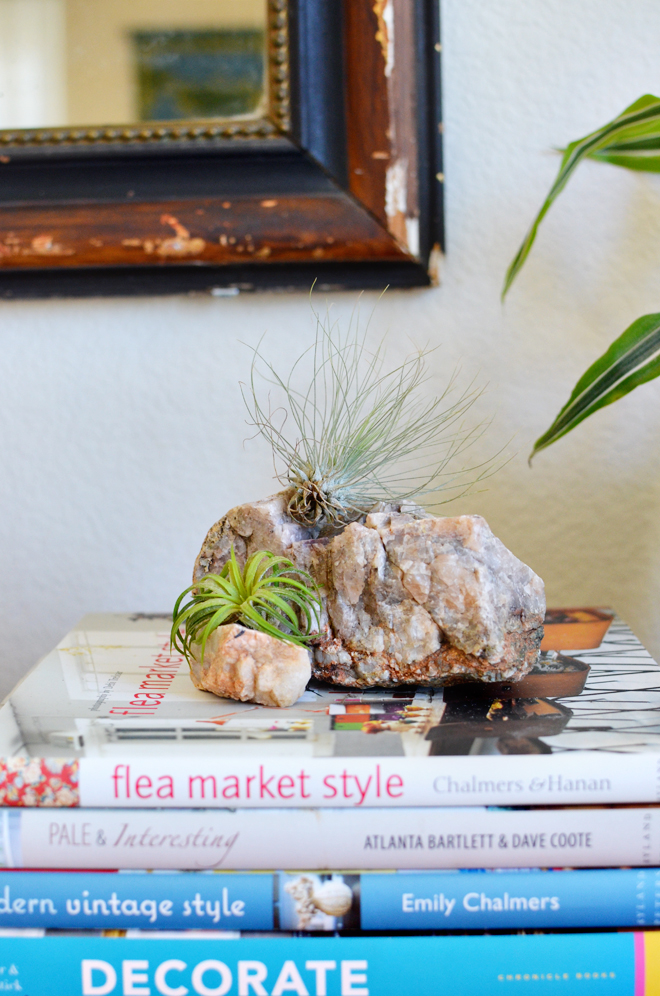
I love air plants and I love rocks. Put them together and you have a cool little sculptural thing to put somewhere in your home! I was totally inspired by Chloe Touran’sIG feed. She has the best air plant-rock combinations. I love everything she puts together (this is so good!)! I wanted to gift an air plant & rock combo for some friends this past Christmas, but I wasn’t sure they would love it like I do, so I just kept them all. Ha! Would you rock the air plant-rock combo in your home?
I have a large growing pile of fabric scraps. I refuse to throw them away because I am sure they can be used for something. I have been seeing different types of interesting necklaces made of buttons, beads, and fabric. Then, I figured why not make one out of my scraps...
I think it made my white shirt a little less boring. This was so quick and easy to make.
How to make a recycled scraps necklace (which is very similar to the straps on my braided tablecloth bag):
1. Take your scrap fabric, I cut a .5''-1'' snip and tear the rest of the fabric down for a nice frayed edge. Used 3 different fabrics for each strand.
2. Take 3 of the torn pieces and tie the ends together with a rubber band.
3. Braid the 3 pieces together and tie ends together with rubber band when done.
4. Repeat steps 2 & 3 for more strands. Remember you can make the strands any length you want, if run out of fabric, just weave more into the braid.
5. Once all the strands you want are braided, gather one end of each strand together and straight stitch together with sewing machine. Repeat for the other ends of the strands. Snip off any excess.
6. Gather ends of the necklace and sew together (snip excess) or a ribbon can be sewn at the ends to be able to tie the necklace closed, but I just sewed both ends together.
7. Voila! A nice way to make use of all your lovely scraps.
Sorry if the directions get you a little lost, but it really is easy. I promise. Maybe I should put some in the shop. Please share any other good ideas you may have of things that can be made with scraps. I would love to hear (read) them!

 Clarity. That word has been speaking to me this week. Clarity on how I want our family to be, clarity in how money and time is spent, and my moments of clarity list can go on. If you aren’t keeping your goal clearly in mind, life will pass you by, and you’ll spend a whole lot of regret later. At least that’s what I think for me. I’ve asked the girls this week what they like and what they think should be happening at home. They said, “We want to hang out!” I thought their response was hilarious and so honest, so we’re working on more hanging out. I mean we’re always together, but I feel like I’m always doing something for them from cooking to teaching to changing to cleaning to chauffeuring that I really do need to just hang out with them. I want to see clearly what my goals are and what my girls want, so that in the midst of the blur of our days, they’re getting what they need most from me, which is me.
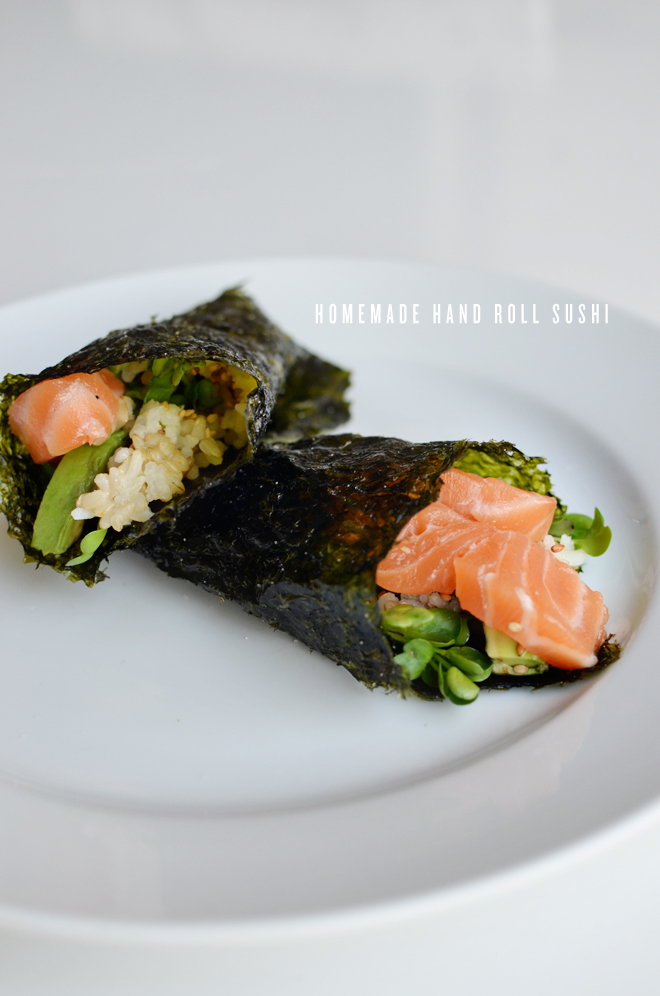


