

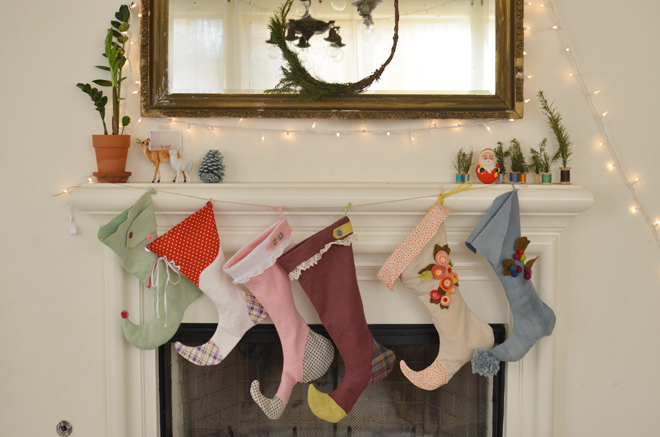
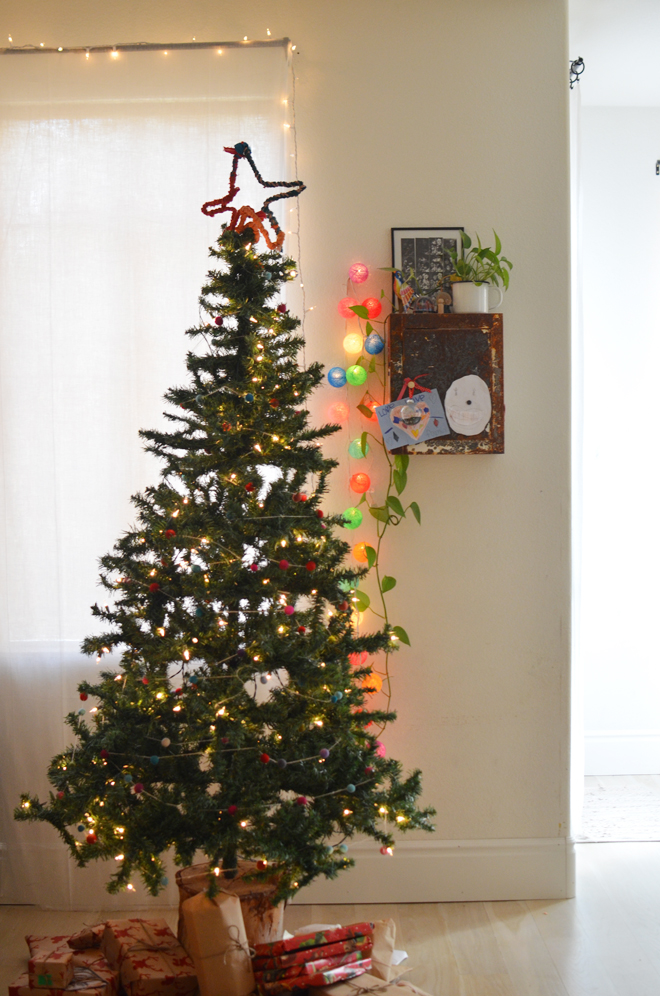
 We go pretty simple with our Christmas decorating, I don’t even really have a theme! Every year I want to get some sort of color scheme going, but it just never happens. My mom goes crazy (in a good way) and our house growing up (and still now) is always decked out. Gold is her color, her tree looks blinging, and she has red touches elsewhere. Maybe next year I’ll get some sort of theme going, but to my kids, it doesn’t really matter. They just love anything up and the lights! The little lights are our favorite parts. As soon as it gets dark, the girls are asking to turn all the Christmas lights. What’s your favorite Christmas decoration?
it’s christmas time here
December 24, 2013
ben turns 39
December 23, 2013
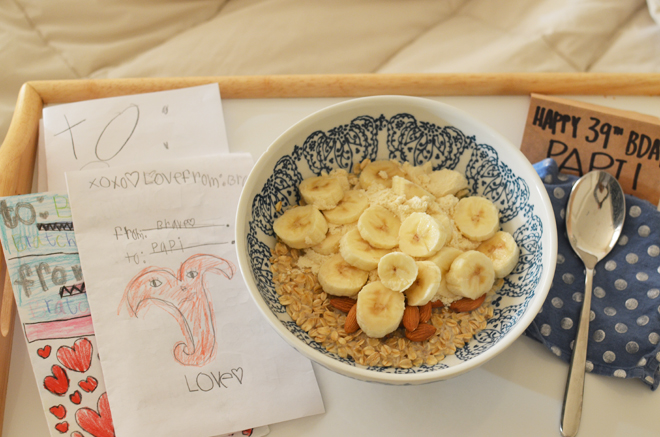
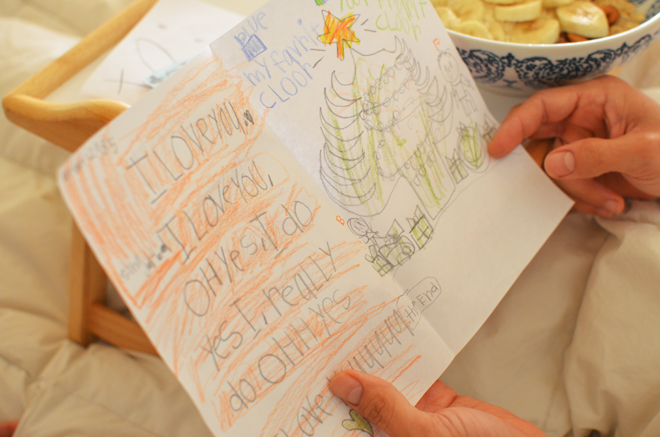


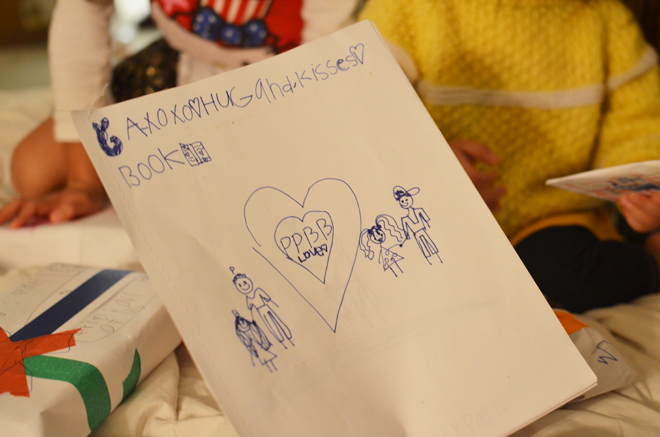
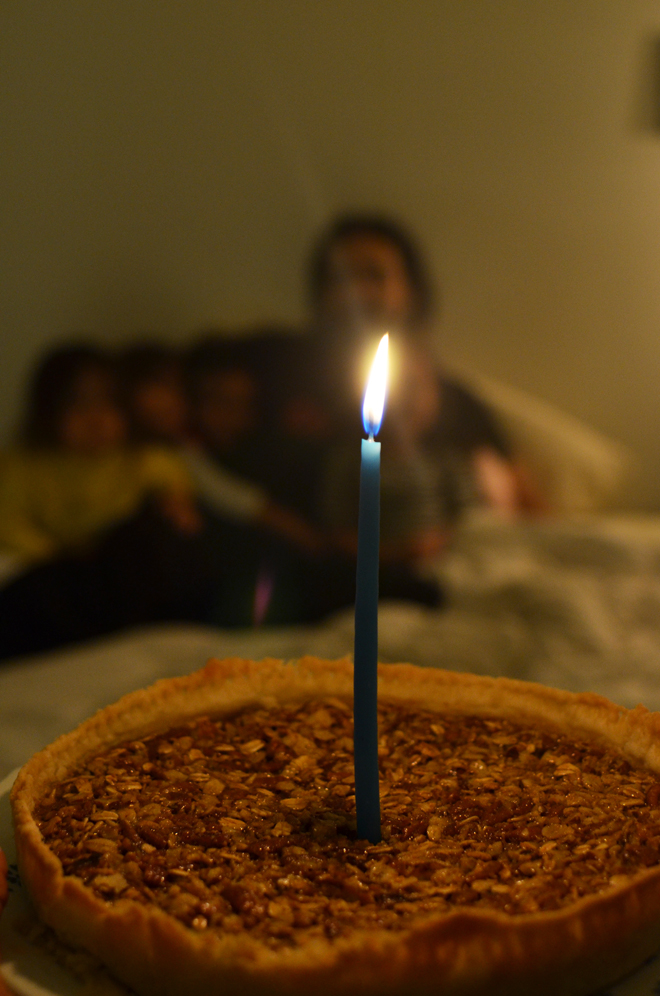
 Ben turned 39 and we had a simple celebration. He got served the traditional birthday breakfast in bed, but his breakfast request was his normal everyday breakfast… 1 cup of oatmeal, 23 almonds, 1 scoop of protein, 1 banana, and covered with milk. He’s very specific. It’s a boring meal in my opinion, but it’s what he wanted. This dietitian really lives what he teaches his patients. Of course, the girls made tons of handmade cards and presents, and even gifted things that were already ours (like a lint remover). Ben went off to work and I cooked up another birthday request for dinner, this time it was much fancier than his breakfast request. That night we all watched a movie and sang the birthday song with pie. I used the oatmeal pecan recipe, but this time added more oatmeal and just used 1/2 cup of granulated sugar. It was a low key day with Ben going off to work, but I think next year we are going to make sure he takes the day off so we can do a whole day of celebrating because that guy of ours deserves it.
By the way, the girls kept asking why I put 39 on his card because according them, he’s 23 and I’m older than him. Oh that Ben is telling those girls lies!
diy: vintage inspired hanging birds on ABM
December 22, 2013
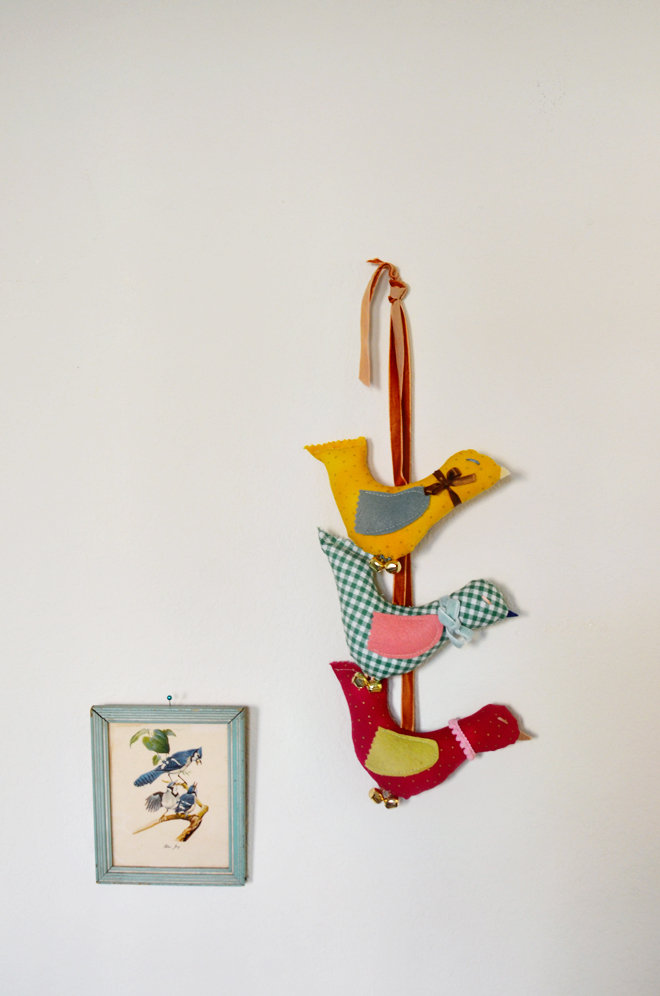
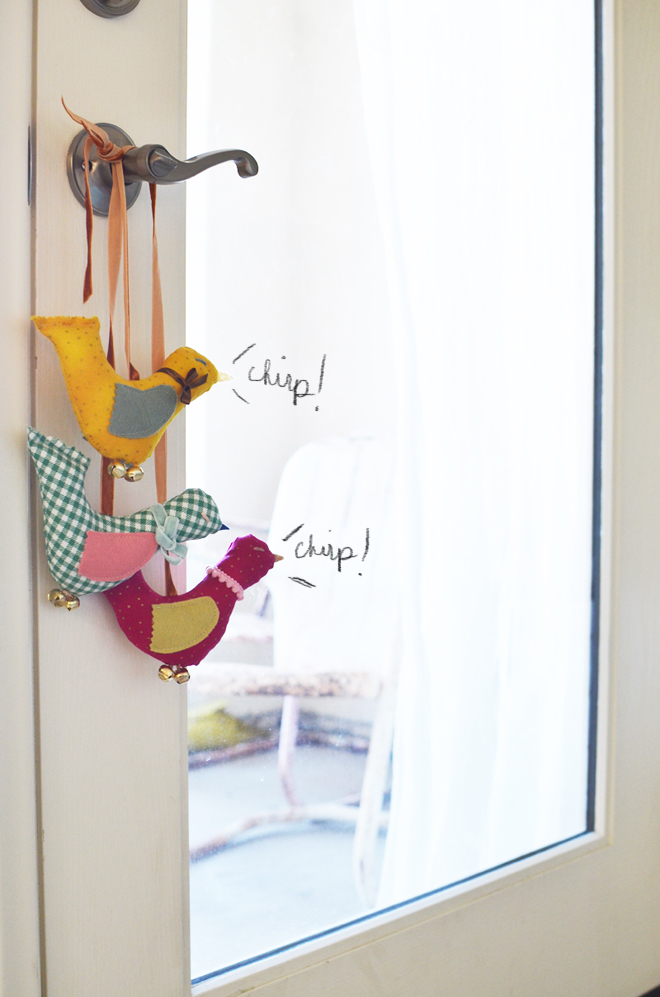 I made these trio of birds inspired by this vintage set. Get the template and instructions on how to make this sweet little hanging over at the A Beautiful Mess blog!
i’m sentimental and crazy
December 21, 2013

 We broke down our crib and gave it away. Glow never slept in it (she’s in the play yard) and she refuses to, so it was time to move it on. I kept meaning to put all the girls in it to get one last picture, but Ben started taking it apart before I got to do that. Once I realized what he was doing, I told him to pause so we could at least get one last picture. He took enough parts off that it was going to take work to get it back together, so while the frame was still together and the bottom was the part the piece that was no longer attached, we figured out a way to still get a picture taken… I kinda held it up using my arms and knees, all the girls went in, Ben quickly snapped a picture (I did the holding up because he has an injured rotator cuff), and then we quickly took them all out. Times like these make me thankful for the early morning workouts I do alongside Ben.
As you can tell by Glow’s face, she didn’t like to be in it, and she probably didn’t need to be in the picture since she never used it like the 3 bigger girls, but I still wanted to stick her in. This crib has been with us since True was born. It’s given us lots of memories and it’s where our three big girls have learned to put themselves to sleep. It’s weird getting past the baby stage as I feel like we’ve been here for years, but I’m looking forward to it. Nervous about how time fast will fly, but I’m trying to be present in the moment. Trying is the word; it’s hard sometimes.
I will admit, these past few weeks have made me crazy mama getting ready for the holidays, battling sickness, and keeping up with the girls. This week I have been especially cranky (could be because it is that time of the month for me), but I feel so bad as the girls bear the brunt of my craziness. True even left Ben a note by the front door to see when he got home and it said, “Papi, mommy is yelling again. And she called me a brat.” For the record, she was acting like a brat. Obviously, this week was a whole lot of not being present in the moment, but with school done for the year and everything set for the holidays, I think these next couple weeks should Lord willing be much better. Ben’s off for the holidays, so having him around helps keep me sane and sharing the load with him is so much better. Plus, we will be with family, so there will lots of extra and willing hands to help with the girls. We’re off from dance and swim classes, school won’t need to be done, and it will just be lots of enjoying the season together as a family.
Despite me being crazy, the girls are still as sweet as ever and I better cherish that now because one day they’re going to know how to give me attitude back (and they probably will have learned it from me unfortunately). Anyone else feeling crazy lately?
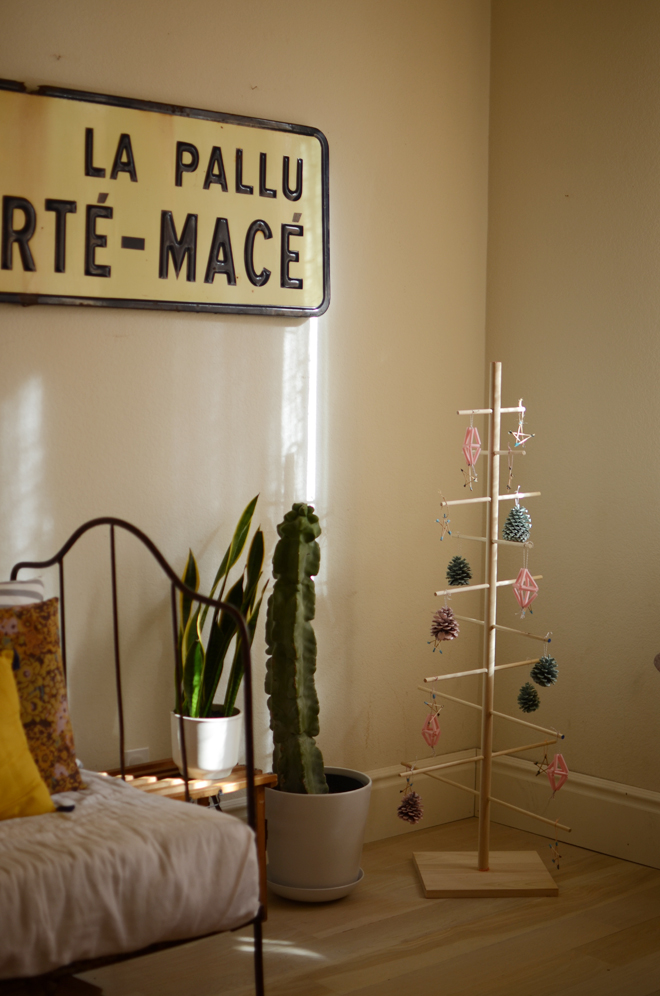
diy: simple dowel christmas tree
December 19, 2013
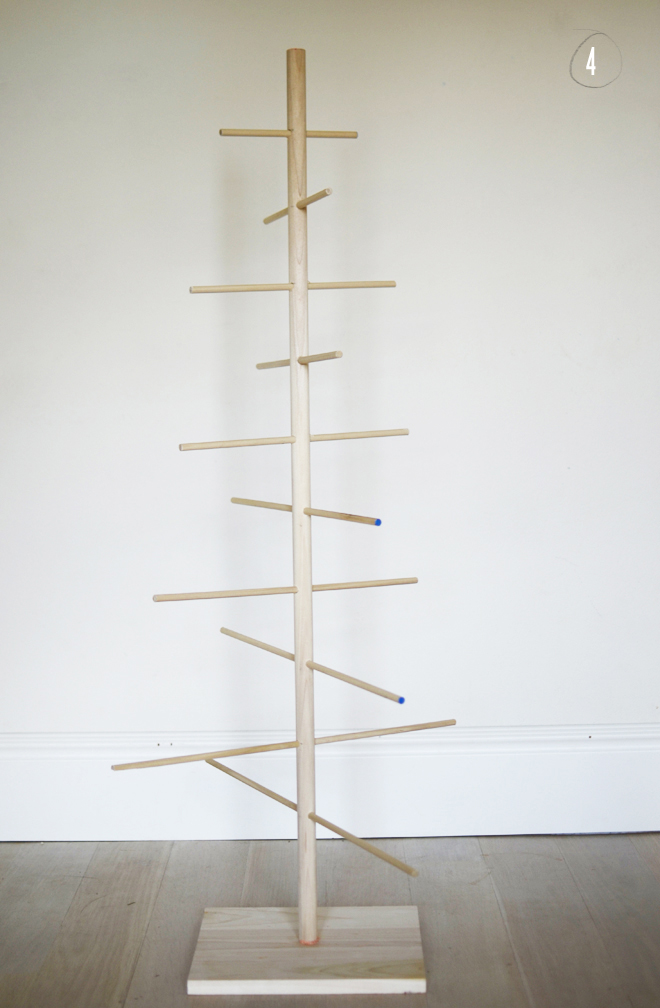
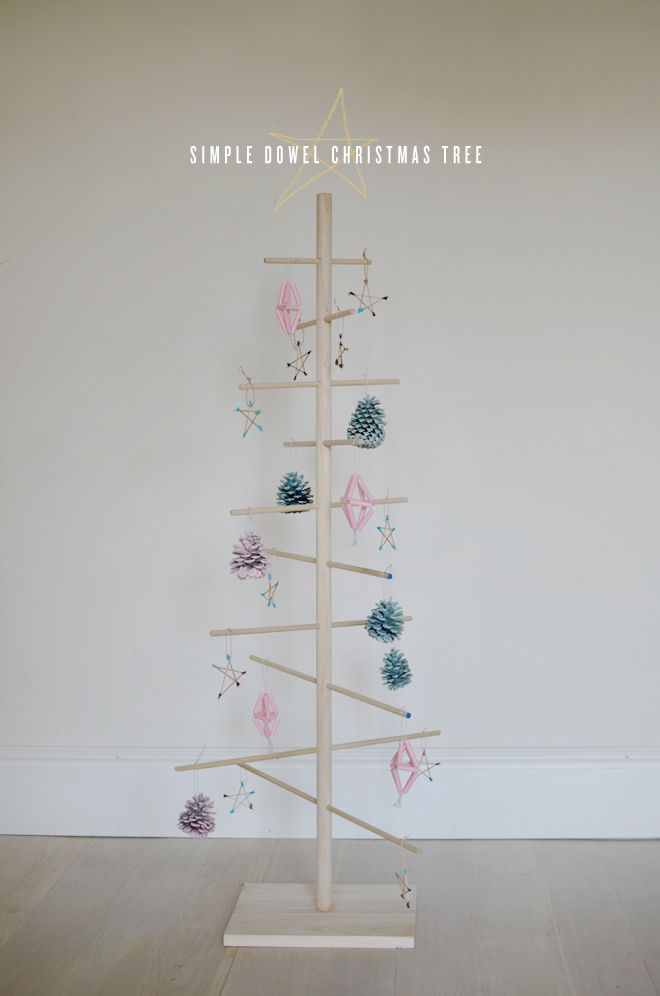 Simple Dowel Christmas Tree
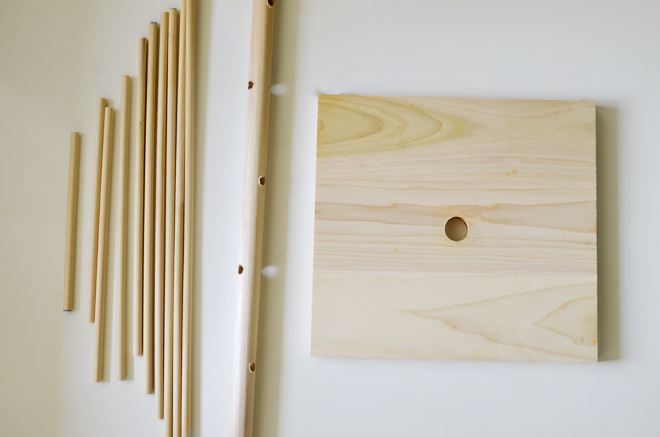
Supplies:
Simple Dowel Christmas Tree diagram
12″ x 12″ x 1″ wooden board (I bought a 24″ x 12″ 1″ wooden plank and sawed it in half)
1″ x 48″ poplar dowel
4 – 3/8″ x 48″ poplar dowels
Handsaw
Drill
1″ bit
3/8″ bit
Measuring tape
Pencil
Sandpaper (optional)
Wood glue (optional)

 Directions:
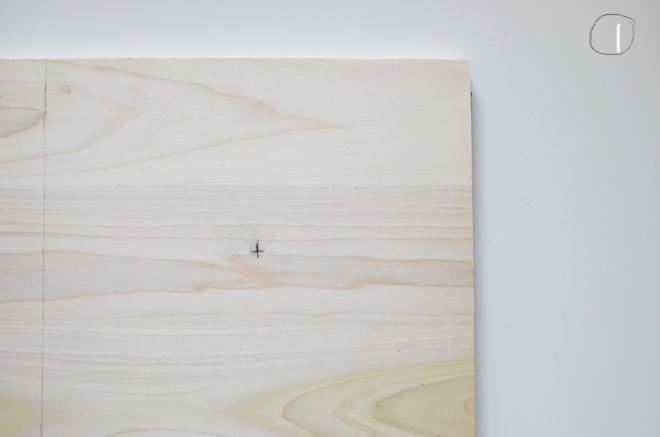
1. Measure and mark the center of your wooden base. Using a 1″ drill bit, drill a hole in the center of the wooden base (drill all the way through the board). Note: I bought a 24″ x 12″ x 1″ wooden plank and cut that in half to get the size I needed for my wooden base.
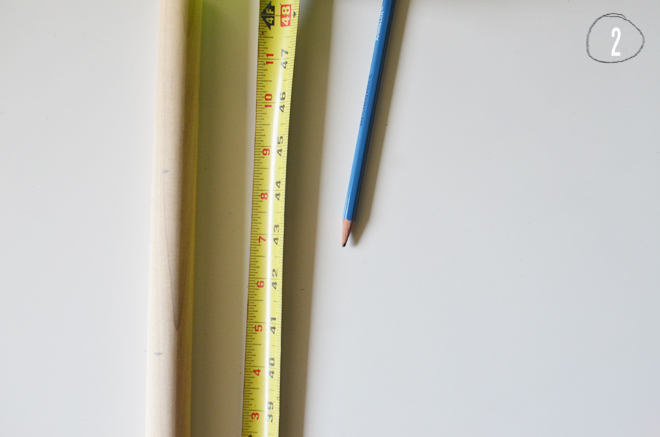
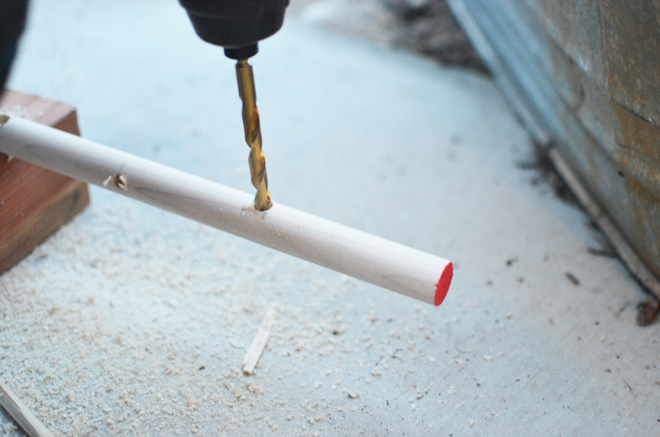
2. Measure and mark the holes for your 1″ x 48″ dowel; this is the main “trunk” of the tree. Starting 4″ from the top, mark your top hole, then proceed to mark the remaining 9 holes every 4″ apart, while at the same time, moving your hole 90 degrees from the previous hole, so that alternating dowels would go in opposite directions (see diagram). There will be 10 dowel slots total with the last hole 8″ from the bottom of the 1″ x 48″ dowel. Once you have all your holes measured, using the 3/8″ drill bit, drill a hole on each mark all the way through the dowel.
3. Measure and cut the four 3/8″ x 48″dowels to these lengths: 8″, 10″, 12″, 13″, 14″, 16″, 18″, 20″, 22″, and 24″. There will be a couple excess pieces, which you can toss or save for another project! If any of your cuts come out a little rough, lightly sandpaper them.
4. Insert the 48″ dowel into the hole in the wooden base, then proceed to insert the remaining dowels into the slots with the shortest length at the top continuing to the longest length through the bottom hole. Note: My dowel fit pretty snug into the wooden base, but if you need to (or would like to) add some wood glue to join the two pieces together to stabilize (or add a strip of washi tape to the bottom of the dowel, so that it fits into the hole snuggly). The diagram will help clarify the steps, so be sure to use that as a guide when making your tree.
There you have it, a simple dowel Christmas tree! Make some decorations and hang them up on your creation…
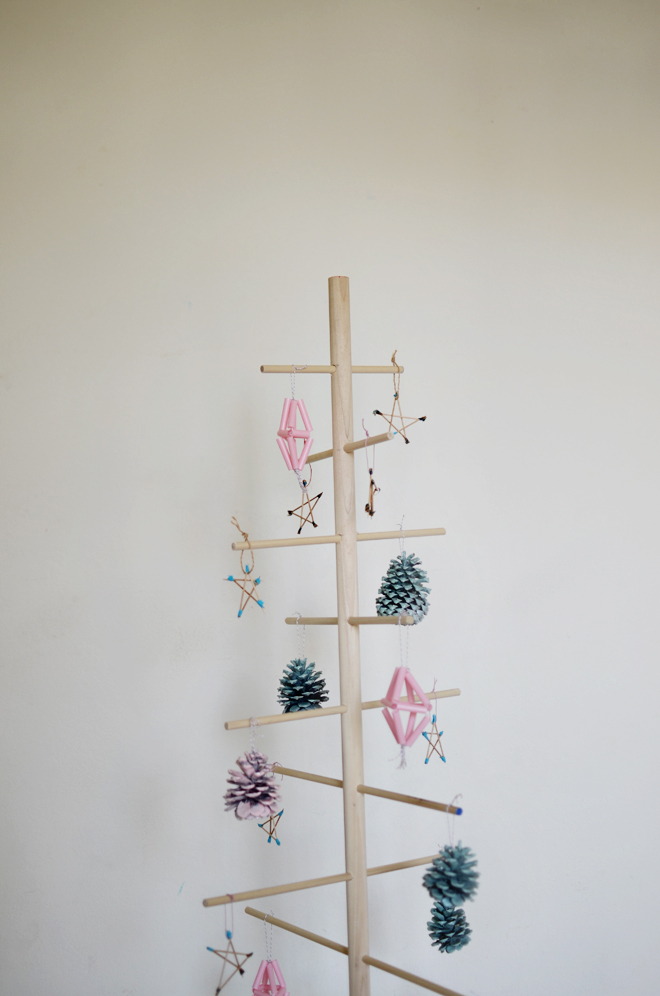
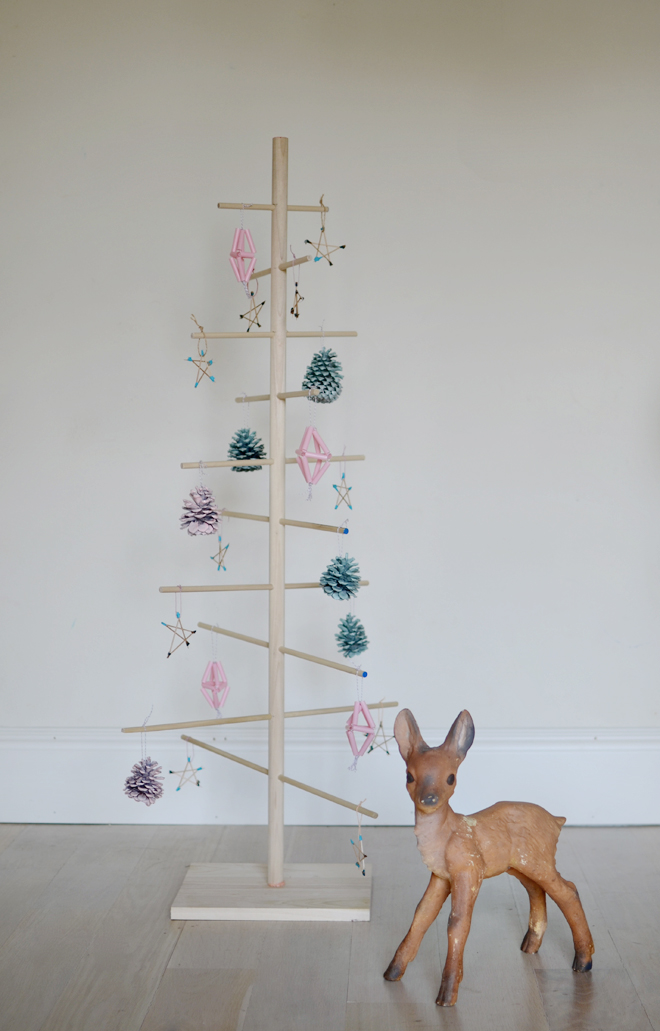 Full disclosure: I’m no Rachel Denbow, so while Ben has taught me how to use the saw and drill, I save that job for him. I measured and marked everything, handed it to him, and he did the sawing and drilling (friends, make sure to always use safety first when dealing with those dangerous tools!). The entire project was done in 30 minutes and it took us longer to make the ornaments (see them here and I followed Rachel’s tutorial for the straw himmeli). You could definitely add more dowels to make the tree fuller. This would even be great to have in a classroom; I think it would be fun to display classroom ornaments on it! Or maybe make it for a kid room! It’s an easy tree to put together (and take apart) and it’s not too fancy, so it will be easy to store. You can even get fancy and paint yours fun colors! I really love our little wooden tree so much…
P.S. This isn’t our “main” tree, but I was tempted to have this take its place. It’s sitting in a corner of our family room to add more holiday cheer.
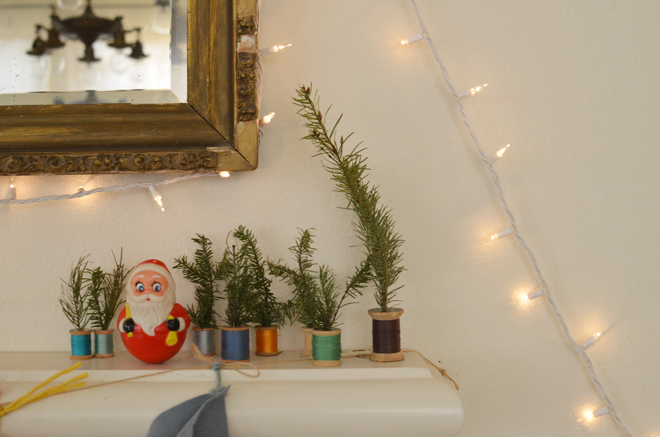
our little christmas makings
December 18, 2013
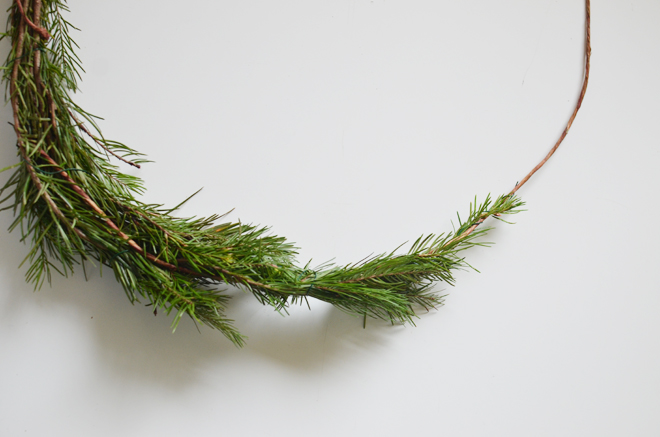
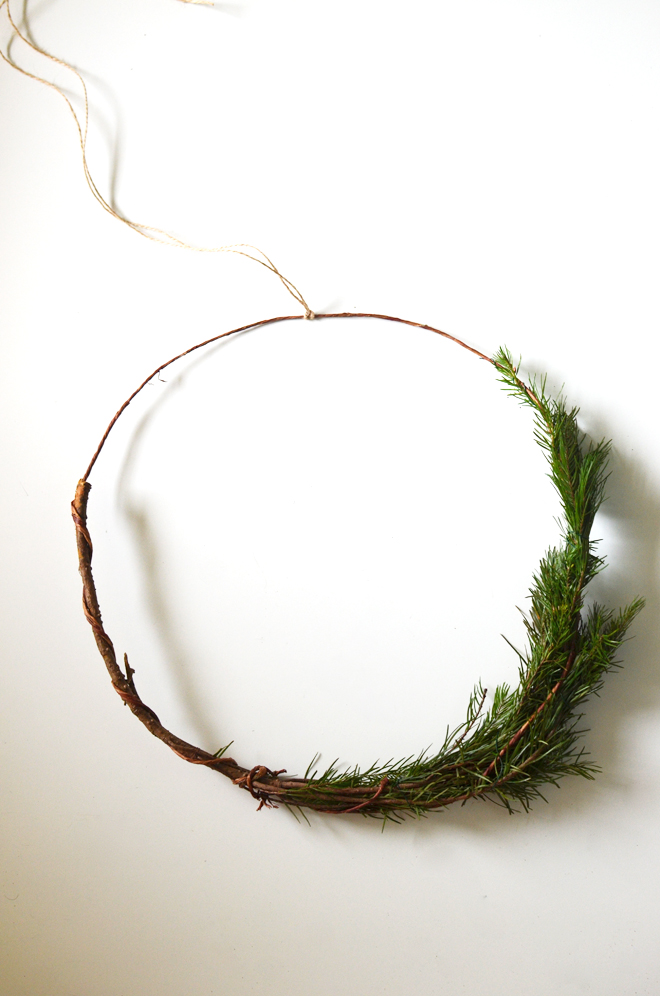 We made a wreath. Just used some tree scraps from Lowes that they let me have for free! Free is always nice.
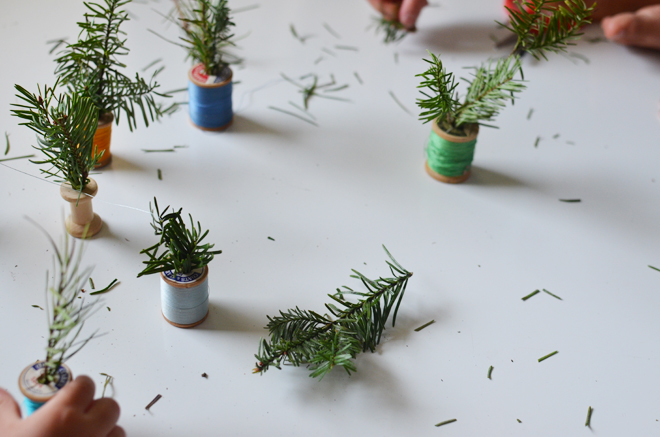
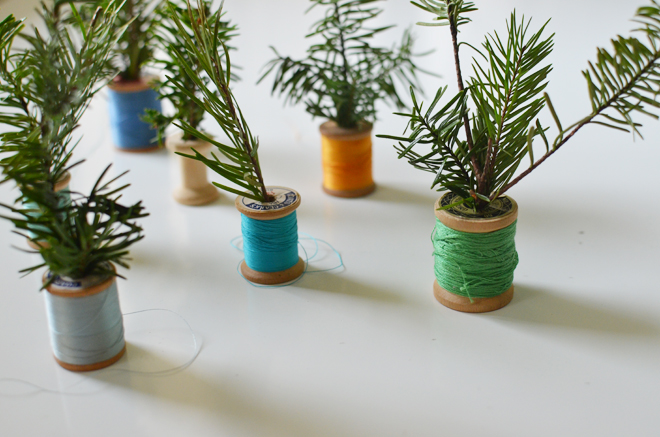
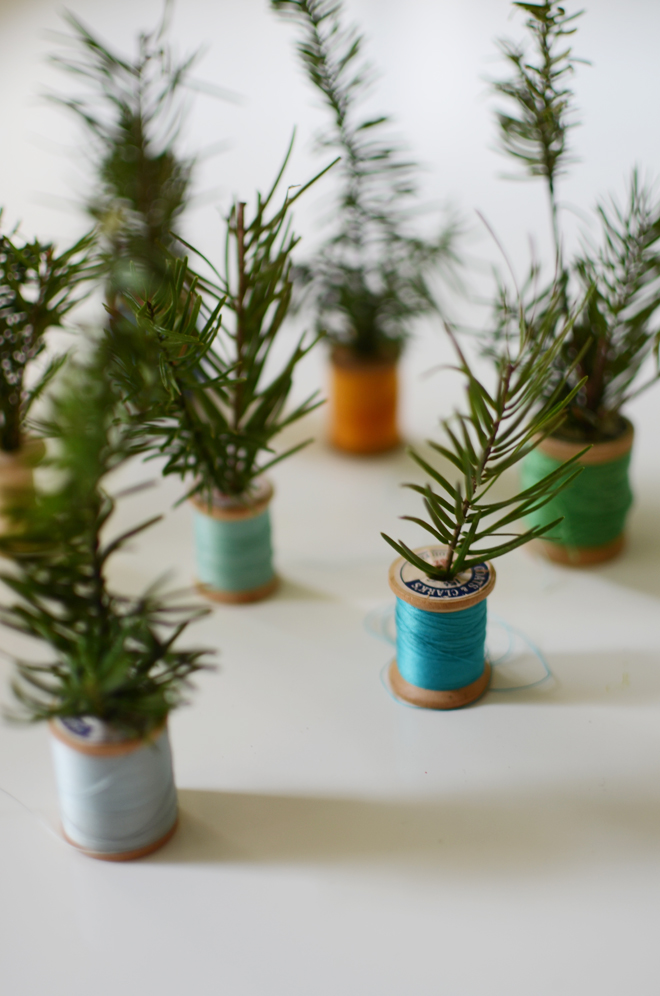 We made some little trees. Using those same free tree scraps and some vintage thread, the girls made trees for their own little forest.
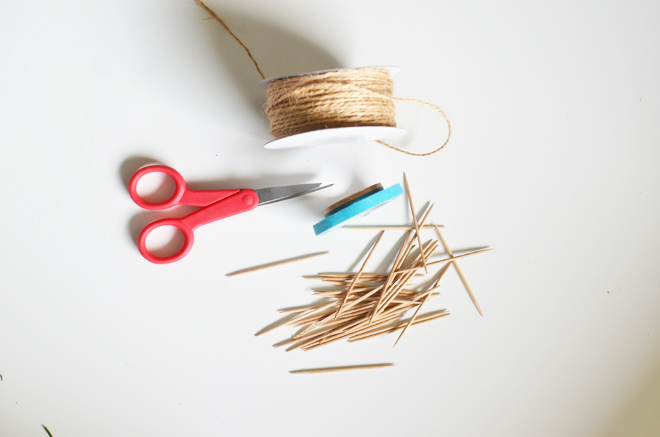
 We made little (toothpick) stars. Inspired by this pin.
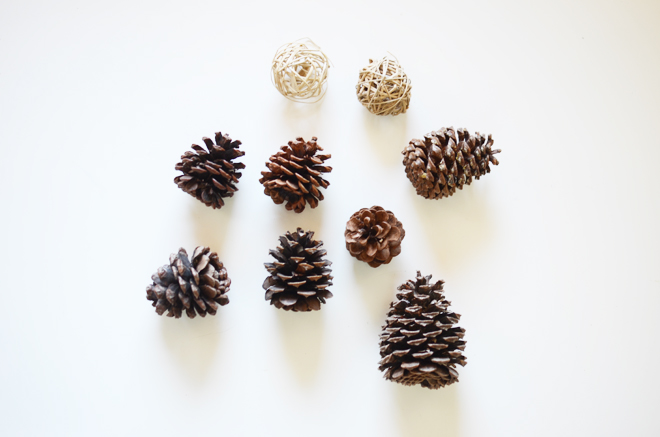
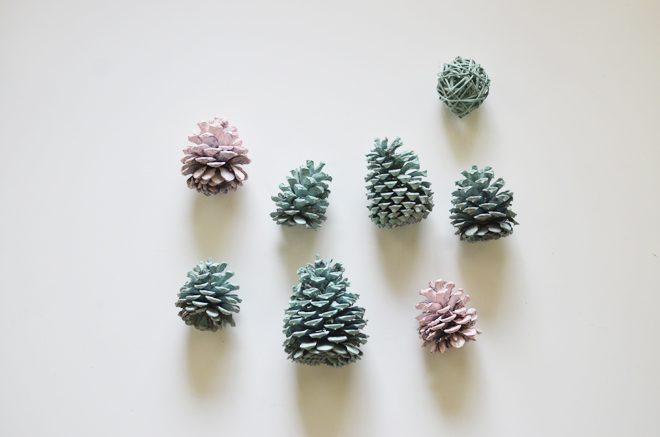 We painted some pinecones. Took a few coats of spray paint (and let it air out for days).
These are just some simple little projects we have done for Christmas; they didn’t take too long, but satisfied that holiday making itch. I added a little strand of string to the pinecones and stars and they make perfect ornaments. There’s so much going on between the girls’ school, extra activities, getting ready for Christmas, baking for gifts, and life in general that this saying pretty much sums up what I’m feeling right about now. We have a couple more days until things calm down a bit, we are definitely ready for Christmas break!


