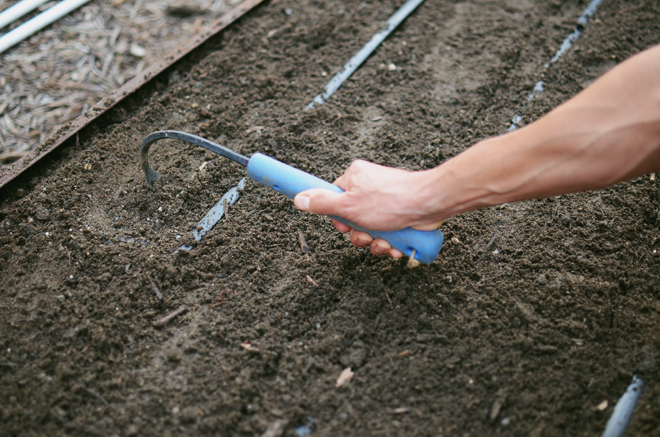
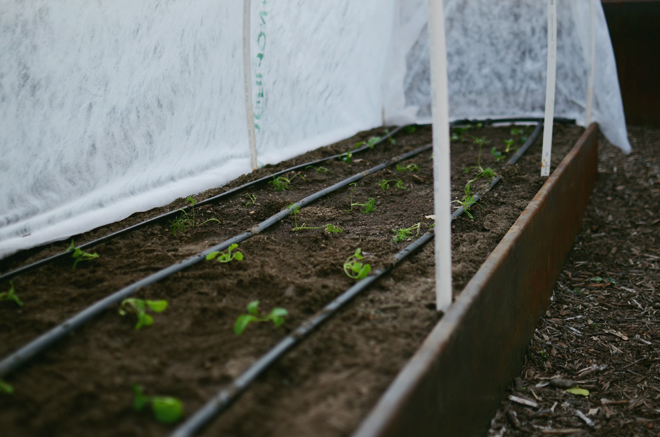
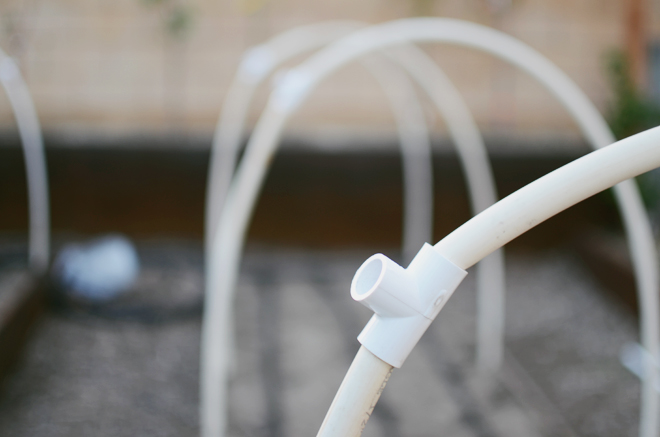
In our previous winter gardens, one of the challenges has been ease of access. On one hand, we need to seal it off tightly so that (1) the pests will stay away, and (2) the wind won’t “blow the ‘green’ house down” (it can get VERY windy here). And on the other hand, we need to be able to access it easily for obvious reasons. If the vegetable plants are on “lockdown,” there’s a process to “unlock” them. Accessing it (without breaking down a good chunk of it) and creating a door of sorts in a temporary housing structure like this has been difficult. Ben thought of adding a tee fittings along the PVC arches in hopes of creating a place to rest one of the long edges; a way to create a door for easy access. It worked.
One of the drawbacks has been that when it gets really windy, the row cover fabric rubs along the tee fittings and it eventually the constant wear creates a tear. We’ve had to do some patch sewing in response.
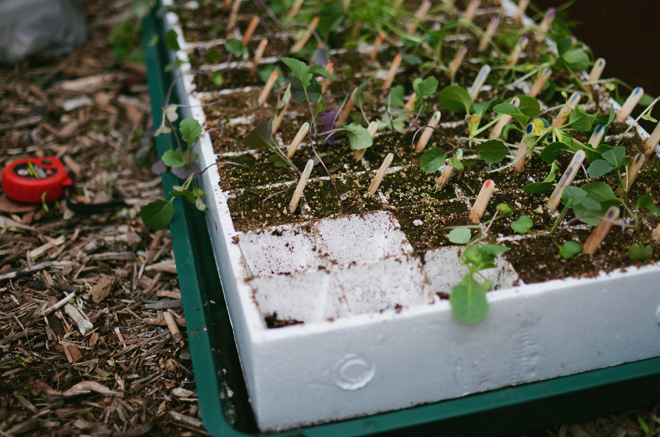
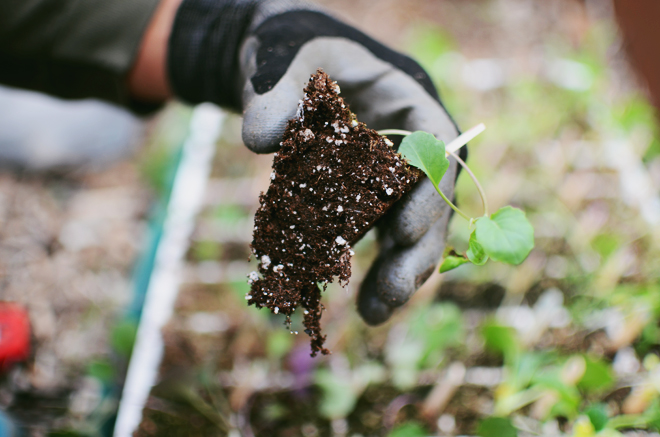
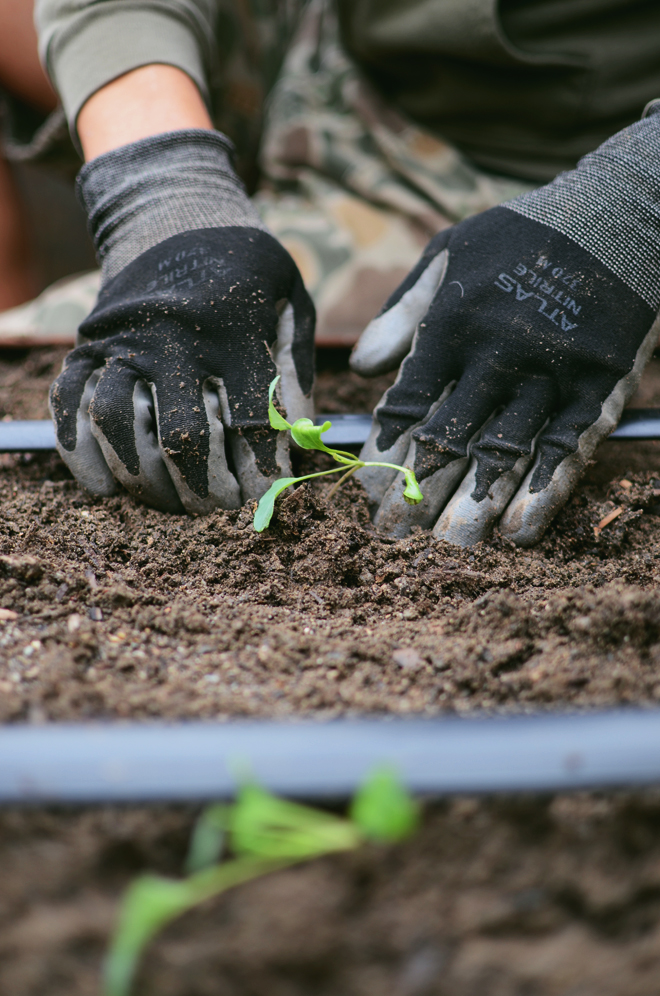
We had the seedlings in trays for 3 weeks, from indoor seeding to the point of outdoor transplanting. A lot of the seeds we purchased were from Baker Creek Heirloom Seeds; the kalettes were only availalble through Johnny’s Selected Seeds. For some vegetables that weren’t available through Baker Creek, we found other vendors and purchased organic/non-GMO seeds. For asian vegetables that were hard to find, we went through Evergreen Seeds; the vendor told us that all of their seeds are non-GMO.
I shared this quick project over on my Instagram (@cakiesblog), so if you want to learn how to make it, get the directions here. This was part of Soul’s lesson for the day, but we all ended up making one. I added a little message on mine because I’m going to hide it for Ben to find when he gets home. I love when Ben romances me, but I totally think girls could (and should) do the romancing too. Anyway, according to Punxsutawney Phil, looks like we will get six more weeks of winter, so most people can’t frolic in their spring clothes just yet.
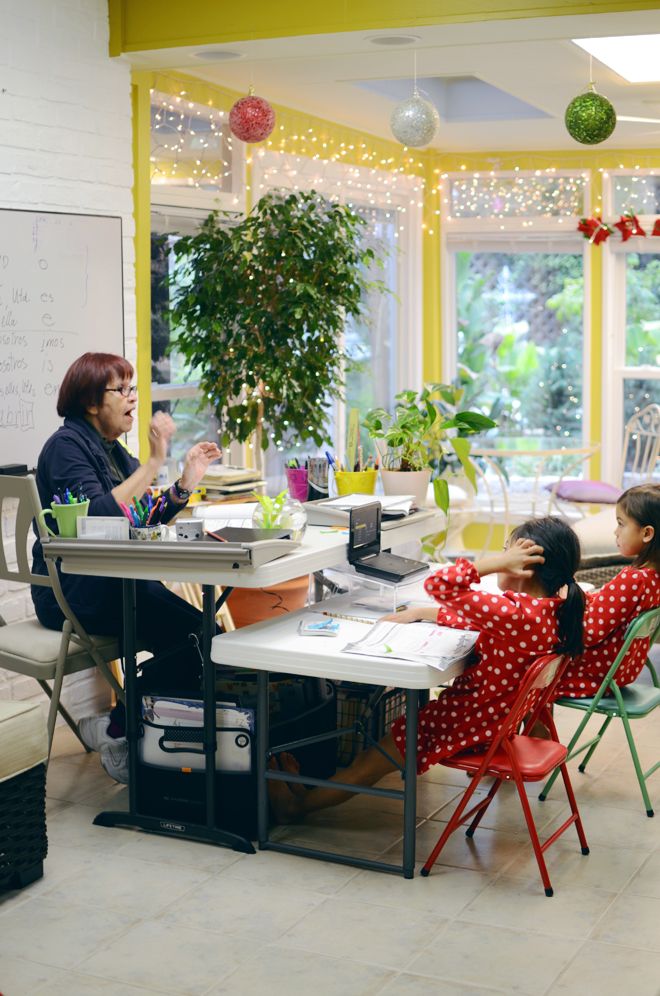
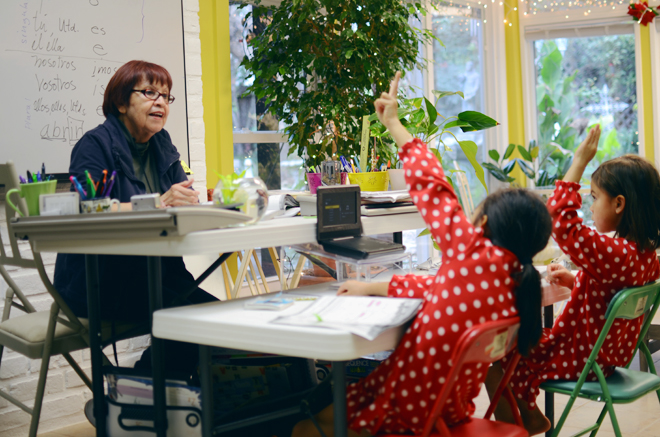
I’ve shared a little about how we started Spanish lessons with Ben’s mom via FaceTime. Read more about it here. When we were in Texas over the holidays, they were able to do some face to face Spanish lessons. The girls love learning from their Grandmama so much!
It’s pretty cool to see Ben’s mom set up of the classroom. You could see a little when they are doing lessons online (mainly the whiteboard), but we got to see firsthand the love and care she takes in preparing lessons for her grandchildren. She has a whiteboard, an array of Spanish books (and Spanish to English ones too), and she even has a class pet for them! And even though the kids were technically on Christmas break from school, they were more than happy to get in Spanish lessons with their Grandmama.
Ben and I are so thankful that his mom is able to be part of their homeschooling. They are all creating special memories for sure, and I think that’s the most wonderful thing about it. They aren’t bilingual just yet, but we’re hoping they get there. You have to start somewhere, right?!
p.s. they lived in those polka-dotted pajamas all throughout the holidays (a gift from their grandma).
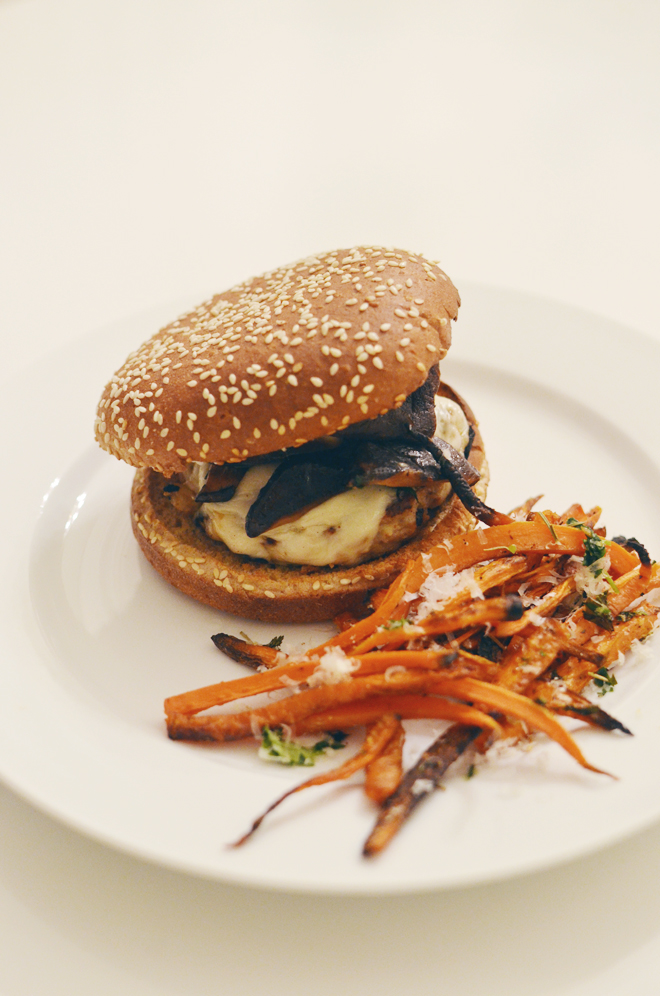
Mushroom Burgers with Carrot Garlic Parmesan Fries. My attempt at recreating a healthy version of the Red Robin (a chain restaurant) mushroom burger didn’t end up so great. My version was delicious, but it didn’t taste anything close to that 961 calorie burger I used to eat all the time back in college (slathered with honey mustard sauce of course). I made a lean ground turkey patty infused with garlic and parmesan, and then topped it off with low-fat swiss cheese. I used shiitake mushrooms, which were so flavorful, and while we all enjoyed it, it still didn’t satisfy my Red Robin craving. For the fries, I just cut the carrots real thin and tossed loads of fresh herbs, garlic, and grated parmesan on top. The burger and the fries made a good pairing.
Week of 2/2 – 2/6
Monday: Chicken Noodle Soup
Tuesday: Won Ton Soup
Wednesday: Leftovers
Thursday: Lavash Pizza
Friday: Ceviche
I made some fresh won tons and soup last week and most of us loved it. I want to make another batch, but this time leave out the ginger in some because I think that’s the part True didn’t like, so hopefully that will win her over. I find myself looking forward to cooking dinner, especially something new. Sure, I get tired of cooking, but I do experimenting and trying out new recipes. I never thought I would enjoy cooking as much as I do these days. I cook 3-4 days out of the week, and the other days we eat leftovers.
I share some tips on how to keep indoor plants alive here.
Thankful for being able to spend some time with my friend Abby, and she came and taught me how to make authentic Hainanese Chicken Rice. I’m so excited to try it out!
God’s been teaching me a lot lately, from really talking to God in prayer, spending time meditating on the Word, and releasing my desire to control things. I’m just begging God to really transform my selfish heart.
The girls have been asking me a lot more when their Auntie RJ is coming home. My parents get to go visit her in Romania in a couple weeks (and they’ll stick around to travel Europe for another 3 weeks after), but then after that, she’ll have about 3 months left and then she will be home!!!
I know Valentine’s Day is more commercialized and appreciating our loved ones should happen everyday, but it’s still fun to celebrate it. I’m not sure what to do for Ben yet, but if he asked me for a wish list, it would more than likely be some piece of antique jewelry (maybe this), but a sweet handmade Valentine card would do too. Do you make any special Valentine’s Day requests? I did order more Tegu blocks for the girls as a gift (this and this).
Don’t forget to watch Bella and the Bulldogs on Nickelodeon tonight! Ben’s cousin is one the creators, and we want to tell everyone, so they’ll get picked up for a second season!
We’ll be taking care of house things today, and after church gathering tomorrow, we will be watching Super Bowl. Happy weekending friends!
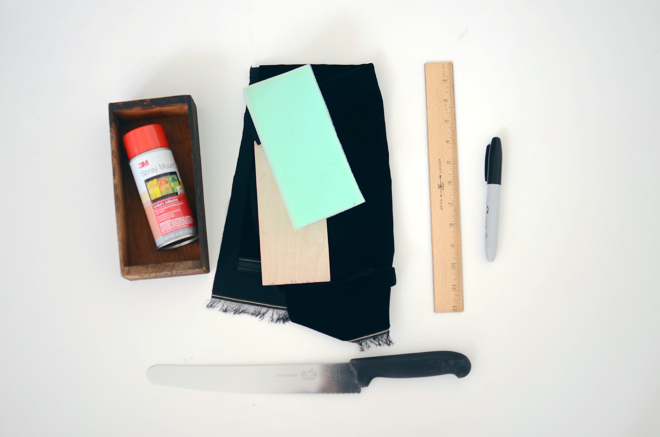
Supplies:
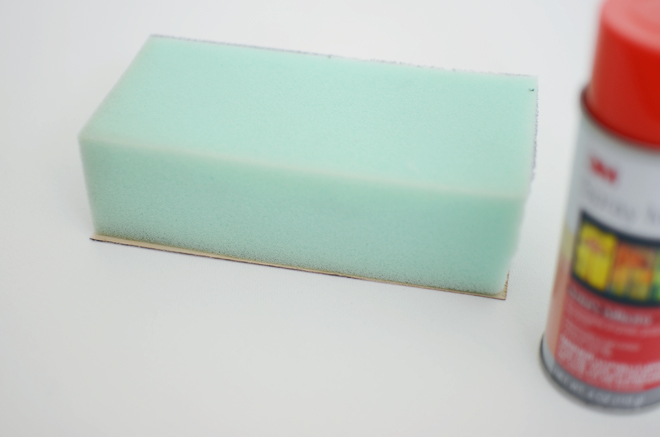
Small wooden box
High density foam (size will depend on the height of your box)
Spray adhesive
1/32″ thick birch plywood sheet
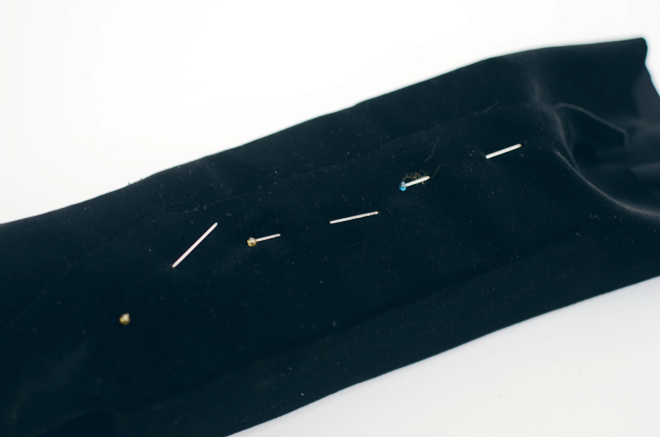
black velvet fabric (size needed will depend on size of your box; I needed a 1/4 yard for my box)
Ruler
Marker
Scissors
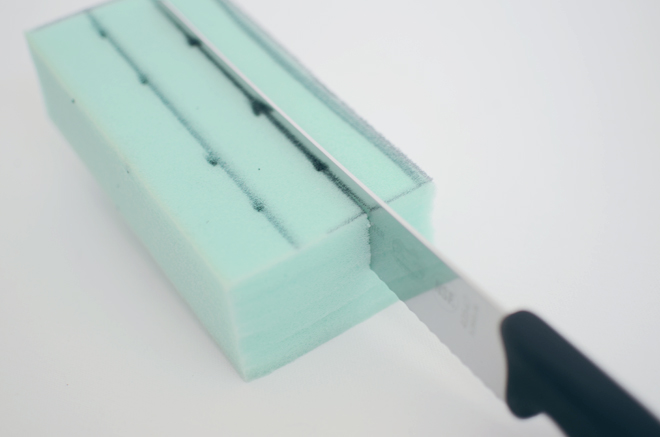
Serrated bread knife
2-3 small pins (or staple gun)
Directions: 1. Measure your box. Cut out a piece of birch plywood 1/4″ smaller (all around) than the size of the inside of your box (the plywood is so thin, I used scissors to cut it). Next, cut out the foam just 1/8″ smaller than the inside of the box. Then, use the spray adhesive to attach the foam to the piece of birch plywood. The inside dimensions of my box is about 3″ x 2″ x 7″, so a 2″ thick foam worked for what I needed.
2. Measure and mark your rows (mine are about 1″ apart from each other), then using your serrated knife, cut straight down into the foam, stopping about 1/2″ away from the bottom of the foam piece. Cut out your velvet fabric about 5″-6″ longer on each side. You’ll want to make sure the fabric is large enough that it will cover all the sides, keeping in mind some of the fabric will also be inserted into the rows.
3. Center the fabric on top of the foam, and with your ruler (straight edge), insert it down into one of the rows until it is nice and snug in the crevice. You’ll want to do this slowly to prevent as many wrinkles as possible. Repeat for remaining rows. Fold the fabric neatly around the bottom, and overlap the fabric ends together (the long side) and pin. I originally wanted to staple the fabric to the bottom, but my staple gun wasn’t working, and my glass pins are so tiny that it worked just as well. Make sure all the fabric edges are folded around the foam and secure, then insert into the wooden box. I just pinned the long fabric ends and folded my short ends in as I carefully inserted the foam into the box.
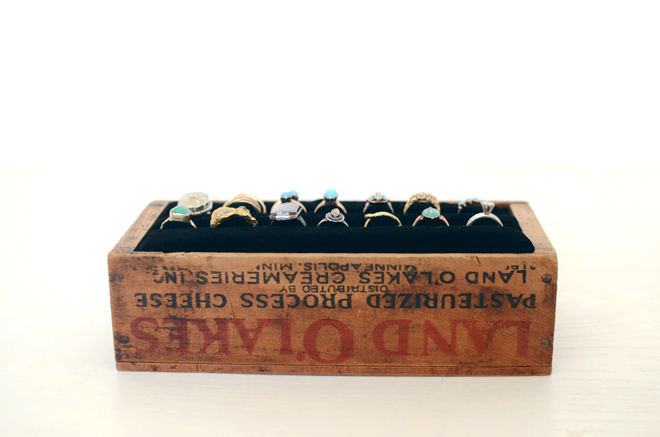
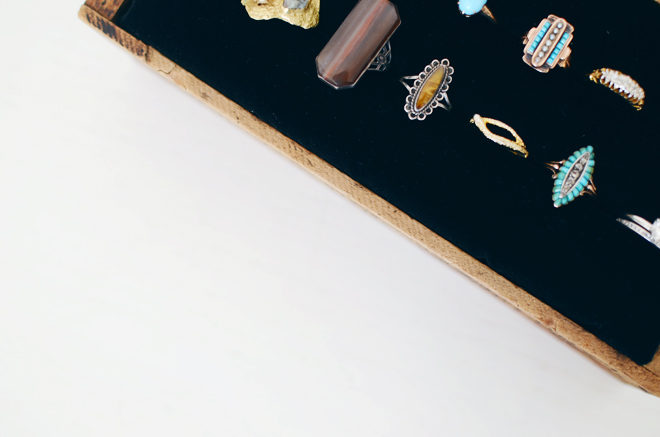
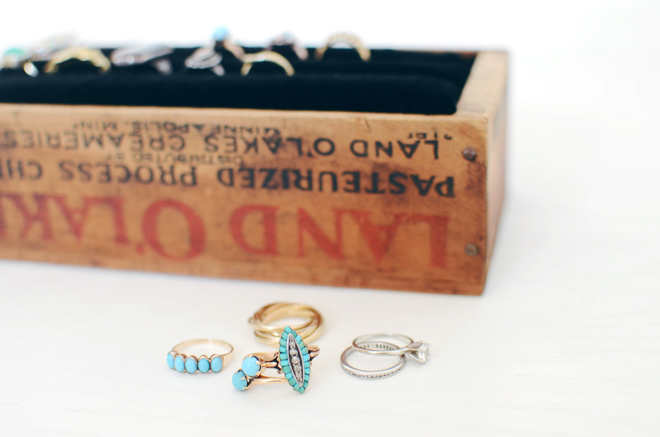
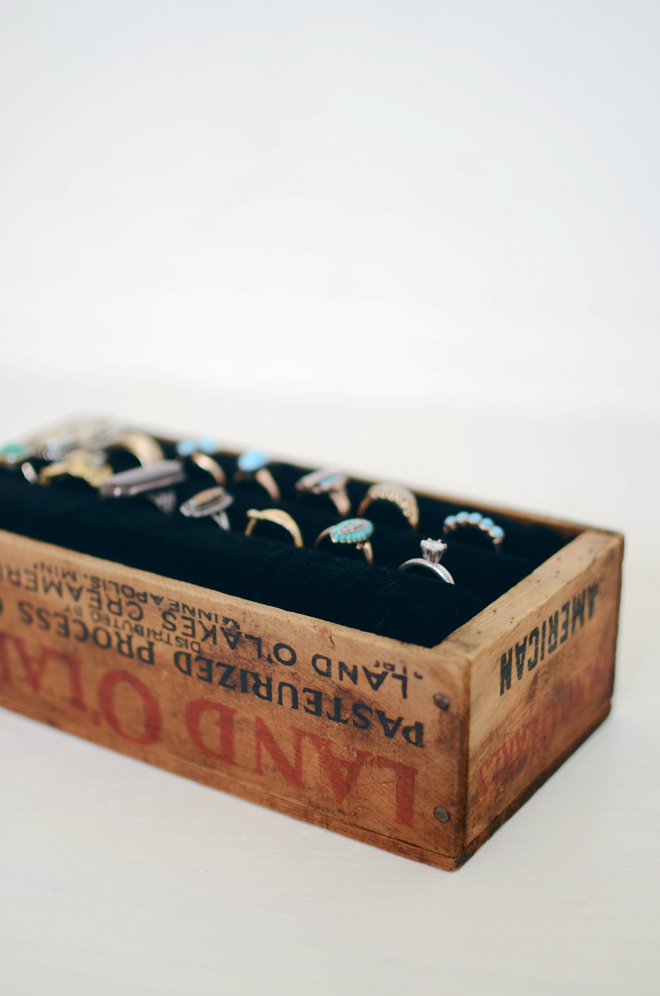
I wanted something to hold some of my rings, and in my research came across these instructions on how to use foam ring holders in drawers. I don’t have that many rings where I needed a whole drawer, but thought a small little box might do. Thus, when I came across this old, wooden, cheese box, I knew it was just what I needed. And because I think my box was much smaller, I was able to do without some of their suggested steps. I didn’t have to staple between each row as my velvet stayed put once I used my straightedge to insert it in, so that saved me a step (and time). I loved the way it turned out and now I can see all my rings when deciding what stack to wear for the day.
Most of them are from Ben, a couple from his mom, a couple from my parents, one from my sister-in-law, and a couple I gifted to myself. Each one has a little story, and as you can tell, turquoise is my favorite. Also, most of them are antique pieces (it’s something I collect!). There are two modern rings in there though, one made by Emilie Shapiro (this ring) and another from etsy (this one that my parents got me a few years ago).
I have a large growing pile of fabric scraps. I refuse to throw them away because I am sure they can be used for something. I have been seeing different types of interesting necklaces made of buttons, beads, and fabric. Then, I figured why not make one out of my scraps...
I think it made my white shirt a little less boring. This was so quick and easy to make.
How to make a recycled scraps necklace (which is very similar to the straps on my braided tablecloth bag):
1. Take your scrap fabric, I cut a .5''-1'' snip and tear the rest of the fabric down for a nice frayed edge. Used 3 different fabrics for each strand.
2. Take 3 of the torn pieces and tie the ends together with a rubber band.
3. Braid the 3 pieces together and tie ends together with rubber band when done.
4. Repeat steps 2 & 3 for more strands. Remember you can make the strands any length you want, if run out of fabric, just weave more into the braid.
5. Once all the strands you want are braided, gather one end of each strand together and straight stitch together with sewing machine. Repeat for the other ends of the strands. Snip off any excess.
6. Gather ends of the necklace and sew together (snip excess) or a ribbon can be sewn at the ends to be able to tie the necklace closed, but I just sewed both ends together.
7. Voila! A nice way to make use of all your lovely scraps.
Sorry if the directions get you a little lost, but it really is easy. I promise. Maybe I should put some in the shop. Please share any other good ideas you may have of things that can be made with scraps. I would love to hear (read) them!


 In our previous winter gardens, one of the challenges has been ease of access. On one hand, we need to seal it off tightly so that (1) the pests will stay away, and (2) the wind won’t “blow the ‘green’ house down” (it can get VERY windy here). And on the other hand, we need to be able to access it easily for obvious reasons. If the vegetable plants are on “lockdown,” there’s a process to “unlock” them. Accessing it (without breaking down a good chunk of it) and creating a door of sorts in a temporary housing structure like this has been difficult. Ben thought of adding a tee fittings along the PVC arches in hopes of creating a place to rest one of the long edges; a way to create a door for easy access. It worked.