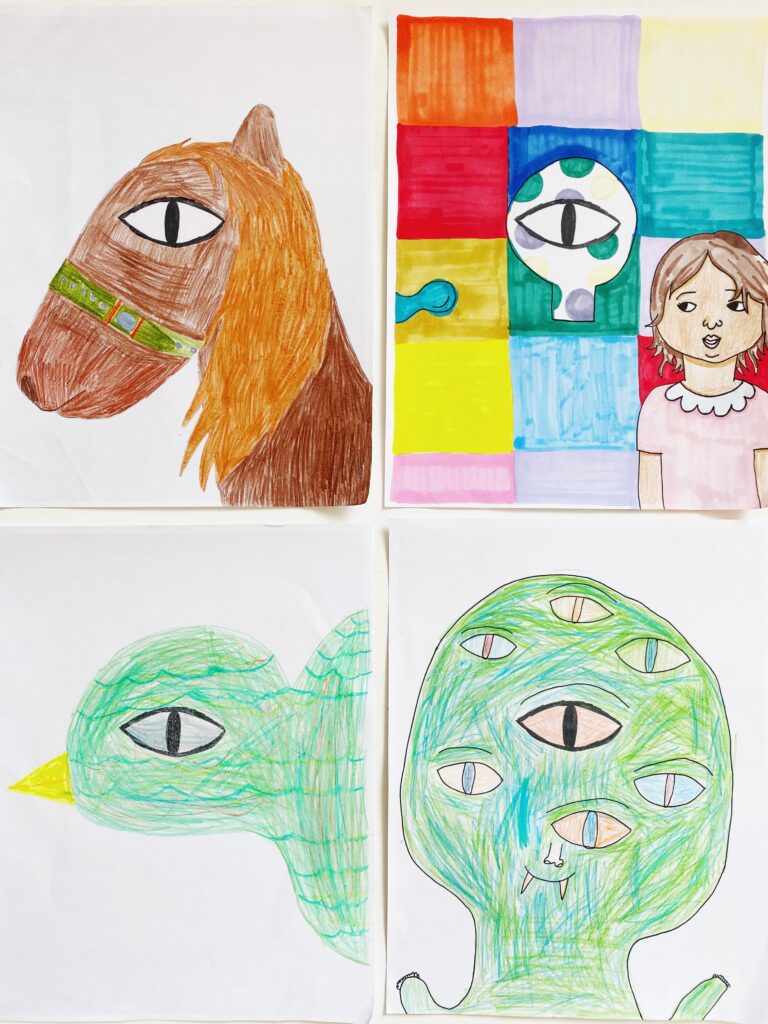
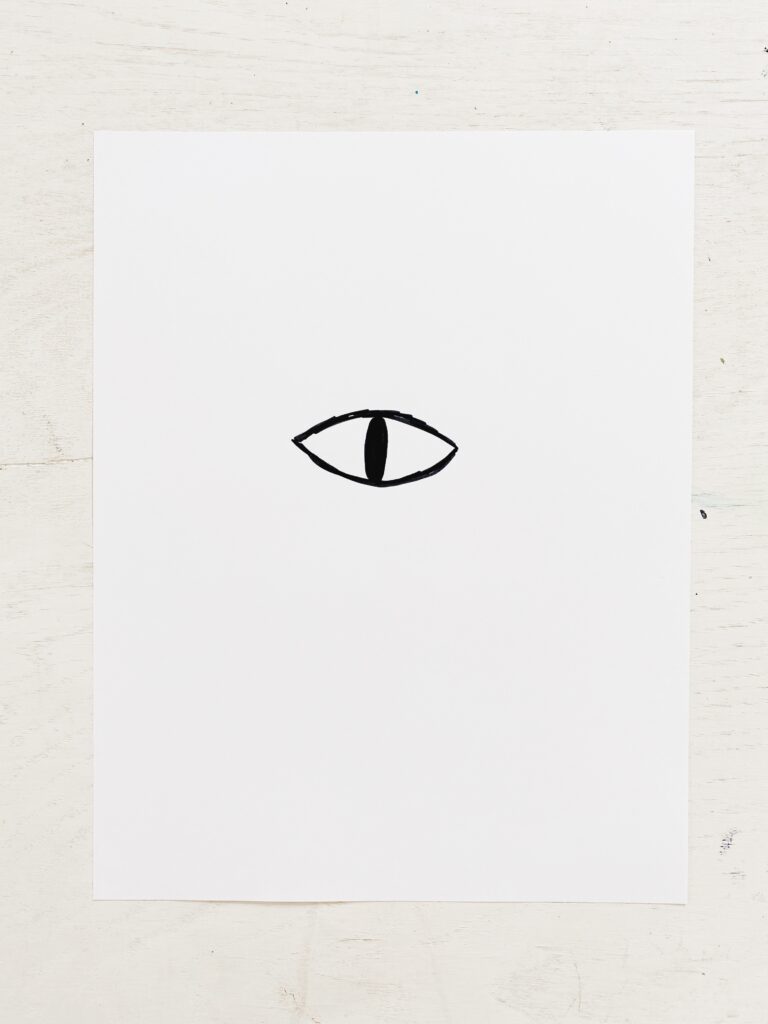
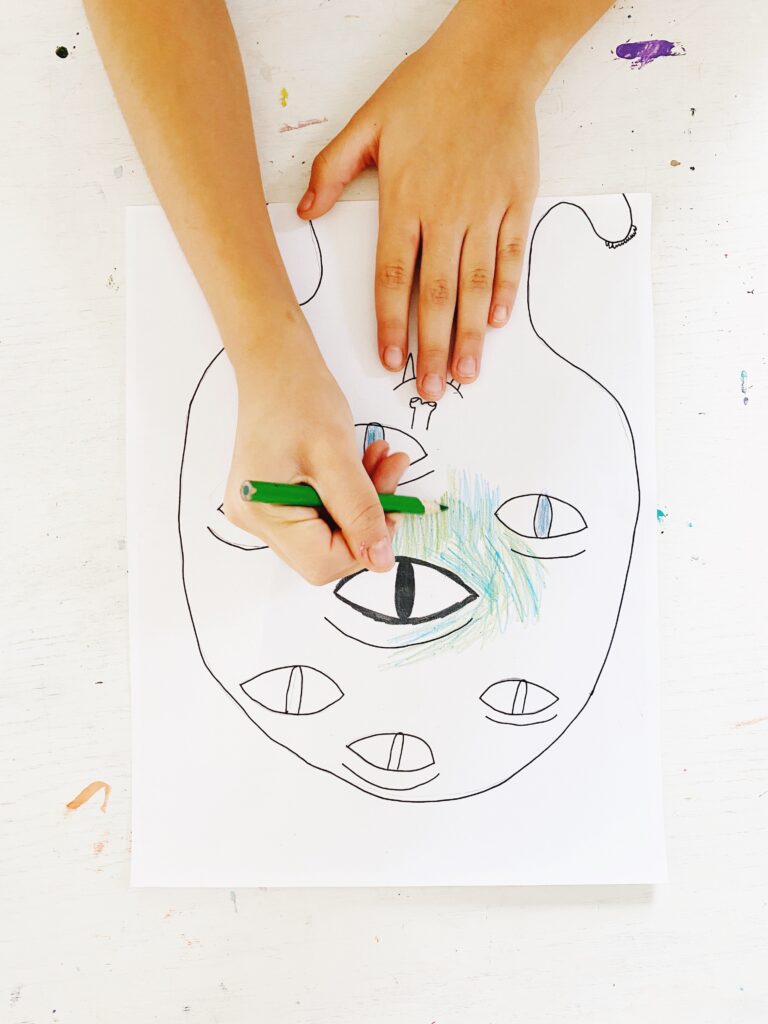
Turn this little eye into your own artwork. What do you see? A monster? A bird? A self-portrait? Create all around with the eye as your base starting point.
SUPPLIES
Coloring utensils
DIRECTIONS
Have fun using the eye as a starting to point to create your own illustration. Share what you create with us! We want to see as each one ends up so different!
If you don’t have access to a printer, feel free to make your own, and be sure to share your creation with the rest of us! We’d love to see! And as always, happy to have you share the project, just don’t forget to tag and credit please. Thank you!
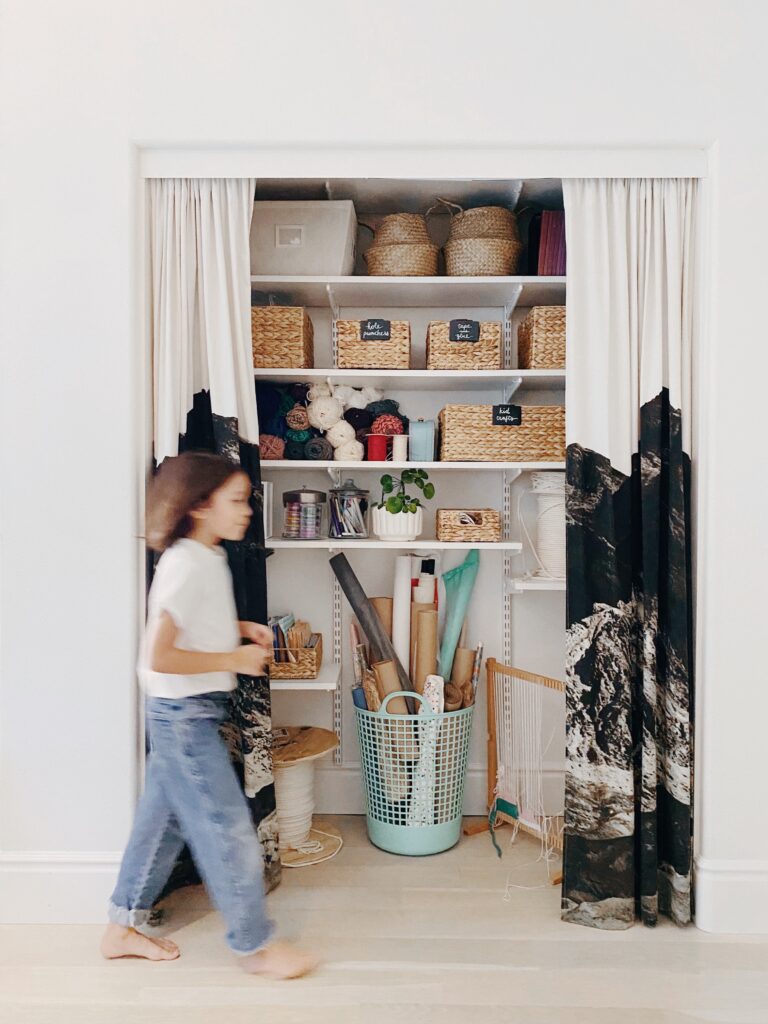
Well, since Covid hit in March, our guest room had been upside down (you might have seen it if you follow me on ig @rubyellenbratcher). There were still holiday boxes, and then the racks that held my craft stuff broke, so everything was just toppled onto each other. Then, I had various craft styling projects due, so I would just go in, take what I need, and then leave things lying around. The guest room got so out of hand that you could barely walk inside. It was an eyesore and giving me mess stress, but I didn’t even know where to start.
Thankfully, The Container Store’s most recent project was working with their new Virtual In-Home Design service and turning my crazy craft closet into an organized craft closet with Elfa Space. When I had my first virtual consultation, I was trying to find time to clean the room before I showed someone online what it looked like, but I never found the time, so the designer saw my crazy mess in all it’s glory.
I told him what I needed and he came up with the plan. We had a couple back and forths on switching out sizing of shelves, but once we finalized everything, everything was listed out and I placed my order. I didn’t have to figure out what pieces I need for my shelves because he did all the planning for me.
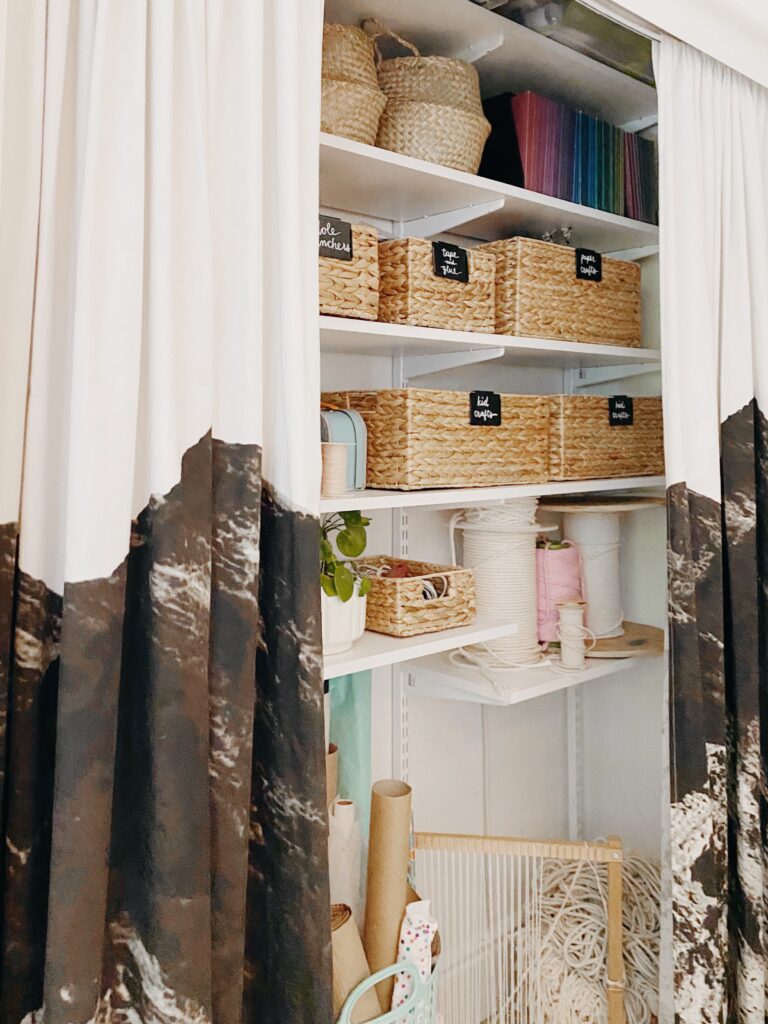
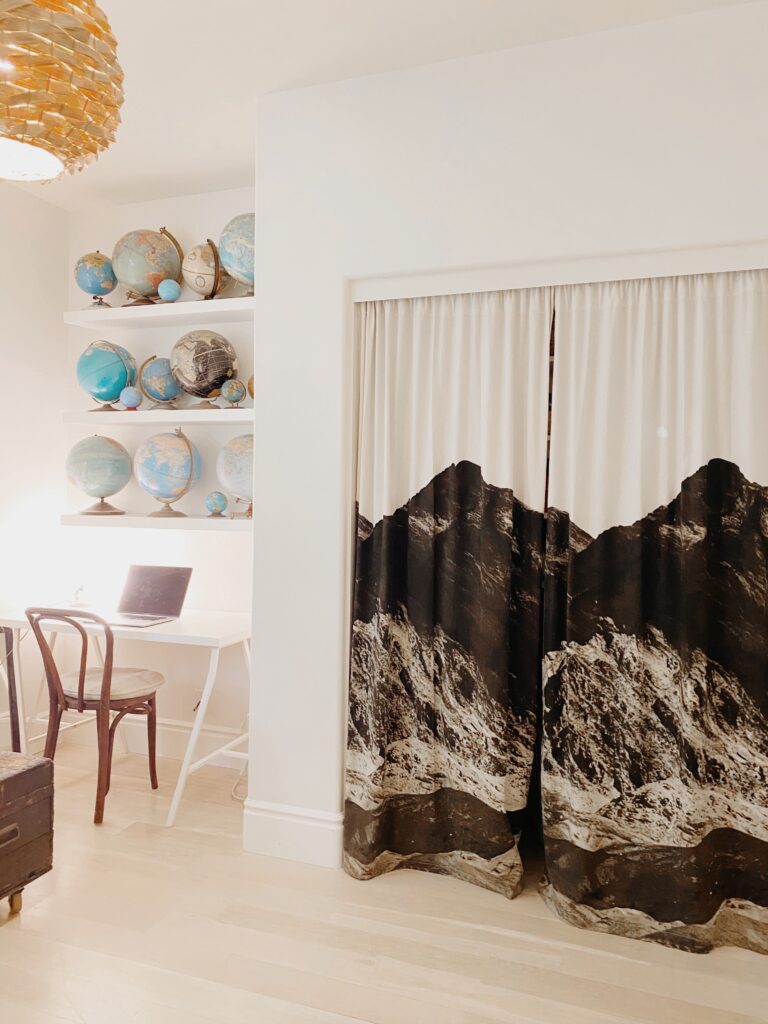
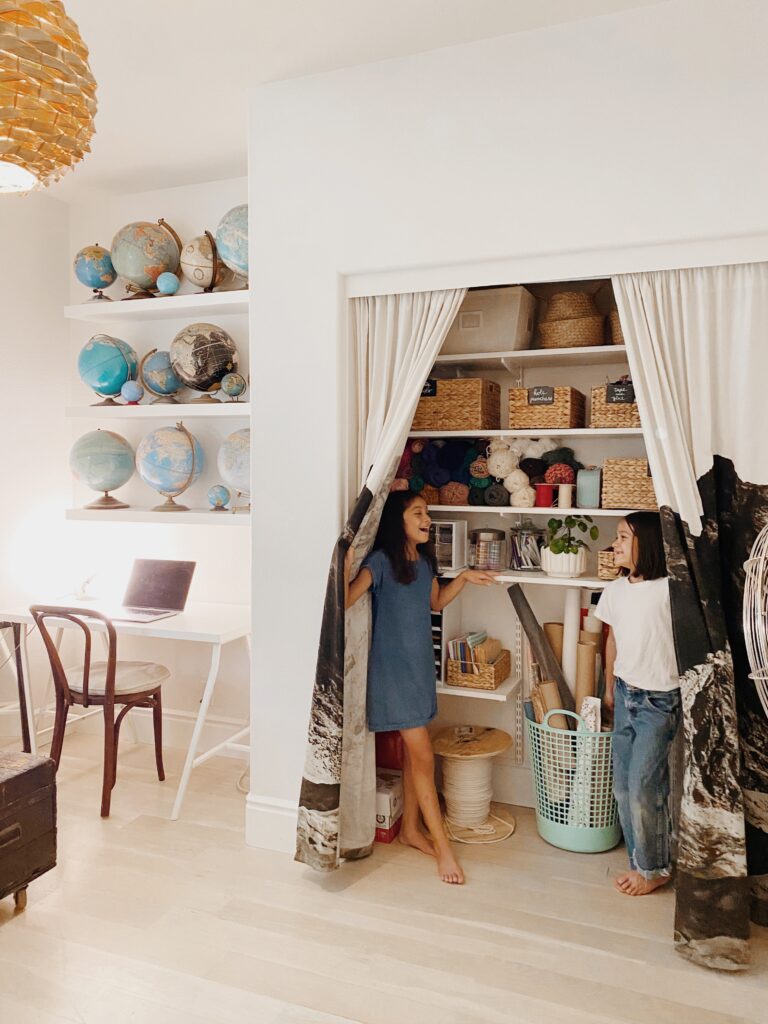
For now, the shelves are in our guest room/office closet. It’s where I keep all my craft stuff. Well, some of it anyway. I’m so glad that the Elfa system is customizable and adjustable. Should we move ever move, I’d like to set it up as a bookshelf. I went with the Elfa Décor system with the 12″ depth. I love how you can adjust the rows however you like; we can adjust it as our needs change.
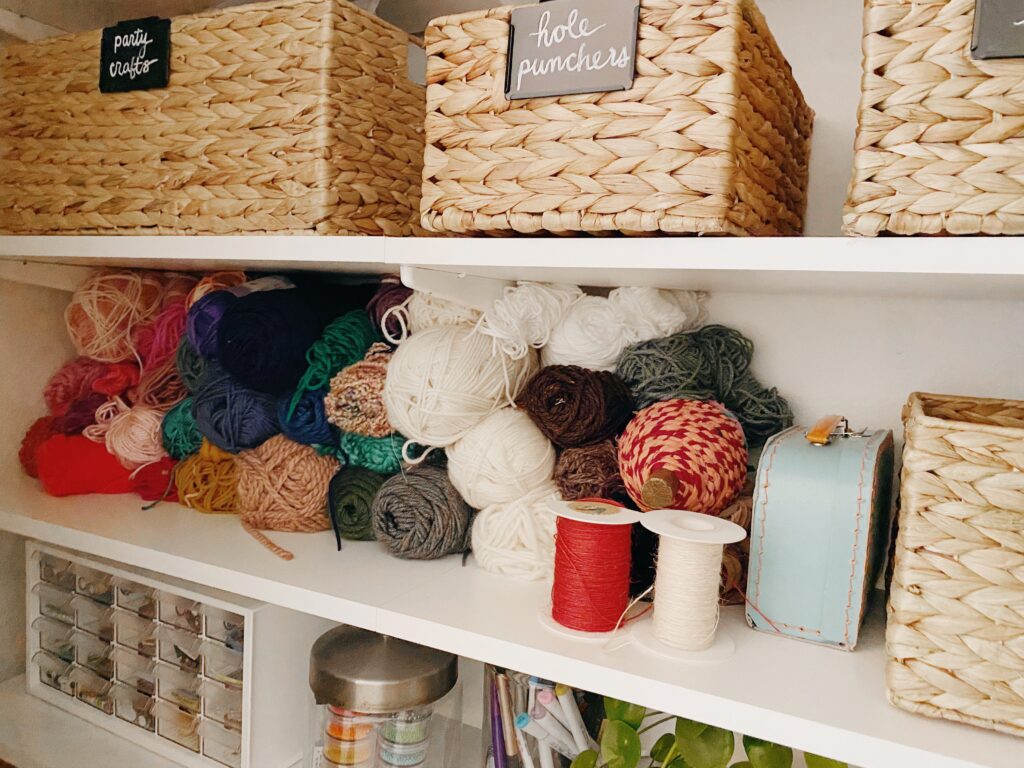
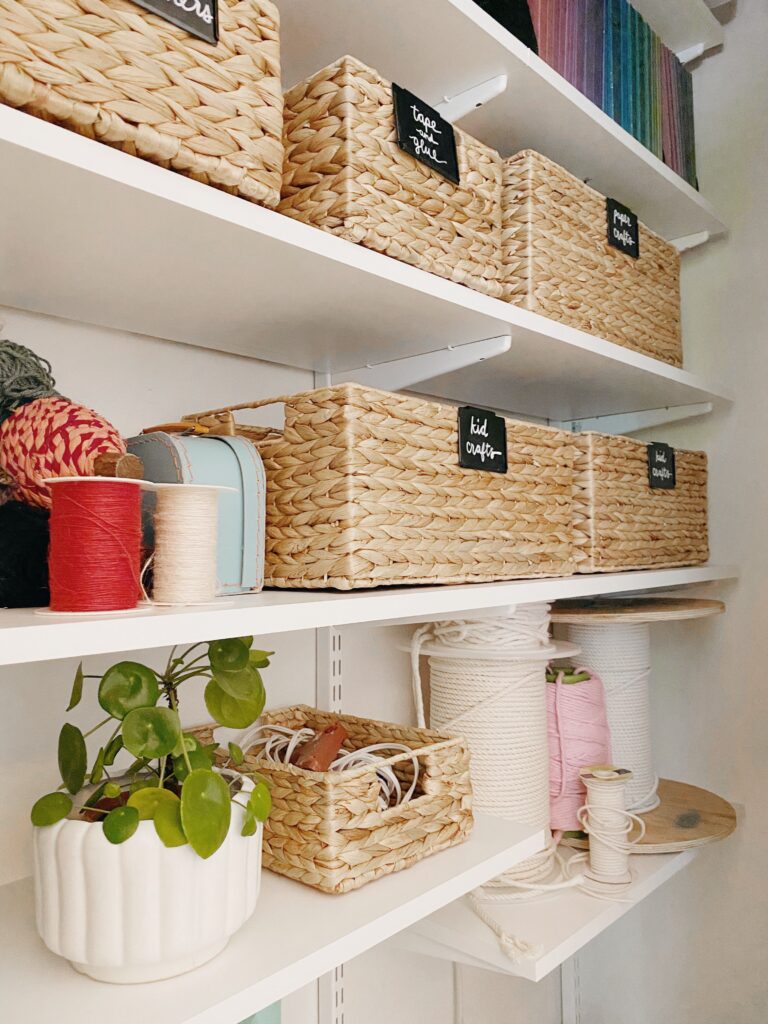
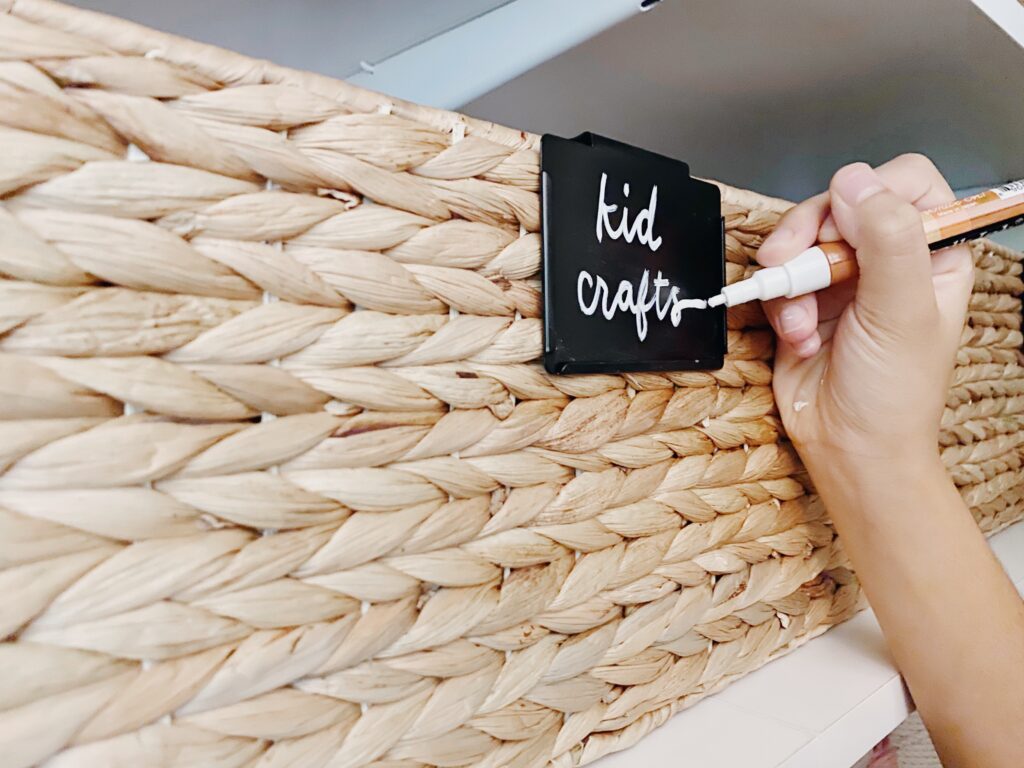
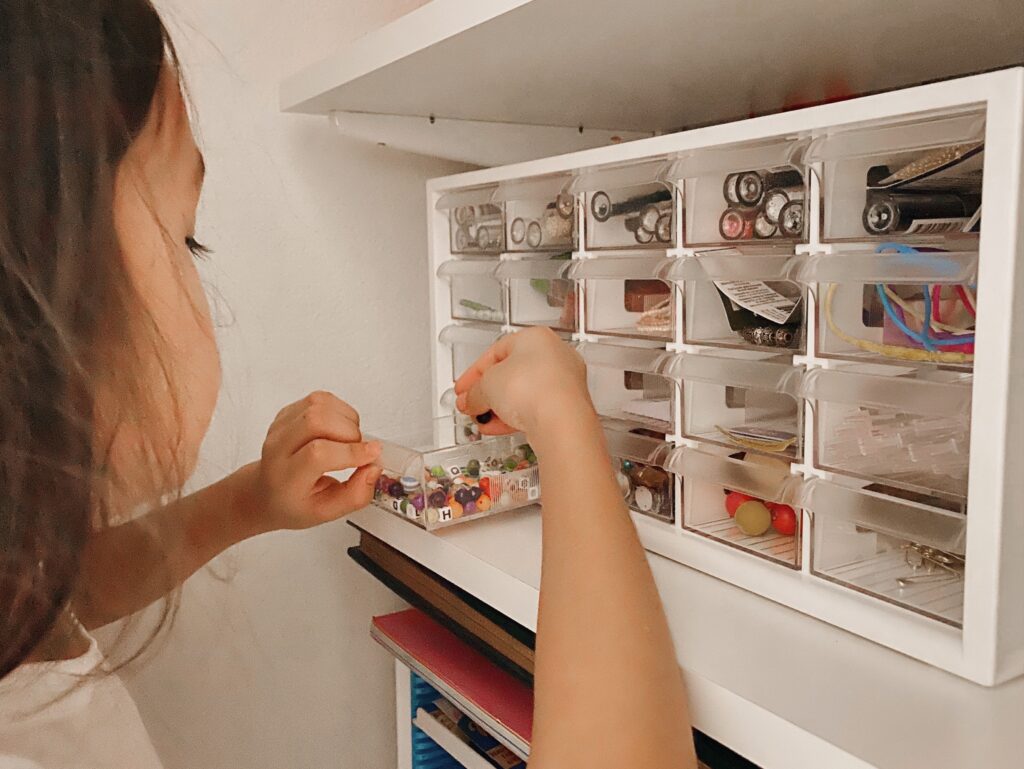
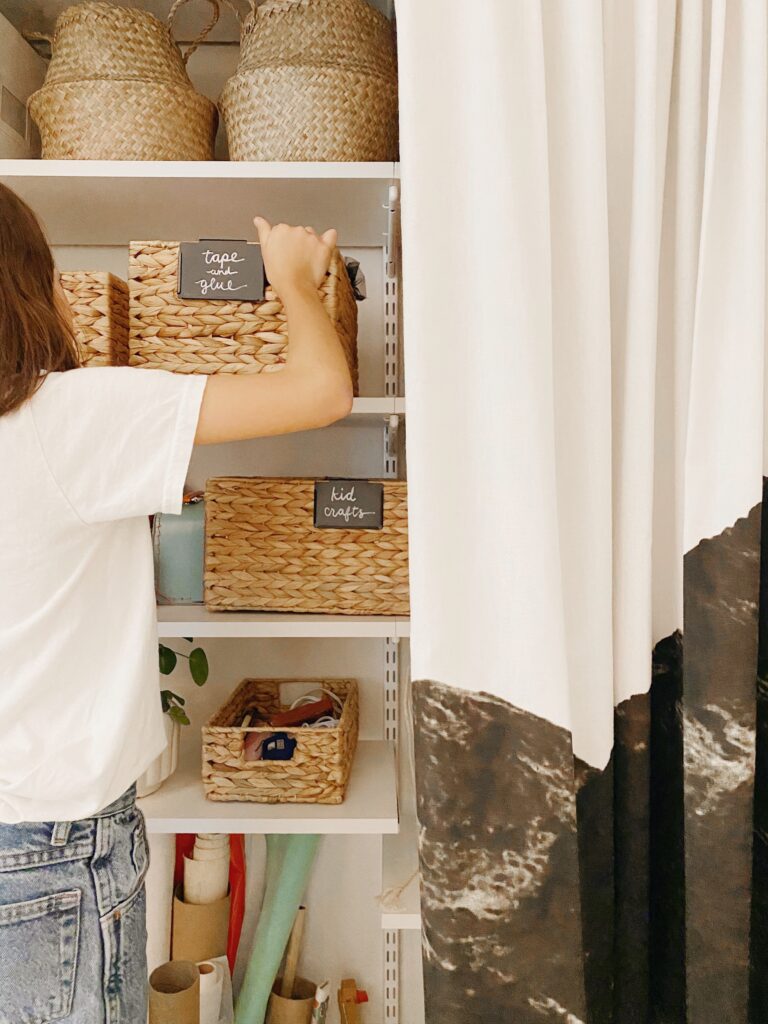
We installed it ourselves. You simply attach the horizontal bar to the wall, and from there, the vertical bars hook in. Then, I attached each shelf on after I figured out what placement would work. Getting it up on the wall was the easy part, now going through and organizing the craft mess took a few days. Thankfully, these Hyacinth Natural Baskets (I got them in different sizes) helped organize and group like items together. We got a paper sorter to keep all our different types of papers organized, and I also used the 20 Drawer Small Stackable Craft Organizer to hold all our jewelry beads. Now, everything has a place, so when things get messy, it’s much easier to clean it all up.
I love the way my craft closet looks and the closet became a more functional space with the added Elfa Décor shelves. Since everything has been organized, I cleaned up the rest of the room, and now the guest room/office has been such a peaceful place to retreat to. With my husband still working from home, he now has a place to work from. It definitely beats him working on the couch, dining table, or kitchen island like he had been the last several months.
This post is in partnership with The Container Store as one of their Brand Ambassadors. The opinions and text are all mine. I appreciate the time you spend in this space, the support you give me, and the brands I partner with.
It’s still hot over here, and while I love my antique and vintage rings, they get put on hold in the summer when the days are really hot because my fingers swell. However, I still get to pile on my necklaces and I’m always wearing a neck mess.
All my jewelry has a story. I probably should write it down before I forget one day. My girls love all my jewelry and they have even called dibs on certain pieces.
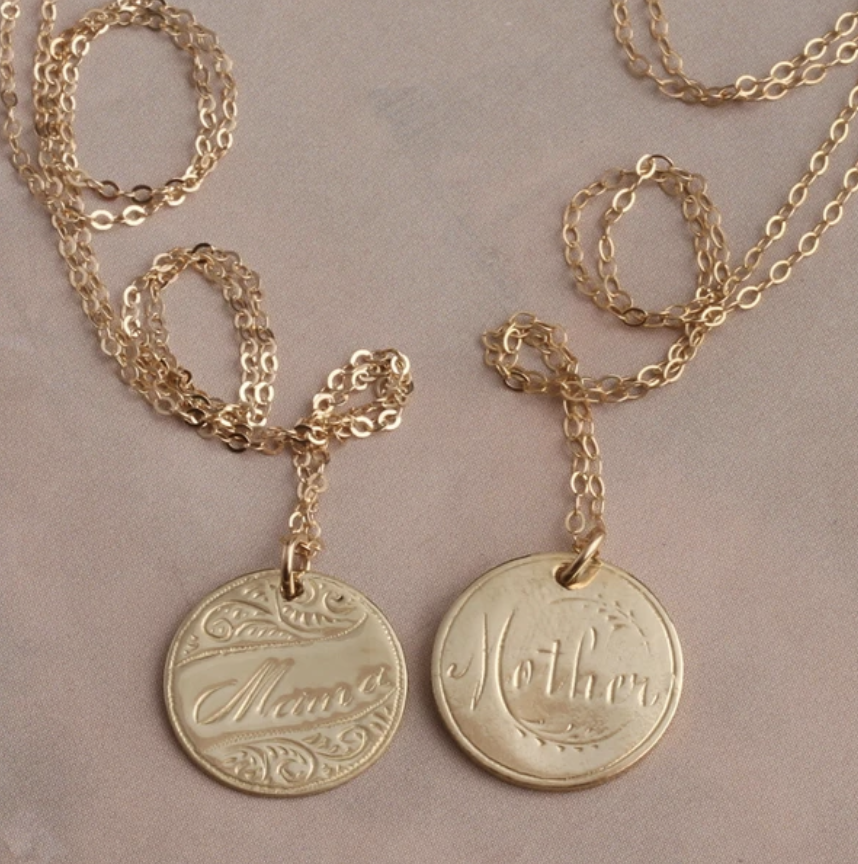
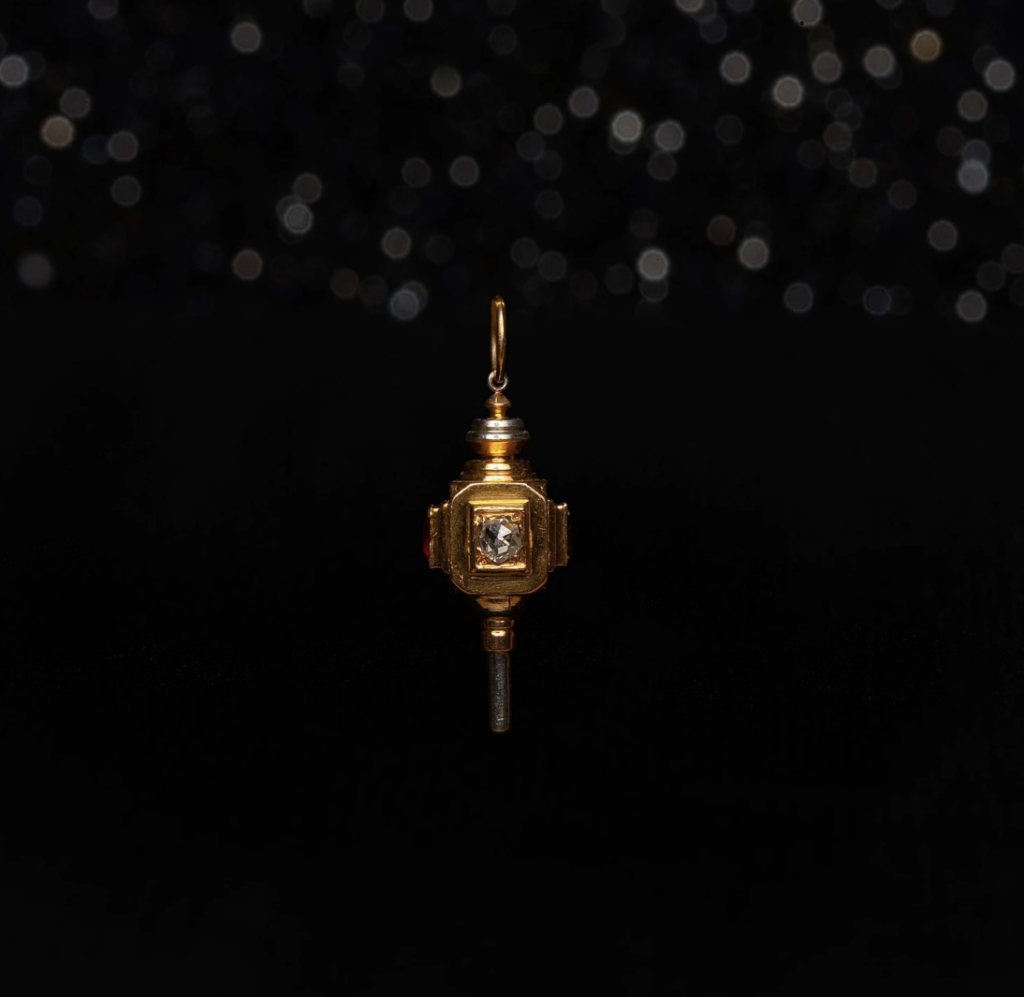
The rose necklace on the left is on a chain that was my mom’s from the ’80s. The locket is a Victorian piece that Ben surprised me with the last time we went out of town. He told me to grab something for his camera in his camera bag, but it was really this locket that he surprised me with. I was so shocked. Surprises are so fun! The beaded necklace was made by me using a fresh water pearl that came from a bracelet Ben’s cousins got me. The bracelet broke, so I took each of the pearls and created something different with each of them. The gold chain was a Christmas gift, and the Victorian cameo was a Mother’s Day gift a couple years ago. The gold heart was from my mother-in-law that she sent along with a sweet little note. Then, I stack all these pieces together and have my neck mess.
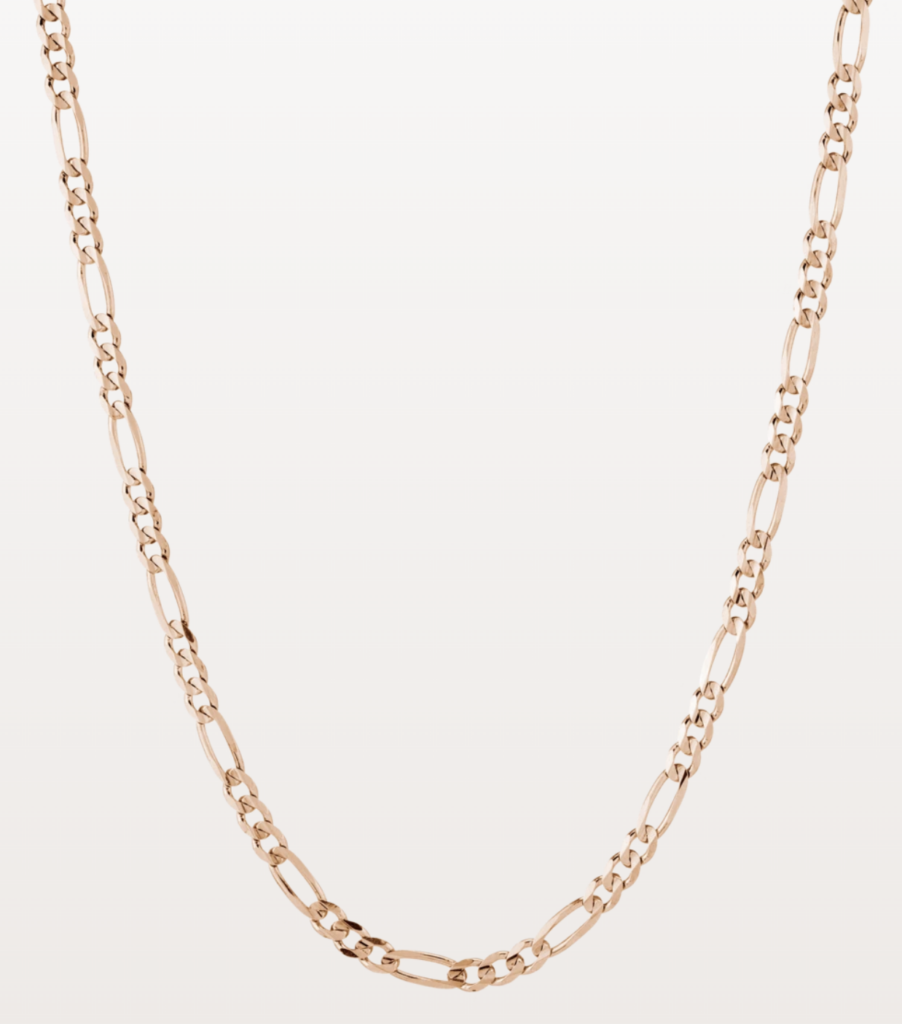
I think I do love rings just a tad more than necklaces, but I do appreciate necklaces too. I think it all came from my mom surprising with little bits and baubles as a kid. She got me my first locket in kindergarten, and she has a pretty extensive locket collection herself. Then, as a teen, they would give me pretty rings as gifts. I lost one in the garage one time as I was doing a science experiment, and I’m hoping it turns up one day. Anyway, here are some pretty chain necklaces I have been eyeing online.
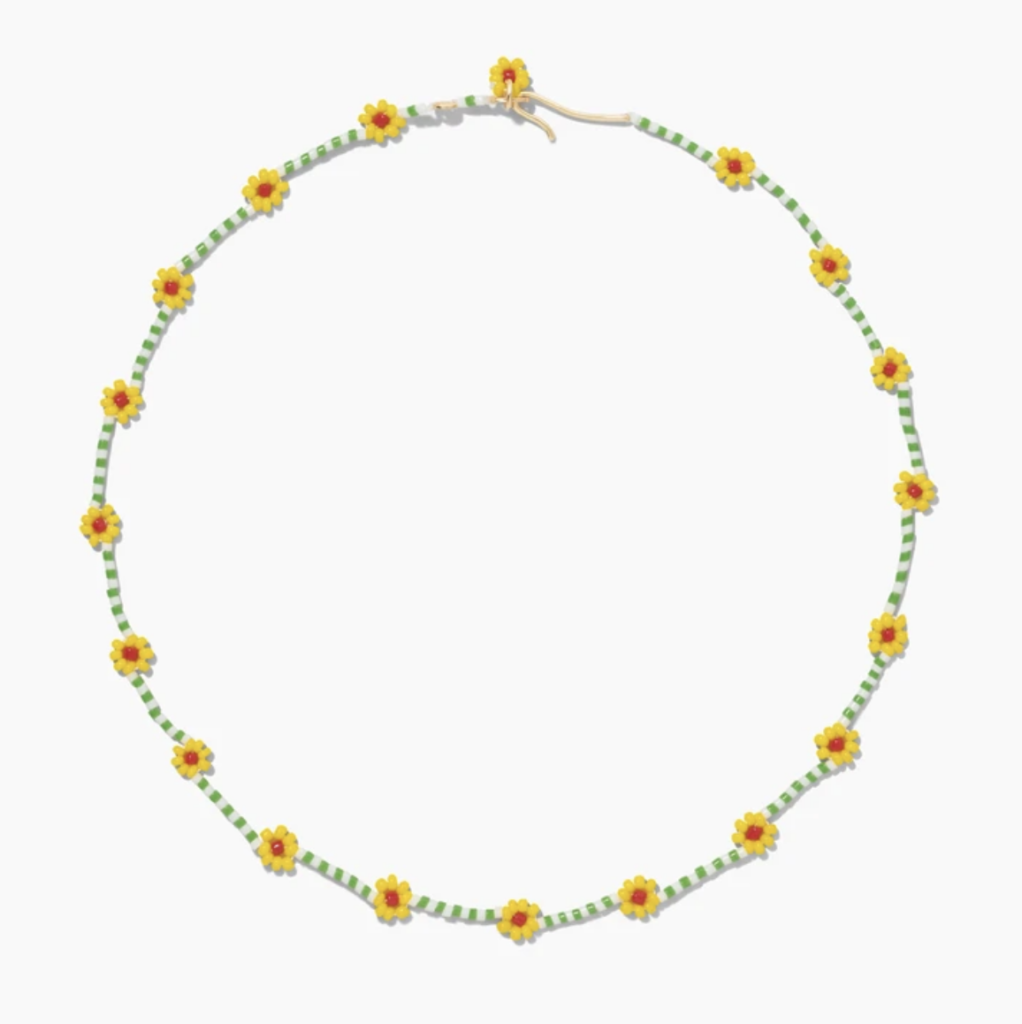
To top all the sparkle, I love putting something fun on like this daisy chain necklace. My girls have been into making their own, so I may need to put in another request.
Are you a jewelry lover? If not, what’s something you appreciate? My BFF is into designer bags and appreciates the beauty and craftsmanship in those. Or maybe it’s fancy coffee for you? We’re just starting to learn about that. I don’t drink coffee, but my husband does, so our friends are educating him on good coffee. These are crazy and stressful times, so sometimes we need something to dive into to help destress a bit, and jewelry provides that bit of fun for me.
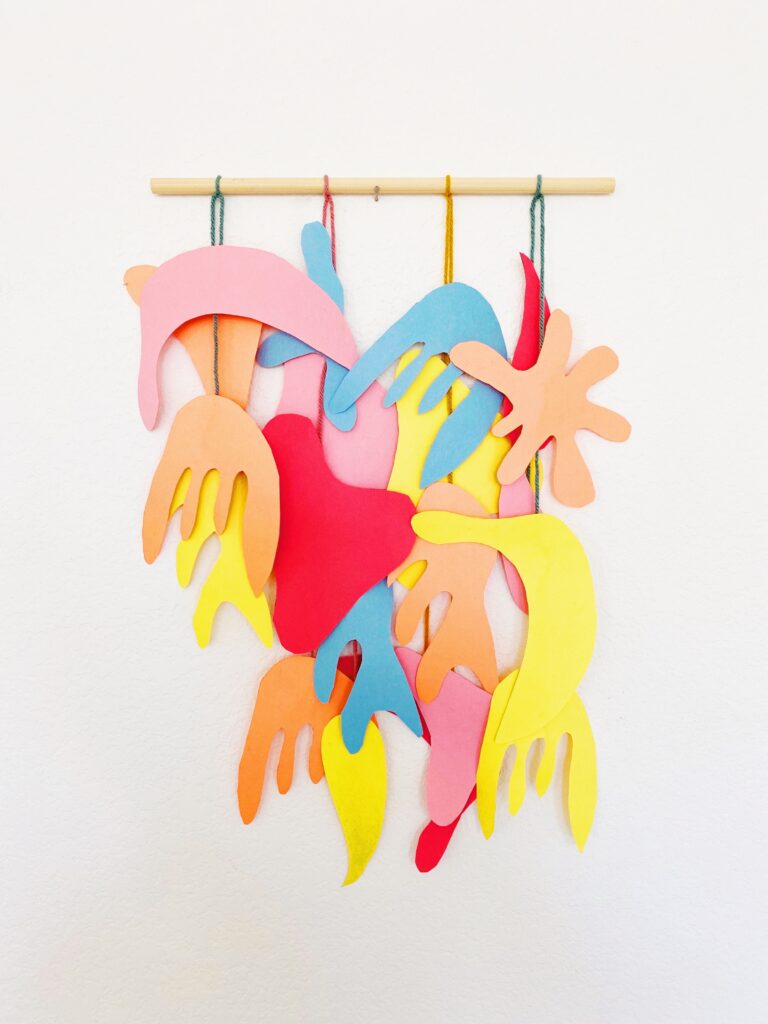
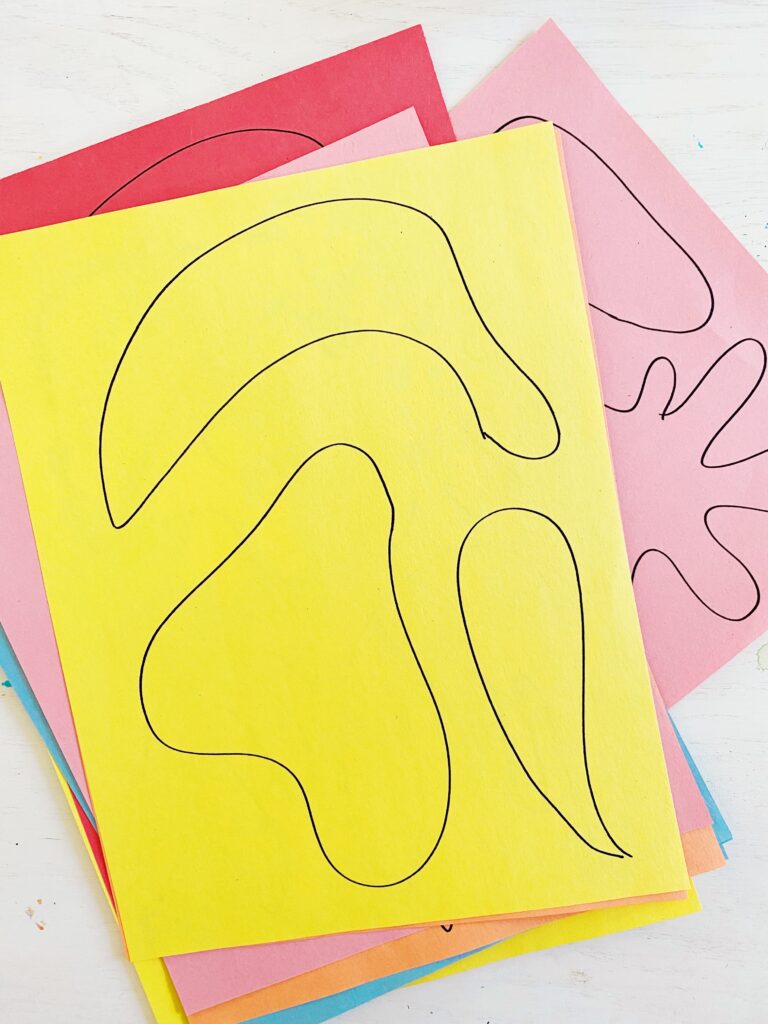
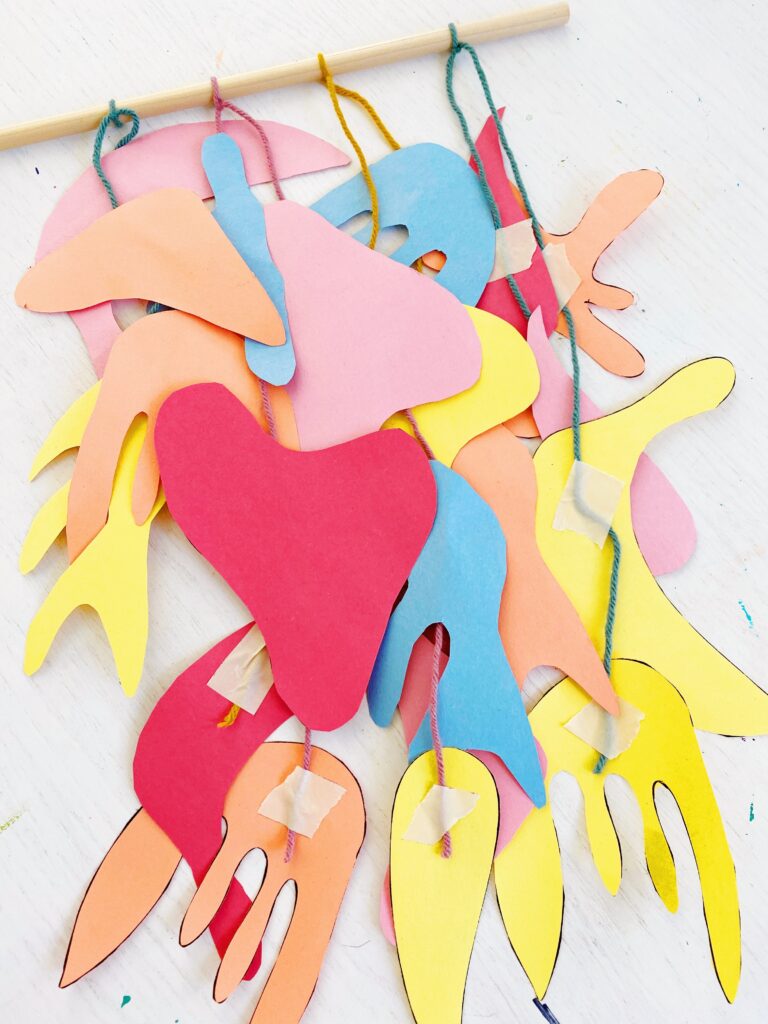
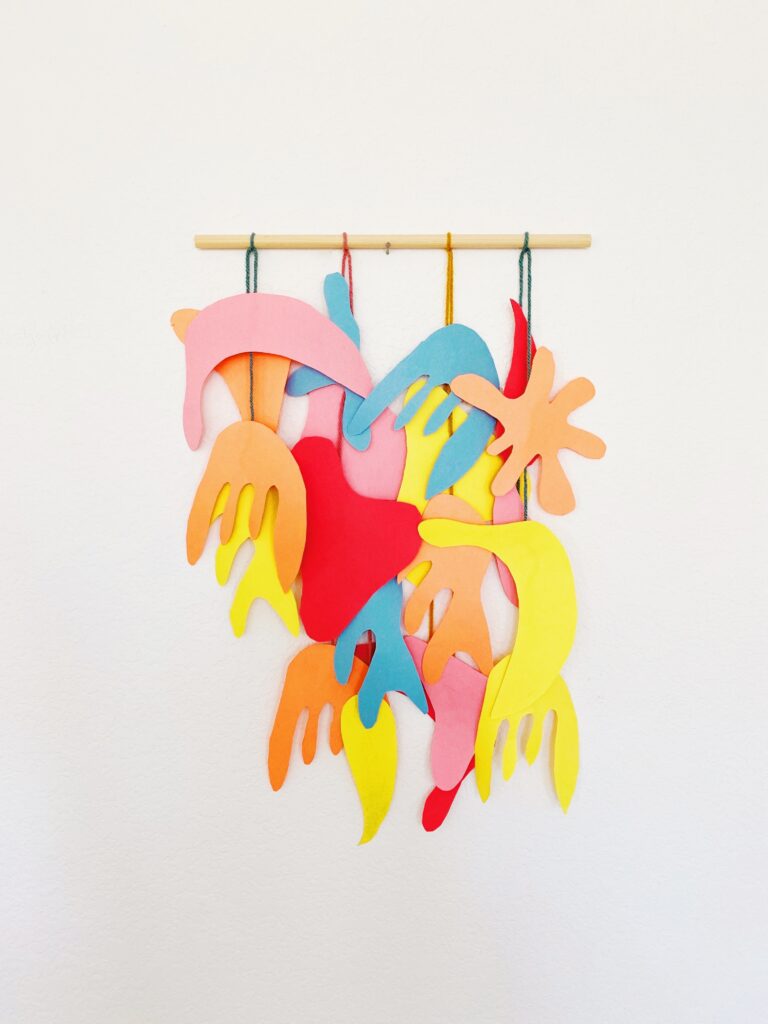
TIP: Cut construction paper down to 8.5”x11” to print directly onto colored paper.
We printed 2 copies of the template in each of the colors.
2. Trace shapes onto construction paper and cut out.
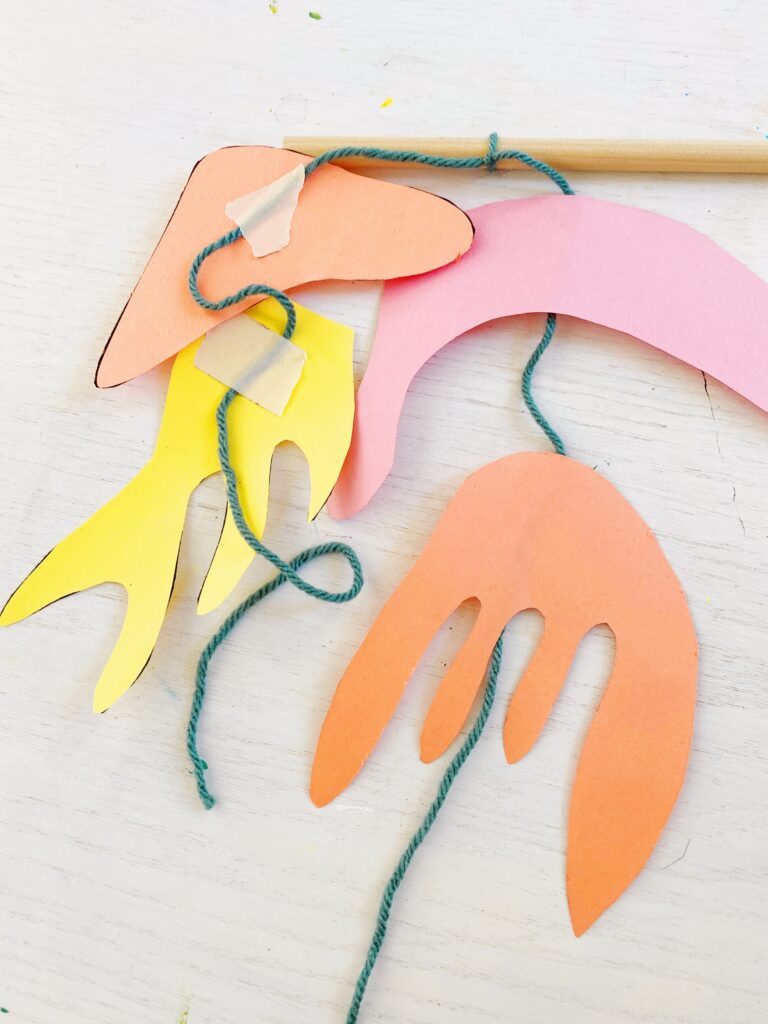
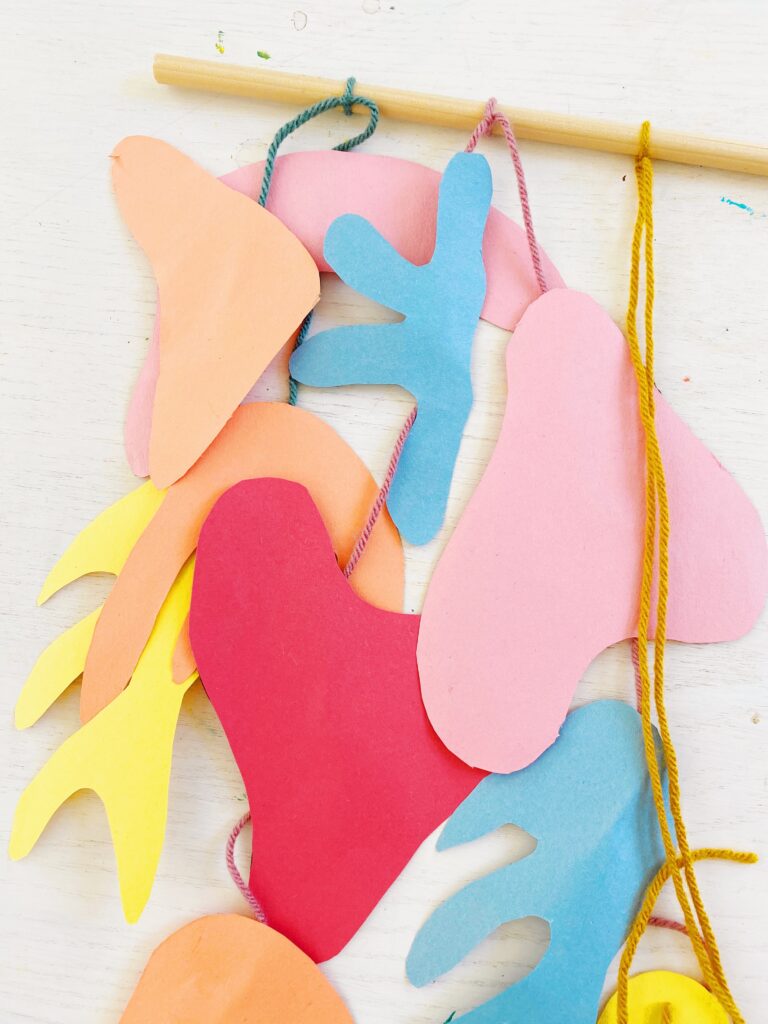
3. Tie yarn to the dowel and glue each cut out shape on.
Put multiple cut outs on one strand of string, and vary placement, color, and number of pieces to get a layered looks.
Easy project to make, and especially fun to do if you’re studying Matisse. We love how colorful and eye catching this wall hanging turned out to be!
If you don’t have access to a printer, feel free to make your own, and be sure to share your creation with the rest of us! We’d love to see! And as always, happy to have you share the project, just don’t forget to tag and credit please. Thank you!
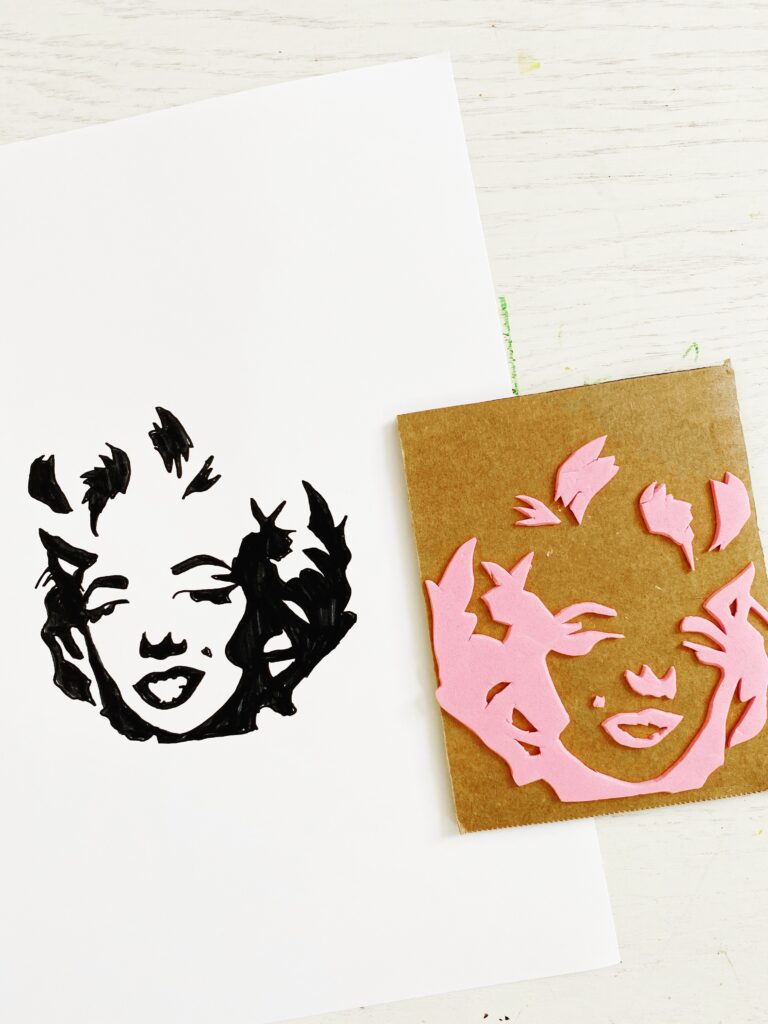
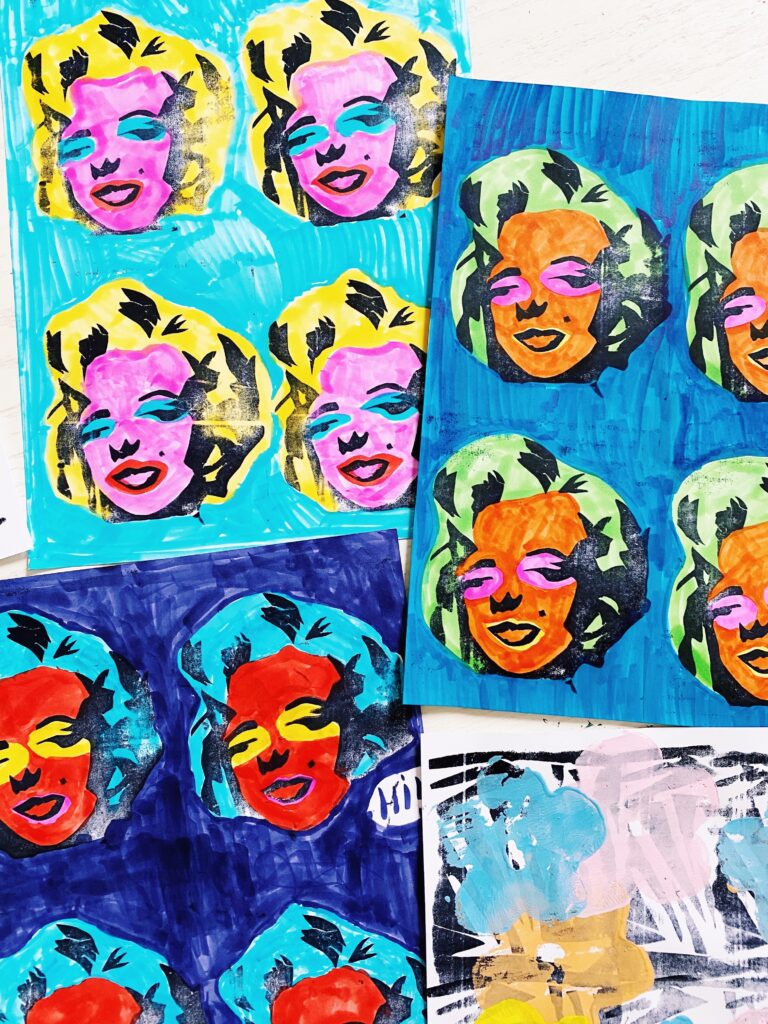
Create your own Sturtevant piece, by using this Sturtevant-Warhol illustration. Watch the video to learn how to make your own Sturtevant inspired art! New art videos come out every Friday!
If you don’t have access to a printer, feel free to make your own, and be sure to share your creation with the rest of us! We’d love to see! Always happy to have you share the project, just don’t forget to tag and credit please. Thank you!
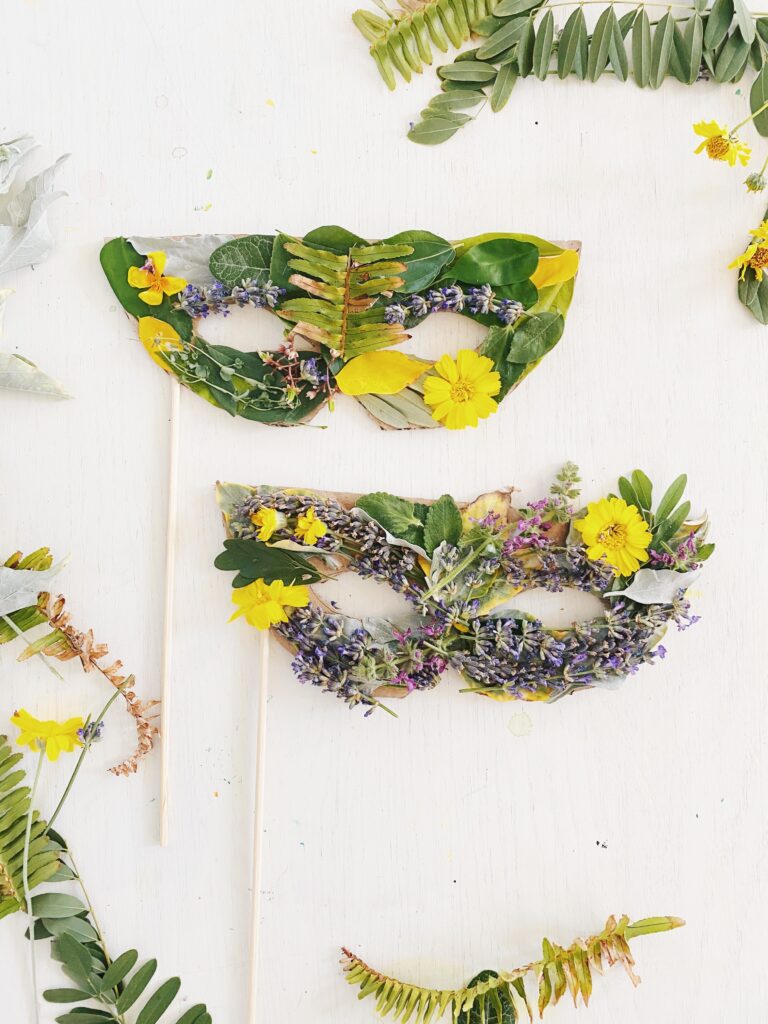
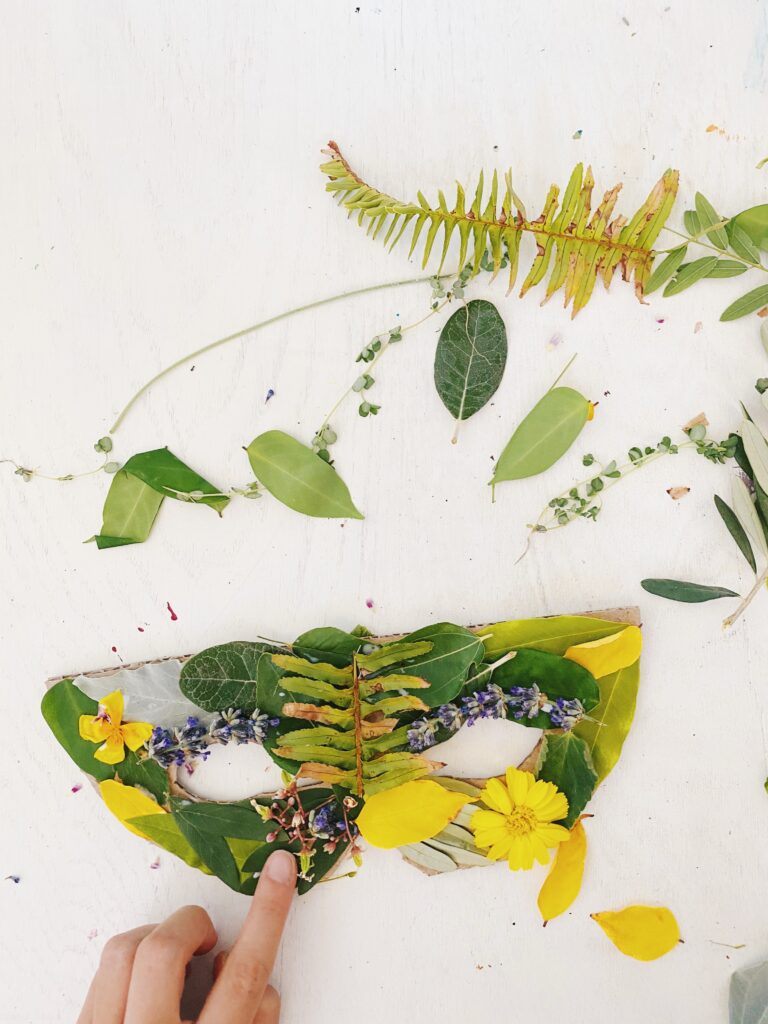
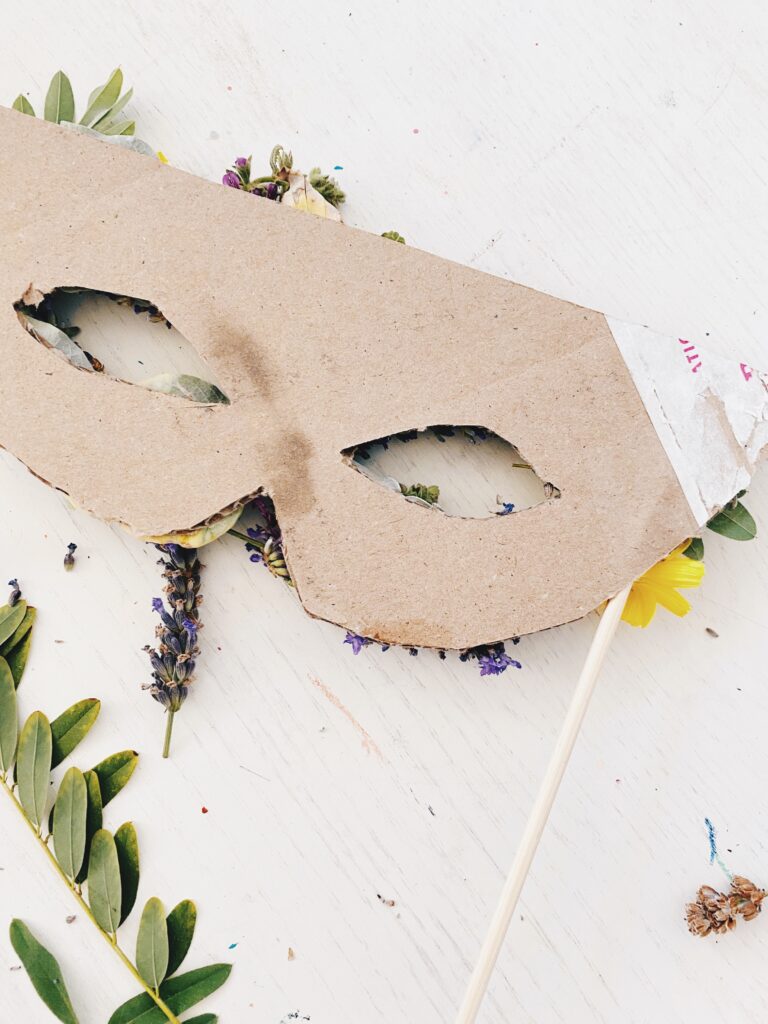
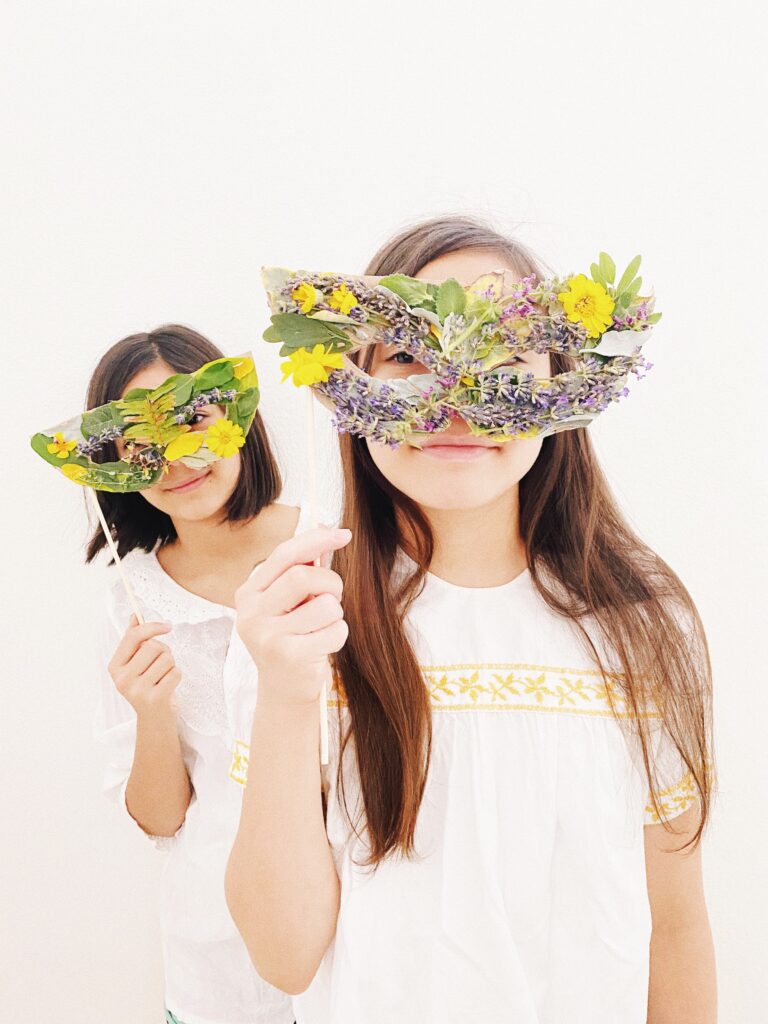
1. Print out template and trace onto cardboard. Cut out cardboard.
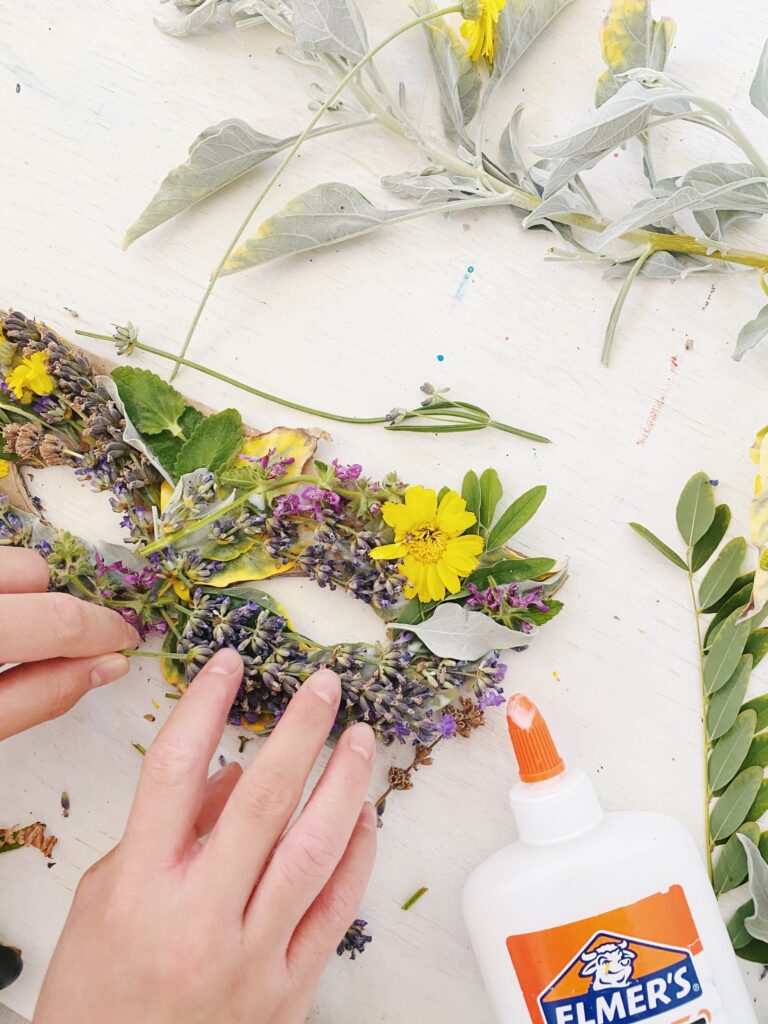
2. Gather florals & foliage outside. Glue onto the cardboard mask cut out. Once decorated, allow glue to dry completely.
3. Insurer skewer into one side of the cardboard. Glue in place, if necessary.
We loved making these NATURE MASKS! They came out so beautiful and it would be fun to have a nature masquerade ball. I can imagine lots of decor for a party like that (when parties can happen again).
Go for a nature walk with that family and gather some bits to make a mask! And don’t forget to share what you’re making with us.
If you don’t have access to a printer, feel free to make your own and share it with the rest of us! Always happy to have you share the project, just don’t forget to tag and credit please.
I have a large growing pile of fabric scraps. I refuse to throw them away because I am sure they can be used for something. I have been seeing different types of interesting necklaces made of buttons, beads, and fabric. Then, I figured why not make one out of my scraps...
I think it made my white shirt a little less boring. This was so quick and easy to make.
How to make a recycled scraps necklace (which is very similar to the straps on my braided tablecloth bag):
1. Take your scrap fabric, I cut a .5''-1'' snip and tear the rest of the fabric down for a nice frayed edge. Used 3 different fabrics for each strand.
2. Take 3 of the torn pieces and tie the ends together with a rubber band.
3. Braid the 3 pieces together and tie ends together with rubber band when done.
4. Repeat steps 2 & 3 for more strands. Remember you can make the strands any length you want, if run out of fabric, just weave more into the braid.
5. Once all the strands you want are braided, gather one end of each strand together and straight stitch together with sewing machine. Repeat for the other ends of the strands. Snip off any excess.
6. Gather ends of the necklace and sew together (snip excess) or a ribbon can be sewn at the ends to be able to tie the necklace closed, but I just sewed both ends together.
7. Voila! A nice way to make use of all your lovely scraps.
Sorry if the directions get you a little lost, but it really is easy. I promise. Maybe I should put some in the shop. Please share any other good ideas you may have of things that can be made with scraps. I would love to hear (read) them!