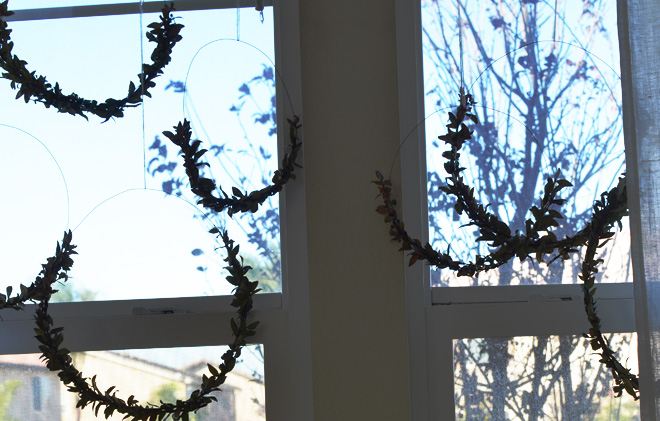
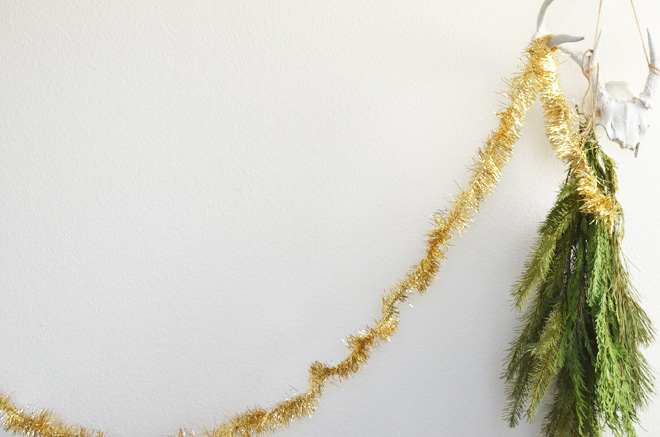
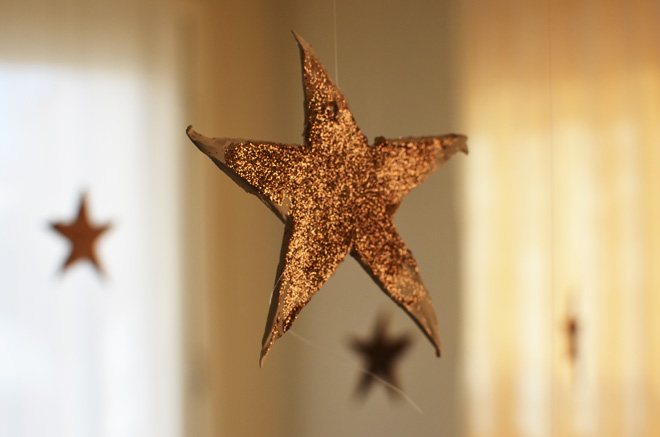
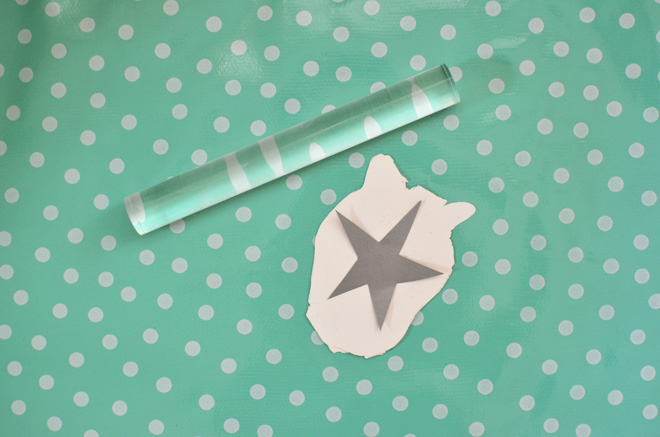
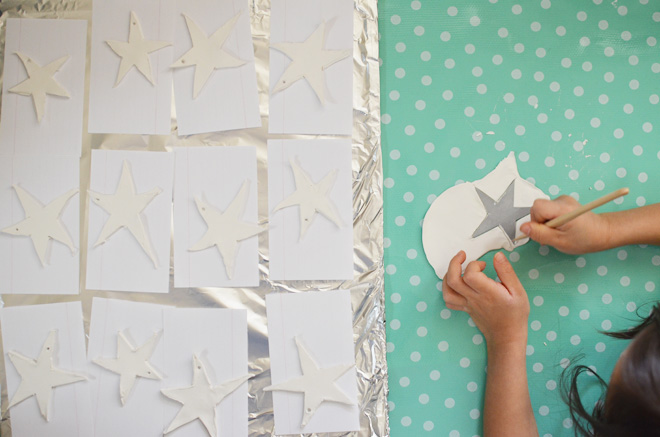
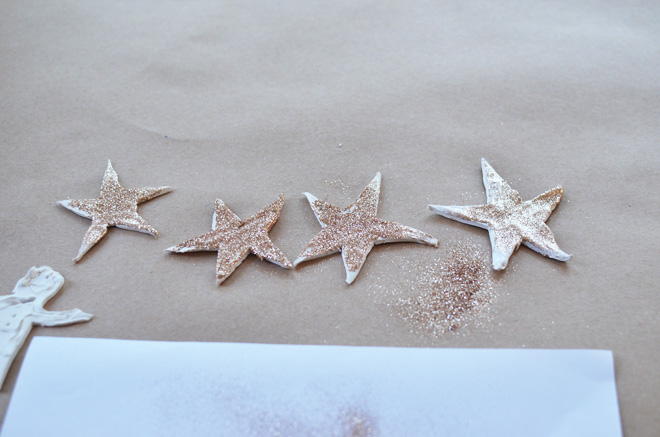
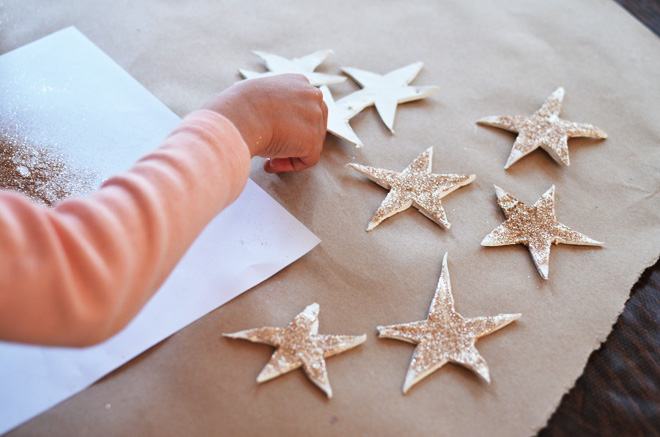
Some of you have asked about how we made the stars seen hanging in this video, so here’s a quick how to…
Supplies:
Oven baked clay
Rolling pin
Sharp edge for cutting the clay (we had some special clay tools, but you can just as easily use things you already have around the house)
Glitter glue
Gold glitter
Star shapes from cardboard (you’ll need to draw out a star and cut it out)
String
Directions:
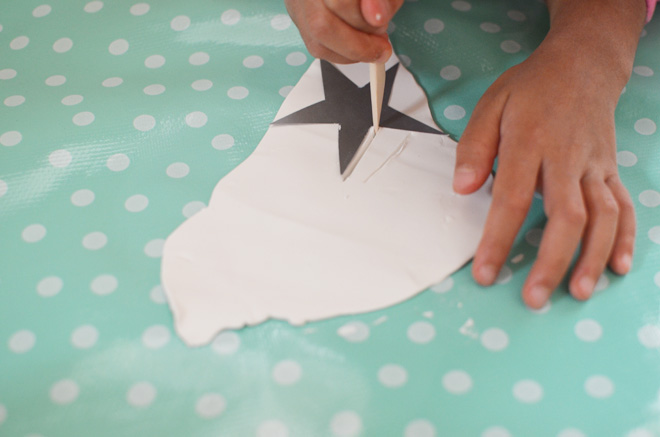
1. Roll out the clay to about 1/4″ thickness.
2. Using your star template, cut around.
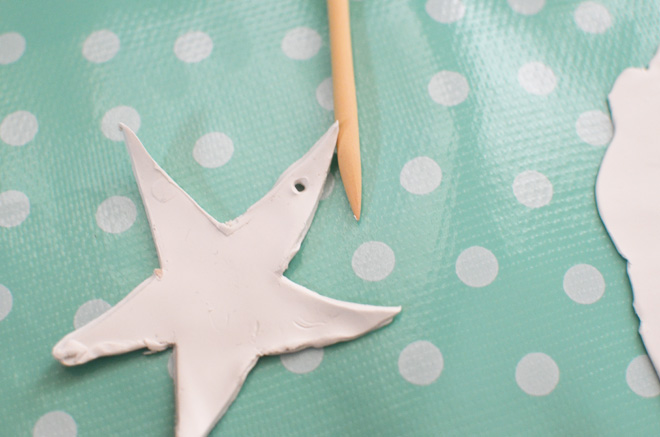
3. Poke a tiny hole at the top of your star.
4. Follow the directions on the box on how to harden clay. Ours went in the oven for about 15 minutes at 250 degrees F.
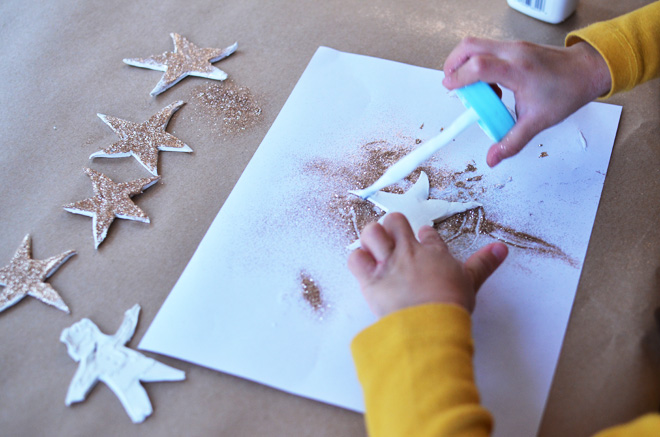
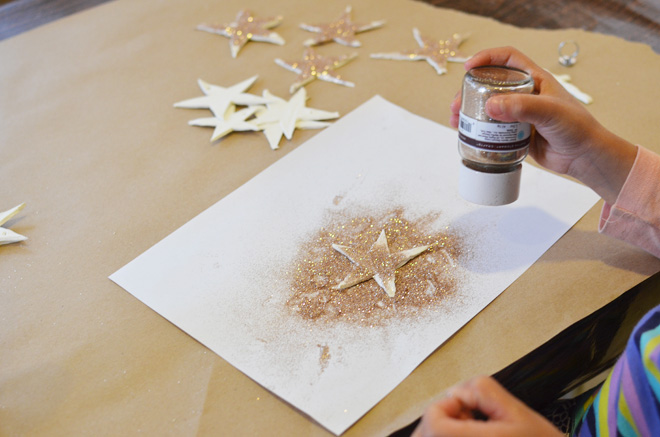
5. Spread glitter glue on one side and sprinkle with glitter. Allow to dry completely and repeat for the other side.
6. String them up somewhere pretty.
It’s the one holiday thing we plan to keep up a little bit longer because we all like seeing the stars dangling from the ceiling. Also, beware… if you do this, you will find glitter all over your floor for weeks! Kids working with glitter means it gets everywhere!!!
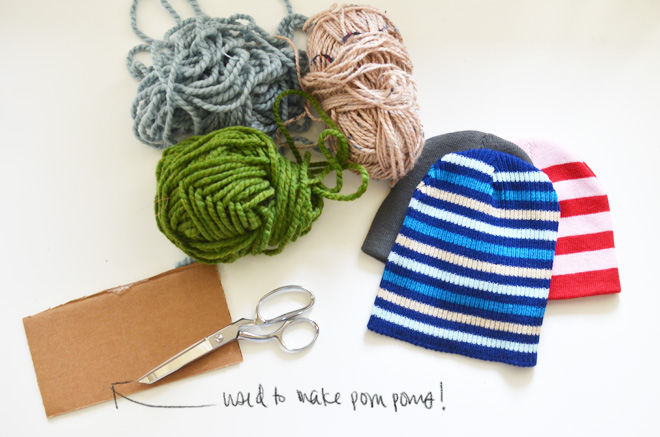
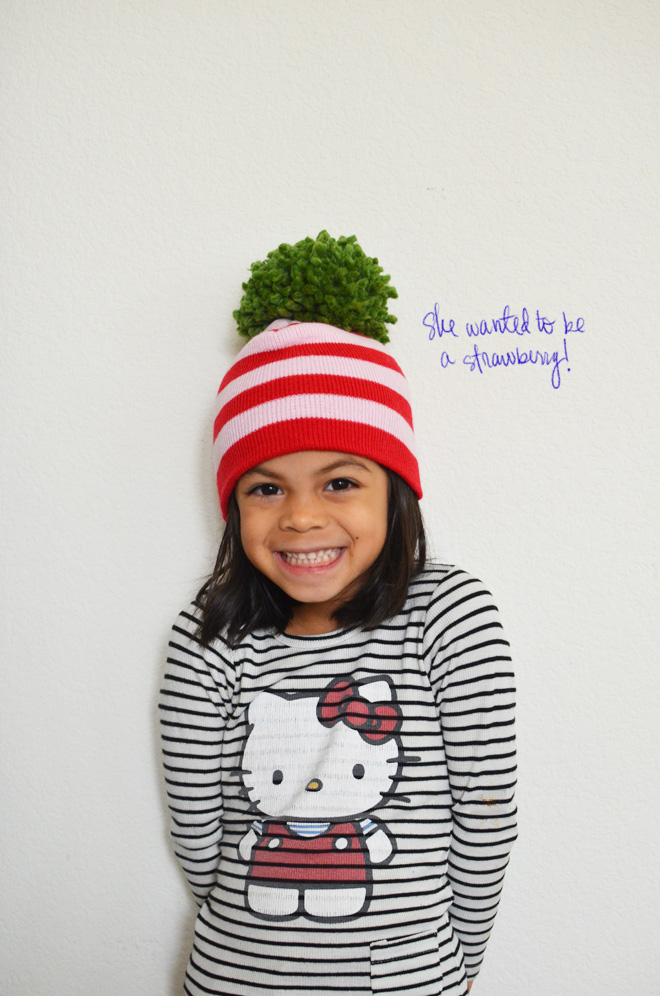
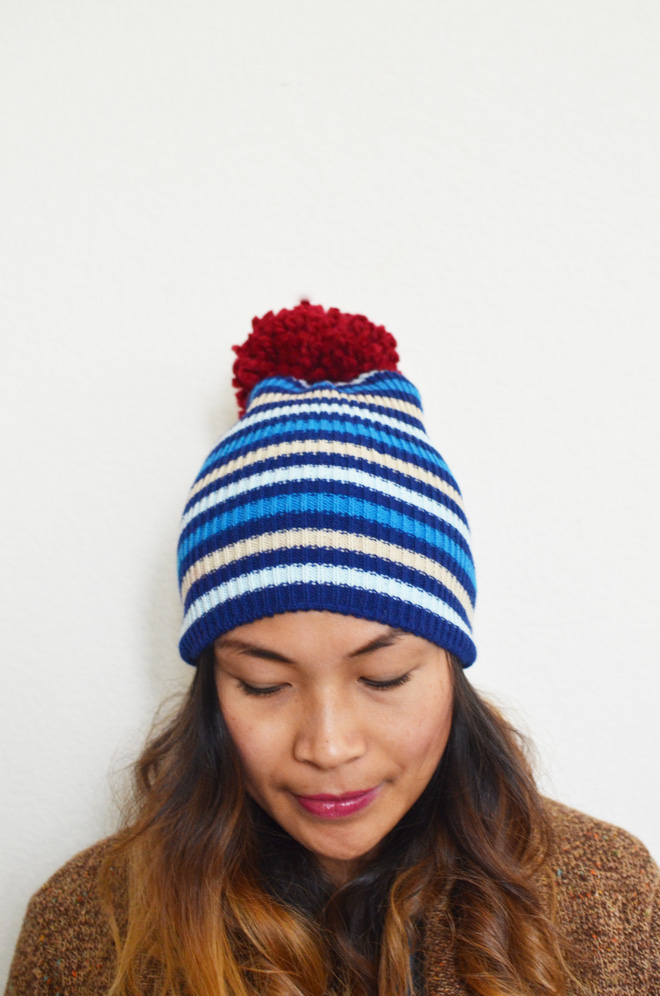
I’ve been seeing those beanies with big ‘ole poms on top and thought they would be easy enough to make our own, instead of spend 29 bucks for one like this. It’s cute, but we do just fine with these… thank you very much. Plus, we went to the dollar store and found these colorful ones, so that made us especially happy to make our homemade ones.
Supplies needed:
Beanie
Yarn
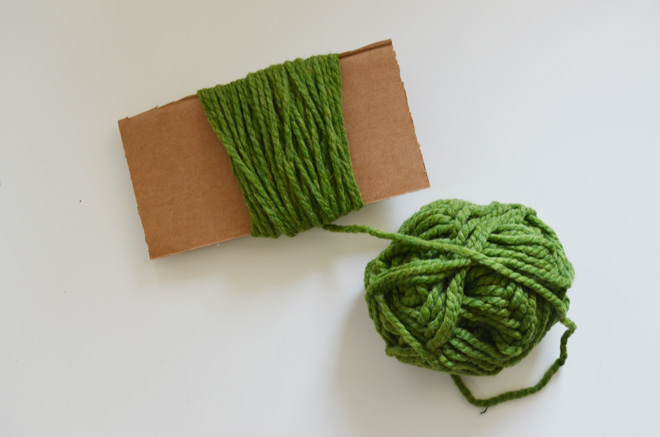
Cardboard (I use this to make my poms and depending the size you want, use a width between 3″- 5″)
Needle
Embroidery floss
Scissors
Directions:
1. Make your pom poms. Use a pom pom maker or just use a stiff board (see Katrina shows you how here).
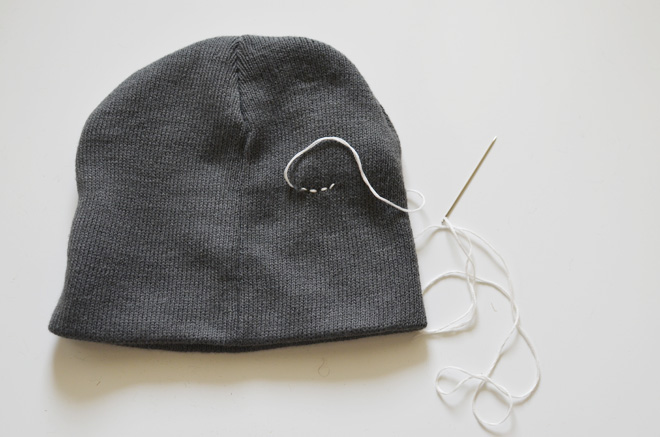
2. If you want a design, embroider it onto your beanie. You could put a stabilizer to help prevent puckering, but we aren’t picky about it and did just fine without it.
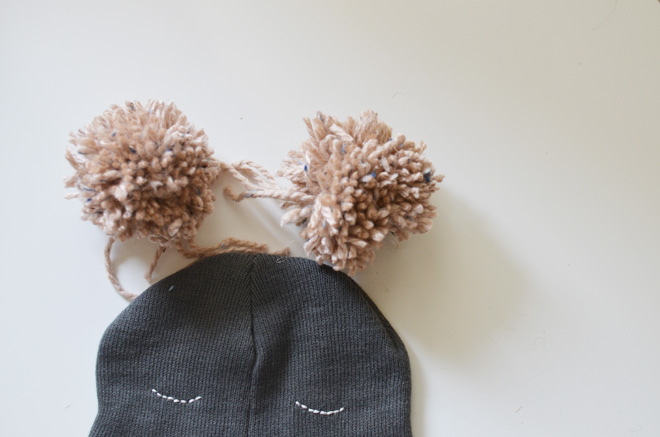
3. With a needle and thread, sew your pom pom onto your beanie.
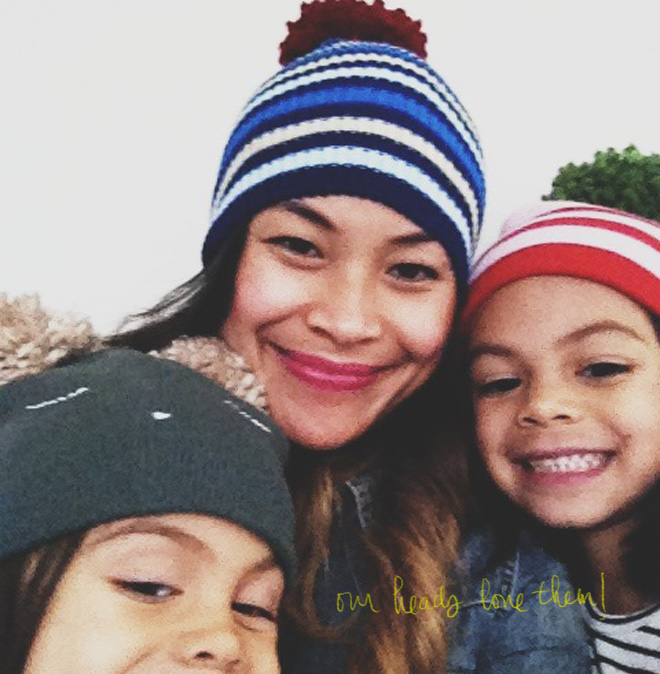
The girls loved it. I loved it. Easy, inexpensive, and now our heads are cozy! At the dollar store, they each picked out their own beanie and True saw the pink and red striped one and said it would be perfect for a strawberry. I think it did come out just right and Bravey turned herself into a little Bravey Bear.
I want to try, key word is try because I am a mom of 4, to do a weekly DIY using the same item to make something for myself and maybe altered a little to make something for them. Hence, the “For Me, For Them” title. This first one is a beanie and I have a few other ideas I want to try and execute, so hopefully I will get to share more with you throughout the year. I’m excited to keep the creating with and for my kids going…
The beanie was a splendid start for this series because it’s been a wonderful California cold lately and we’ve been bundled in scarves and sweaters. Now our heads get to be cozy too. I am totally lovin’ it!
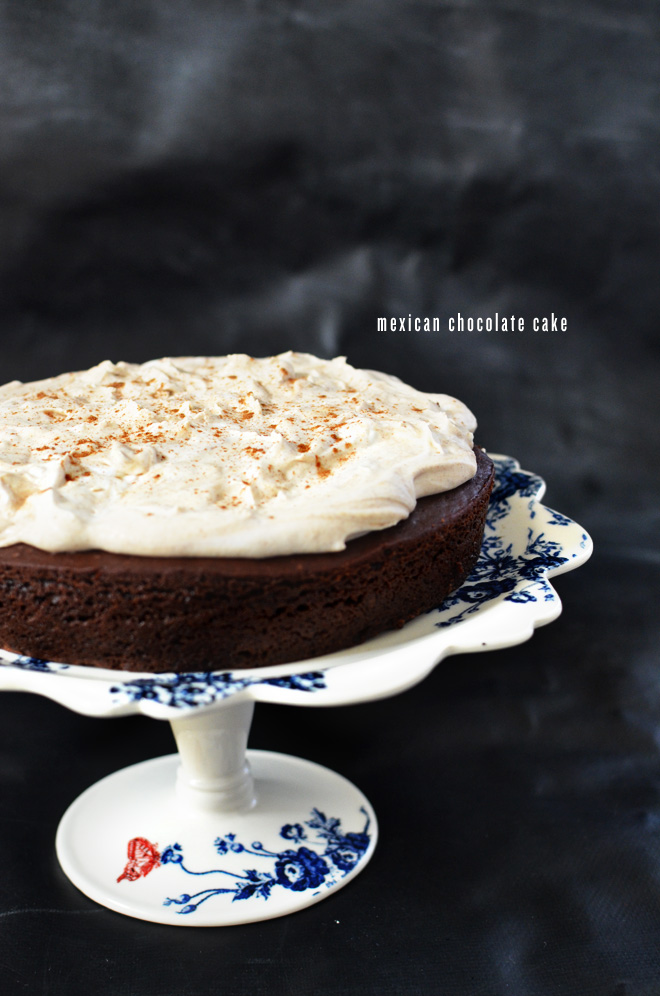
For our Christmas with my family, I made thisMexican Chocolate Cake that I found on pinterest. It sounded interesting, but the cayenne pepper had me nervous. Let me just say that we all loved it so much, this included Ben, who really could care less about desserts. You can’t really taste the cayenne pepper, but whatever it did to the mixture, it sure came out yummy. The mascarpone frosting was also excellent. My oven tends to cook things faster, so while the directions said 45 minutes, I did 30, but next time I think I might only do 20 or 25 minutes.
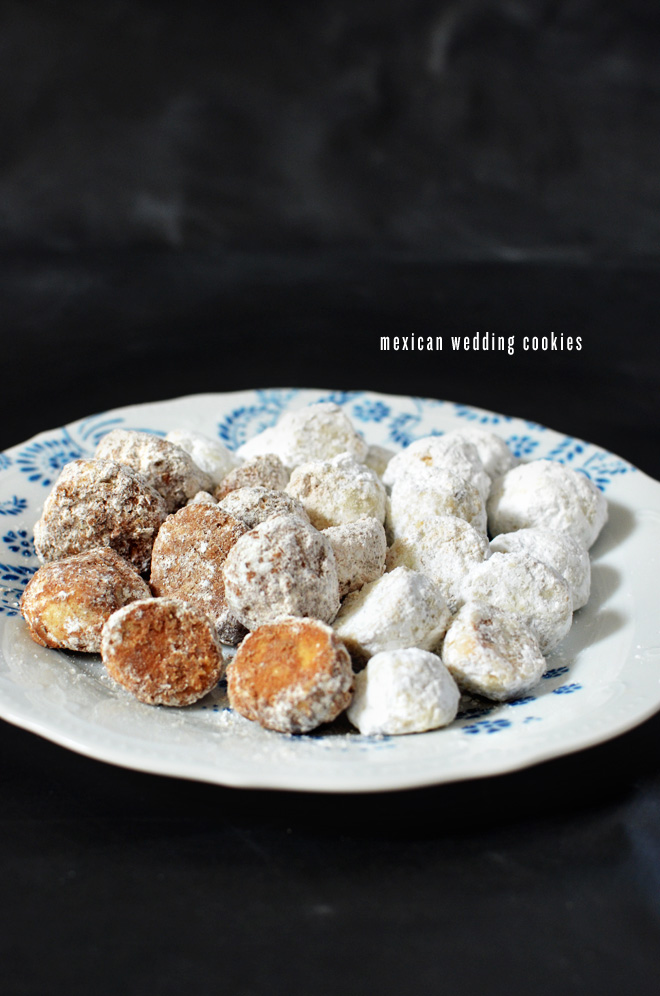
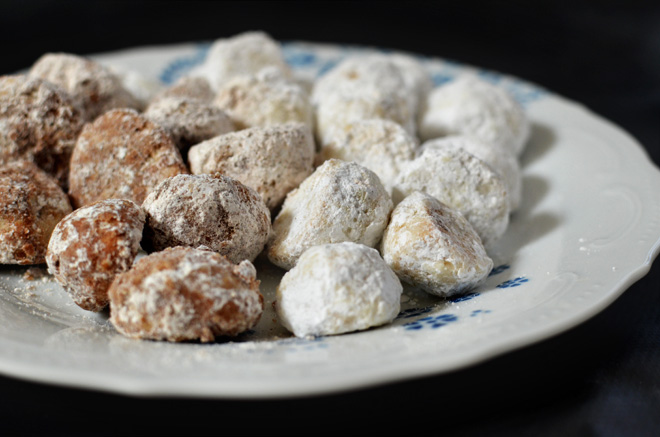
I want to try to make this again into cupcakes or maybe even into cupcakes in jar. I think it might be my favorite chocolate cake recipe yet! Besides the chocolate cake, the girls and I made theseMexican Wedding Cookies, which were another thing I pinned. I omitted the food coloring because Brave is allergic to artificial colorings and one batch was done with walnuts and another using chocolate chips because True is allergic to nuts. To distinguish the chocolate chip ones, we added cinnamon to the powdered sugar, so that True would know which ones she could eat. It’s all butter and a whole lot of sugar, so obviously it tasted good.
I’m totally a sweets person. I have to exercise a lot of self control when I’m around any sugary goodness. Most times, I do good at moderation (like here), but there are sometimes I totally cave and indulge. I can’t help it, sugar can be addicting!
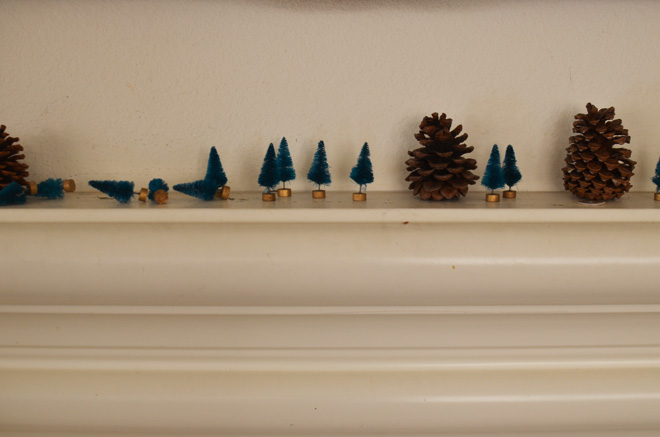
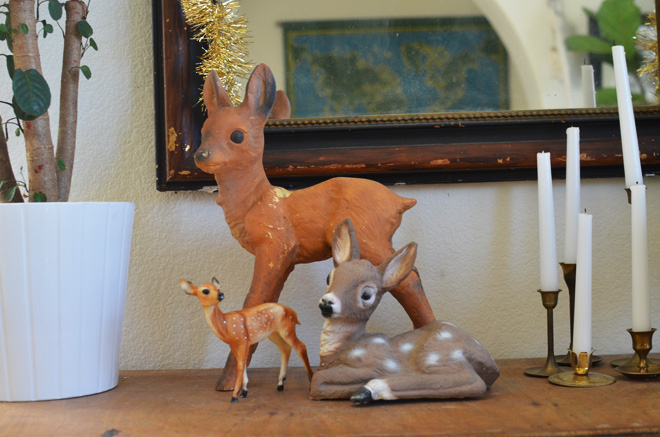
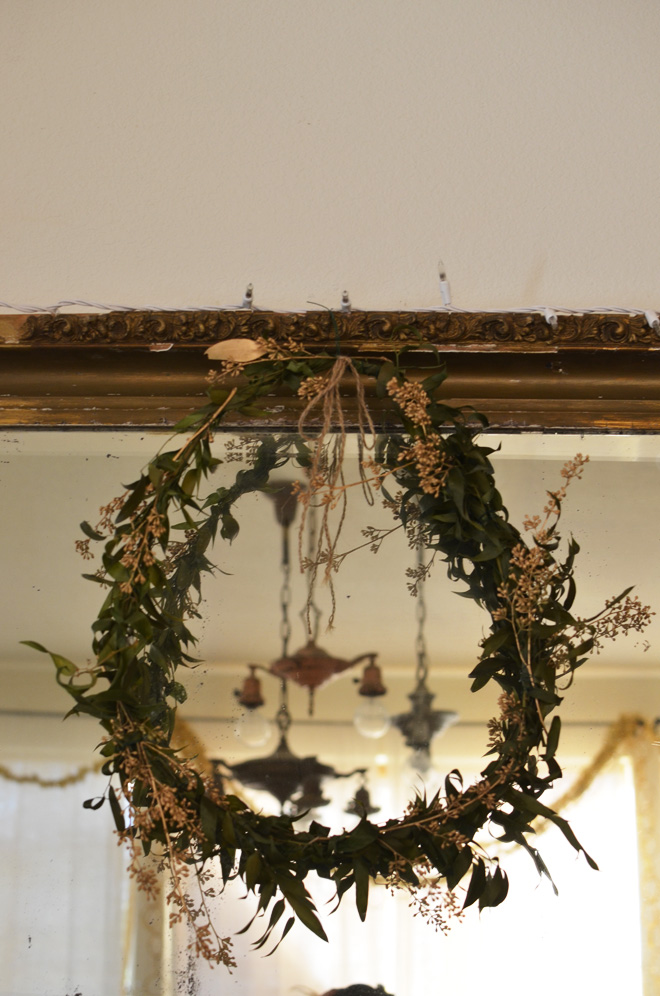
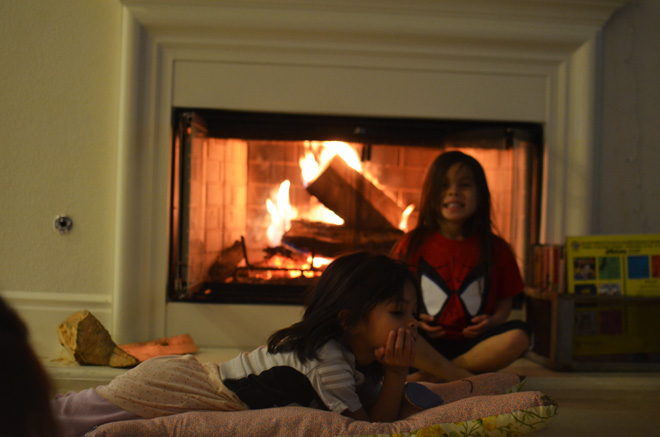
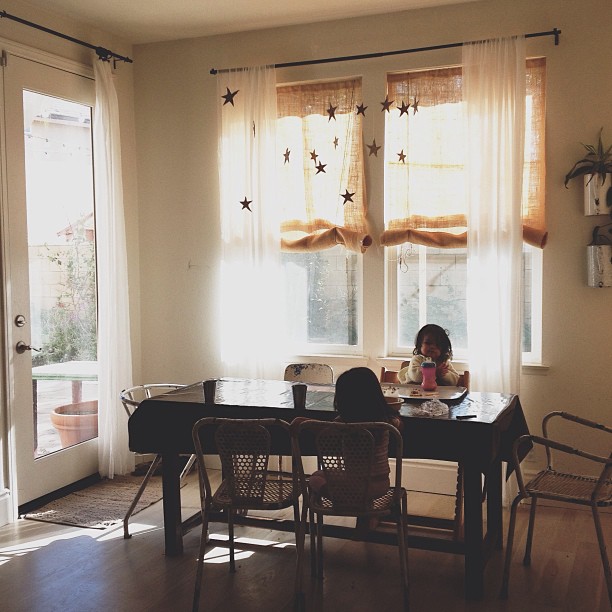
Today’s motto is “back to life, back to reality” and with that, we bid farewell to most of our Christmas decorations. We still have the tree up because we never got a family picture in front of it, so the goal is to take one tonight and the golden stars are still hanging above our dining table, but we may leave that up a bit longer. The girls did have a request to keep their little tree in their room and I agreed just for a couple more weeks.
Things are (mostly) back in place and again and the house feels slightly fresh (just don’t go upstairs because the mess in horrendous!). The morning was spent cleaning and putting things away and it feels good. I can’t really think clearly in a messy space (in the common areas), so I feel much better. If you went to our bedroom though, oh man, that’s a whole other story. That is where I let my messes run wild! They cannot be tamed. It’s pretty embarrassing. Well, despite the messes in the bedrooms, things are generally clean, but please if you come over, just don’t look too closely!
I know my parents tend to leave their tree all the way up into February, so if we get the longing for a little bit of Christmas, maybe we’ll head over there! Goodbye Christmas, see you next year!
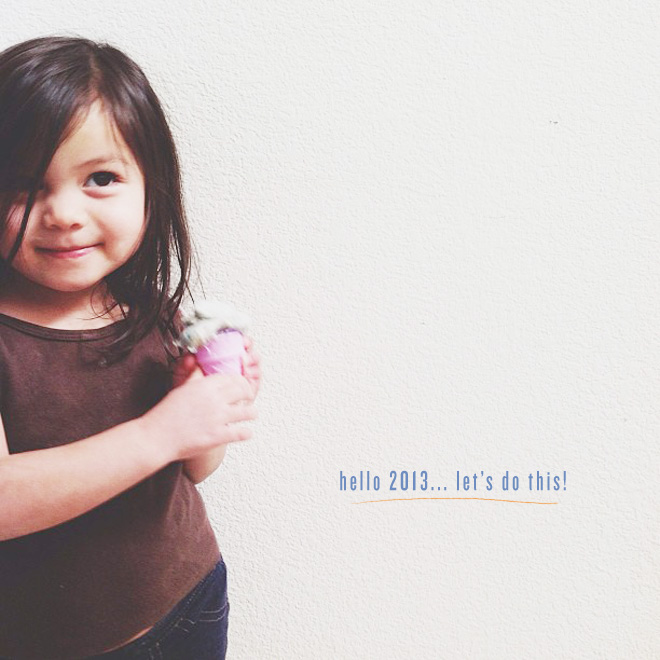
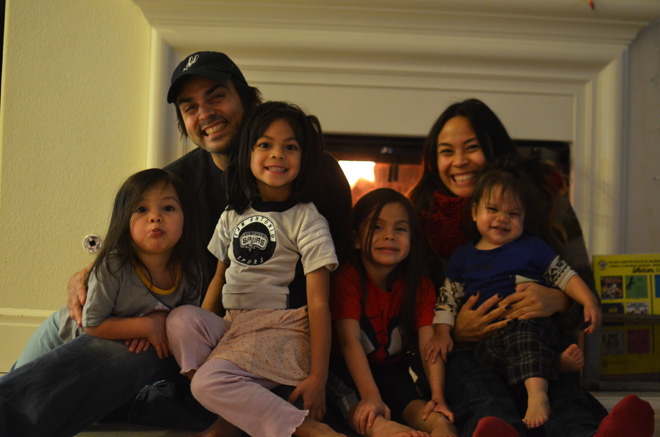
It’s the new year. Wow! That was fast. 2012 was quite good and while trials were experienced, we’re thankful and looking forward to see what will come of the new year and how God will grow us even more. The year for us has already started quite busy as we (Ben) has undertaken the task of planting a backyard orchard culture (more to come on that later) in our yard and I have been working on a few things myself. The big girls got to spend a few days with their Auntie Linda and Uncle John while Ben and I took care of the babies and some other things. We’re all back together now and we’re ready to get back into our routine with school and work tomorrow.
Some learned, links, and thoughts for the new year…
Serve my girls with even more gladness this year. I think I easily get frustrated that I lose the serving with gladness part much too quickly. I am here to serve them, not the other way around, so it’s something I need to improve on.
This post about God will be doing 10,000 things in your life, though you may only be aware of 3.
I want to work on memorizing more scripture like this lady. Scripture will help me fight the constant battle within my heart to love God more above all else.
I’m thankful for hobbies such as crafting and blogging. It’s an outlet that I really enjoy and I’m thankful for all the opportunities that have come from it. And really, much of the thanks are to you my readers. Thank you for taking notice and sharing what you like here.
Don’t let useless things rob you of your joy. Stop reading the blog that annoys you (I know it’s hard as I am totally guilty of this! And if you don’t care for this space, don’t waste your time here, please don’t.), don’t sweat the small stuff , and whatever the circumstance, find the fun and engage it.
I had a few other things I wanted to link to, but now I can’t remember. Oh well. I have some new ideas for this space along with continuing along with other things I have already been doing. If you have any suggestions of what you would like to see here, things I could do better, or any other blog thoughts in general, please share.
I’m quite excited about this new year. Last year was full of surprises and I’m sure this new year will be much of the same. Life is just like that though, there are always surprises, good and bad. We’re just six days in, but hello 2013, let’s do this!
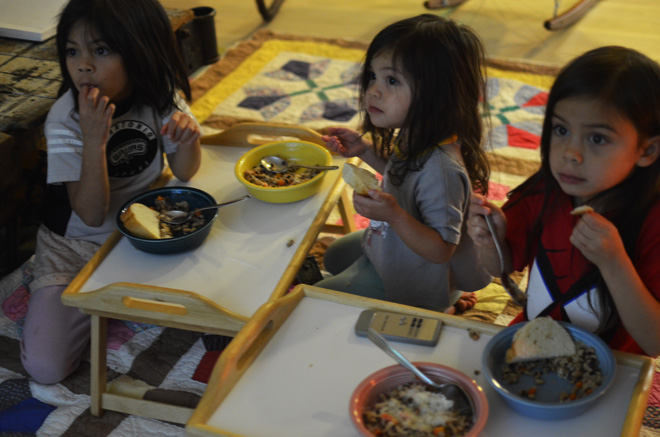
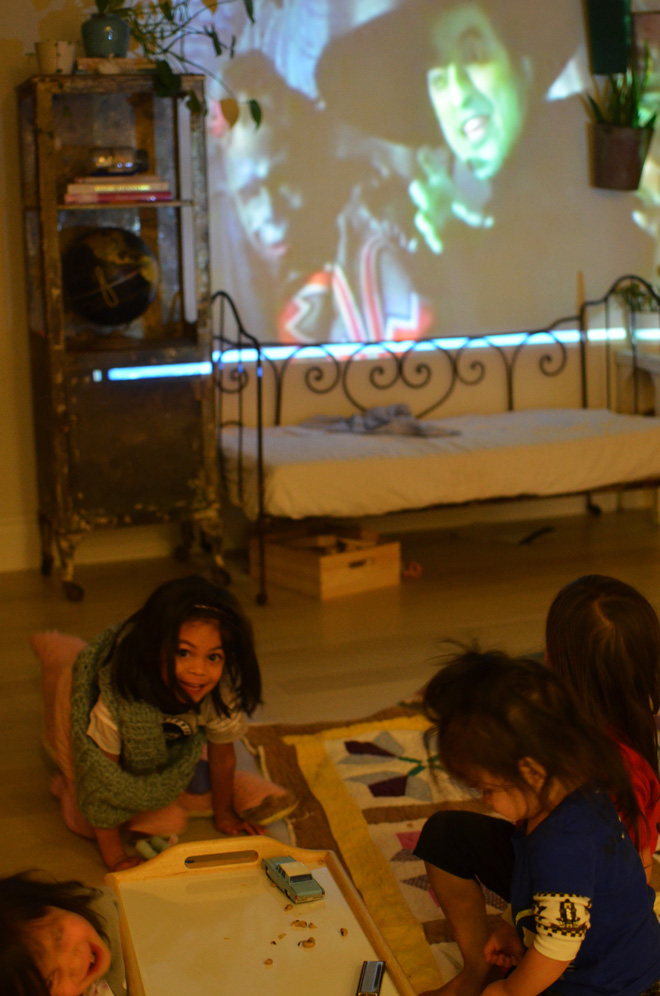
This New Year’s Eve was a much more casual affair compared to our other previous NYE celebrations. Instead of going our typical crazy route for our Bratcher Dance Party, we went comfy cozy instead staying in our pajamas all day long. We ate our black eyed peas in front of the fire, while watching The Wizard of Oz with the girls for the first time. After which we took out the strobe light and danced. We called Grandmama to wish her a Happy New Year, since she’s 2 hours ahead of us in Texas, and then proceeded to dance a bit more. We put all the girls to bed a couple hours before midnight, and Ben and I spent the rest of the night watching Prison Break.
There were no fancy frills and it was our perfect way to ring the new year. In fact, we didn’t do a countdown at all, we just knew the year changed right when we got a text message from one of our friends, so we we’re like, “I guess it’s midnight.” Then, we shared a kiss and continued to watch our show. Being with Ben and my four happy girls was all I needed to welcome 2013!
Anyone else stay in pajamas to ring in the new year?
I have a large growing pile of fabric scraps. I refuse to throw them away because I am sure they can be used for something. I have been seeing different types of interesting necklaces made of buttons, beads, and fabric. Then, I figured why not make one out of my scraps...
I think it made my white shirt a little less boring. This was so quick and easy to make.
How to make a recycled scraps necklace (which is very similar to the straps on my braided tablecloth bag):
1. Take your scrap fabric, I cut a .5''-1'' snip and tear the rest of the fabric down for a nice frayed edge. Used 3 different fabrics for each strand.
2. Take 3 of the torn pieces and tie the ends together with a rubber band.
3. Braid the 3 pieces together and tie ends together with rubber band when done.
4. Repeat steps 2 & 3 for more strands. Remember you can make the strands any length you want, if run out of fabric, just weave more into the braid.
5. Once all the strands you want are braided, gather one end of each strand together and straight stitch together with sewing machine. Repeat for the other ends of the strands. Snip off any excess.
6. Gather ends of the necklace and sew together (snip excess) or a ribbon can be sewn at the ends to be able to tie the necklace closed, but I just sewed both ends together.
7. Voila! A nice way to make use of all your lovely scraps.
Sorry if the directions get you a little lost, but it really is easy. I promise. Maybe I should put some in the shop. Please share any other good ideas you may have of things that can be made with scraps. I would love to hear (read) them!

 Some of you have asked about how we made the stars seen hanging in this video, so here’s a quick how to…