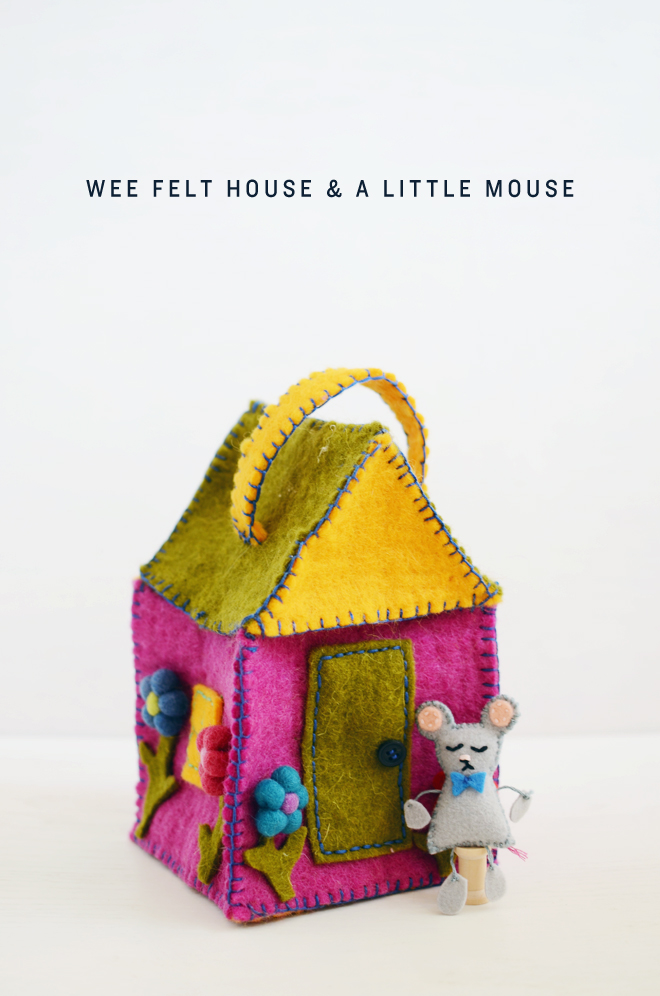
 Wee Felt House & A Little Mouse
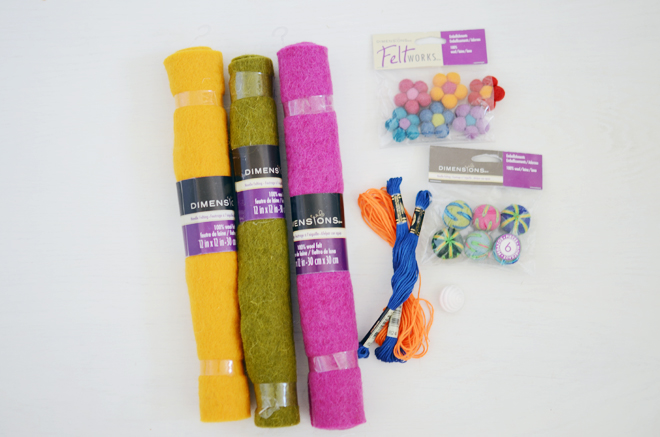
Supplies:
Wee Felt House & A Little Mouse Template
3 – 12″ x 12″ wool felt rolls
Felted flowers and balls
Various scraps of felt or wool felt (for the mouse)
Coordinating embroidery floss
Embroidery needle
Poly-fil (for the mouse)
Snap buttons
Scissors
Button
Fabric glue
Pins
 Directions:
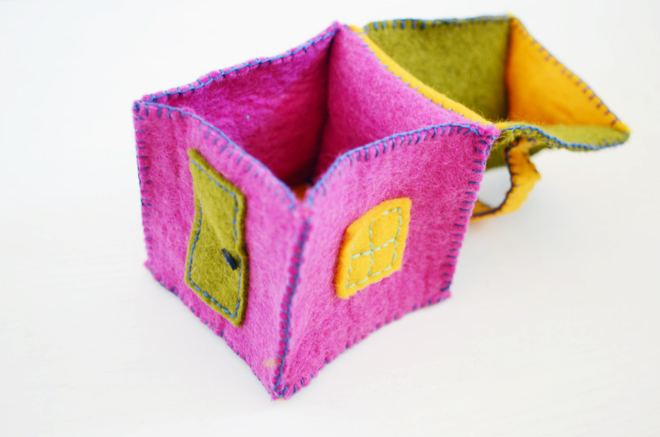
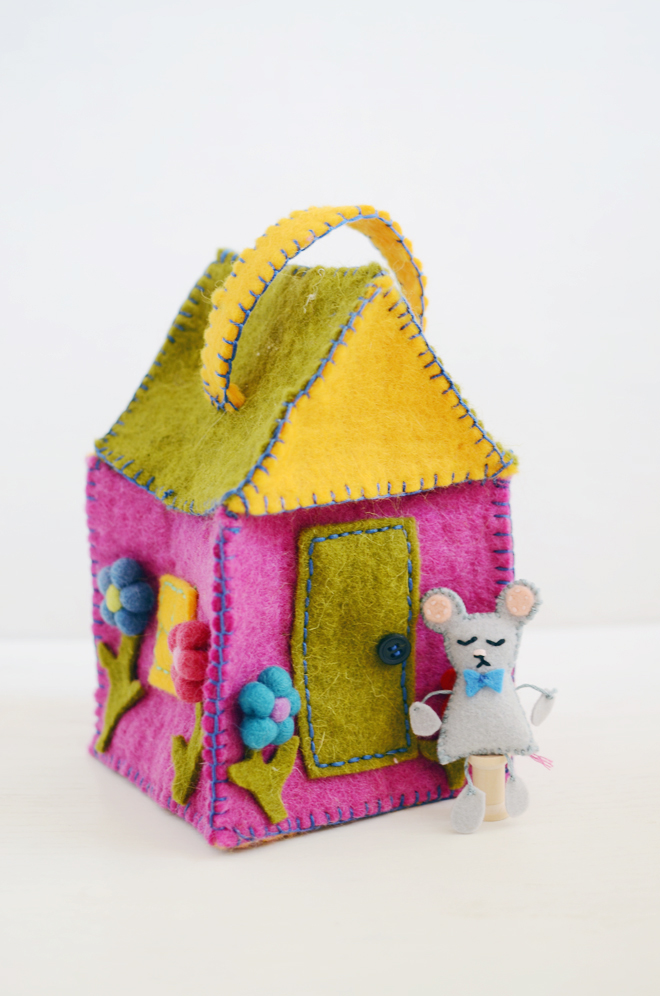
1. Using your template as a guide to cut out the triangle portions of the house roof. For the body of the house, cut out five 5″ squares from your wool felt fabric. For the side of the house roof, cut out two 4″ x 5″ wool felt pieces. For the windows, cut out three 2″ squares, and for the door, cut out a 2″ x 4″ piece of wool felt.
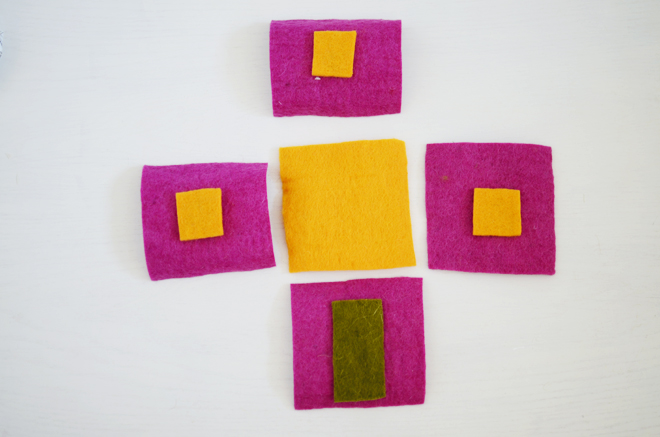 2. Hand sew your door and windows onto four of the 5″ squares, set aside one to be the bottom of the house.
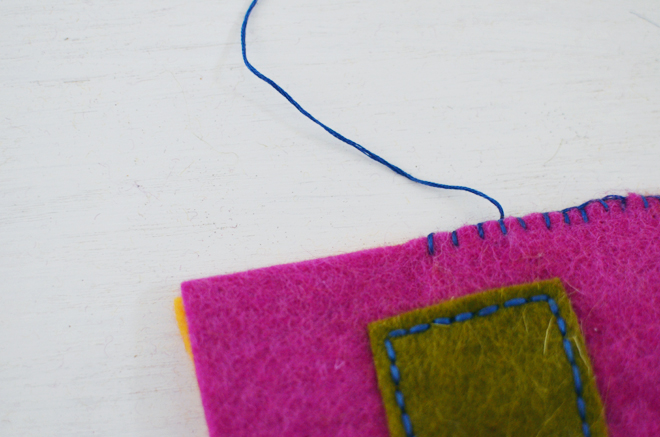
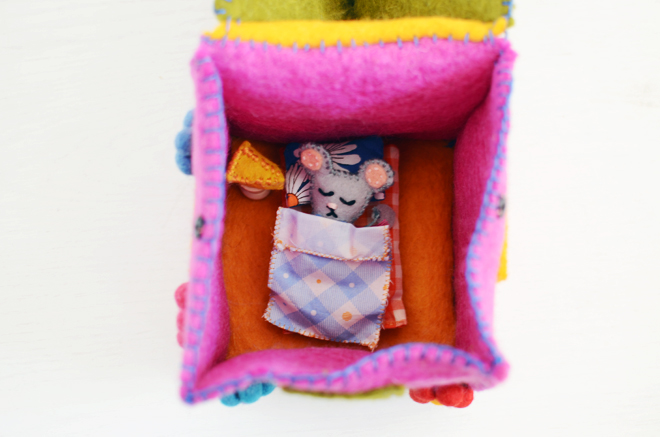
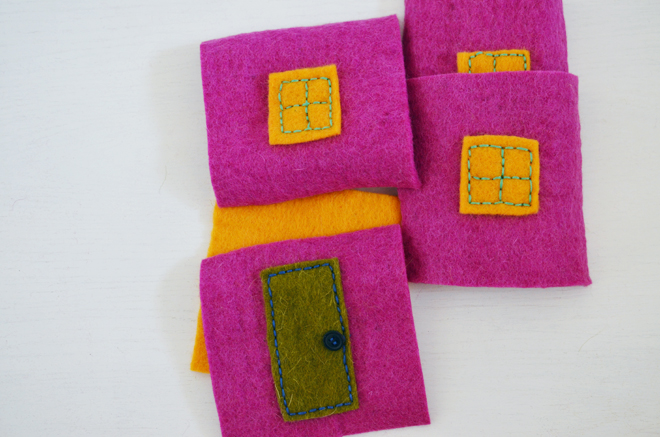 3. Pin the four walls of the house to one of the four sides to the bottom of the house. To attach, use a blanket stitch to connect each piece together. Go around sewing the all four sides of the bottom of the house. Continue sewing together the corners of each house. Then, sew three sides of the top of the house. Leave the top back of the house free of stitching.
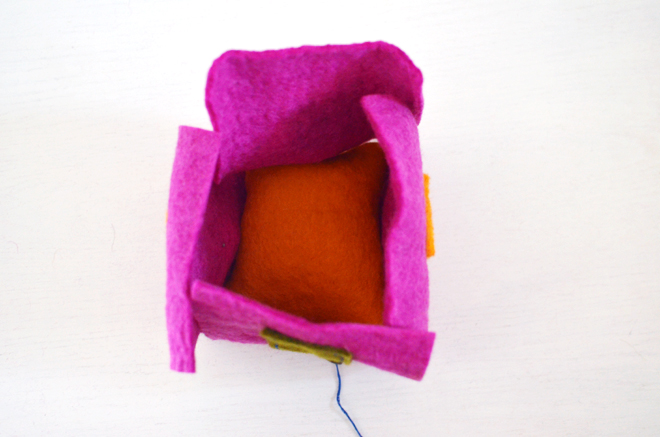
 4. To make the roof of the house, pin together the long side of the two 4″ x 5″ pieces together, then pin the ends to the two sides of the triangle (the 5″ side of the triangle should line up with the bottom of the roof. Blanket stitch all sides of the roof together, but leave the back bottom of the roof free of stitching. Then, pin together the back bottom of the roof to the top back of the house, and blanket stitch those two edges together.
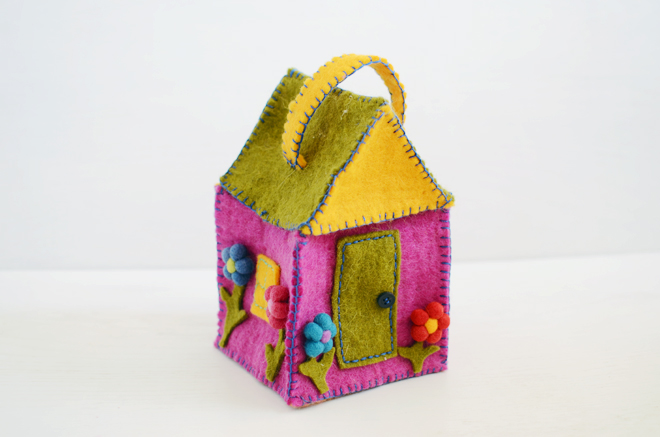
Cut out a 1″ x 8″ piece of wool felt, sew each short end 3″ down from the top center of the roof with a blanket stitch, and continue to blanket stitch all the way around. This is the handle of the house. Using fabric glue, add the felt flowers and balls to decorate the house. This can also be hand sewn on as well.
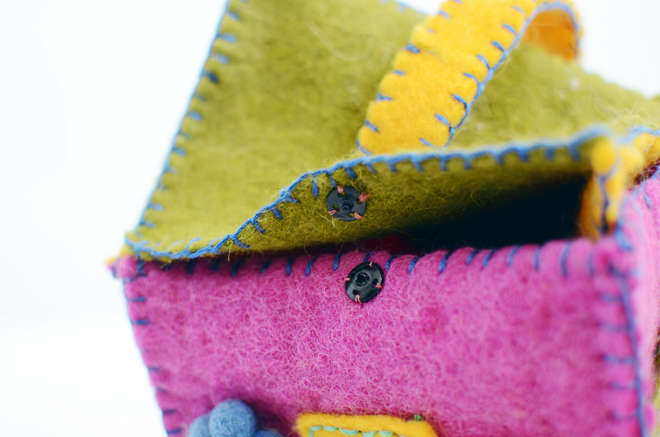
Sew on the snap buttons onto the top right and left of the house; one stud on the bottom center of the roof, and one socket on the top center of the house body.
 Wee Felt Mouse
Directions:
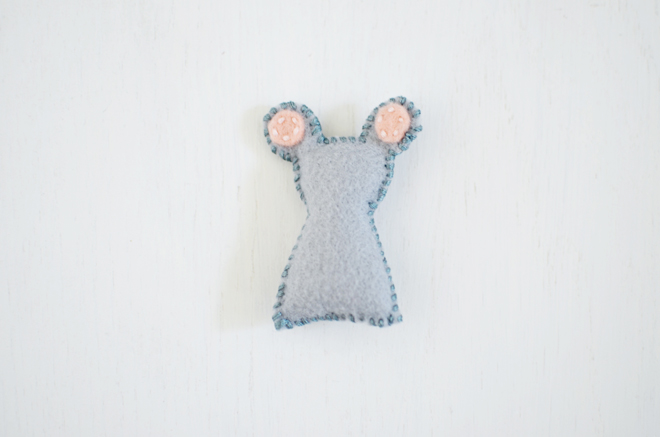
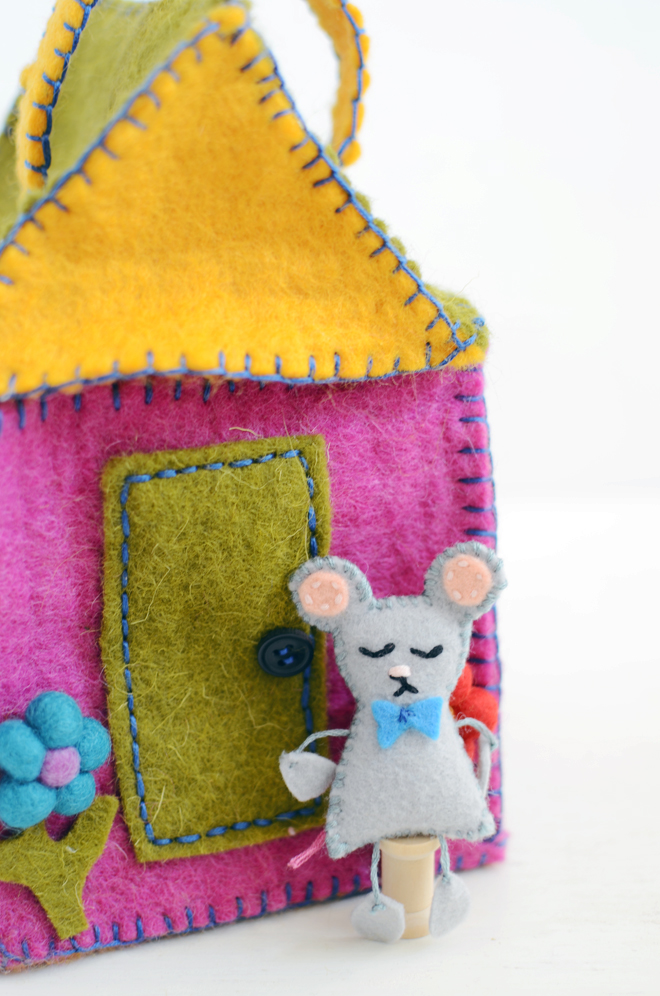
1. Cut out the felt pieces for your mouse using the template. Stitch on the inner ears onto one of the mouse body pieces; this will be the front of your mouse. Place the front and back mouse body pieces together, with the right side facing out, and stitch all the way around the edges of the mouse to create the mouse body. Leave a small opening, lightly stuff with Poly-Fil, and then continue to sew the opening closed.
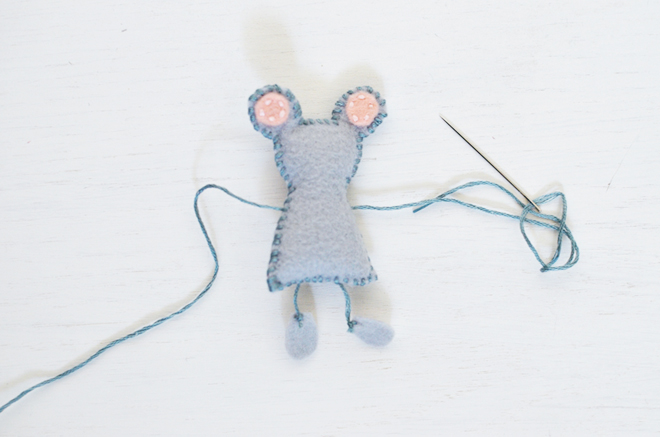
 2. Sew a strand of floss up through the bottom for the little legs of the mouse. Sew on a little felt foot on each end and knot. The bottom of the feet end up dangling about 1″ down from the base of the body. Sew another strand of floss through one side of the body and out the other side for the mouse arms. Sew felt hands on each end and knot. The arms and hands extend about 1″ out on each side of the mouse body.
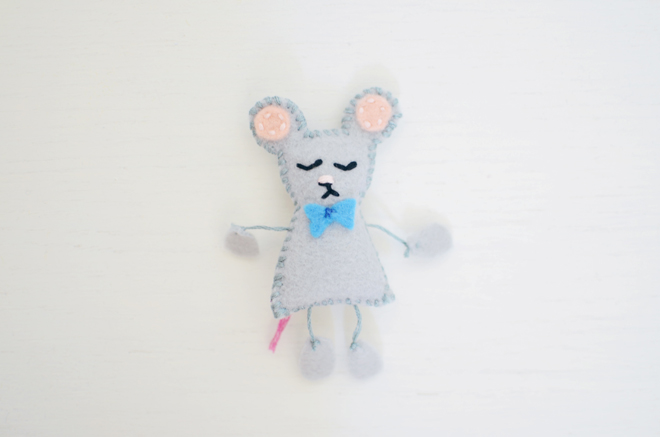
 3. Embroider on the face of your mouse and add any additional touches you may like. I added a tiny bow tie on mine. With your embroidery floss, add on a tail at the back of your mouse.
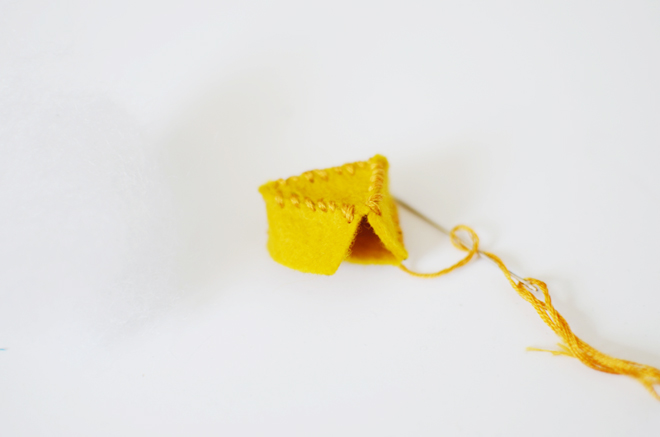
 4. Line up the three cheese block sides with a triangle and stitch all the sides together to the triangle. Continue to sew the sides of the cheese block, and then add the bottom triangle and continue to stitch all the sides of that piece on. Before stitching the cheese block closed, add a tiny bit of Poly-Fil, and then stitch the cheese block closed. Make sure that all the sides, edges, and corners of the cheese block are stitched together. I had made all the pieces for this tiny mouse when I felt like he was missing something. Then it dawned on me: this little guy needs a cheese block. I think it was the perfect addition!
 Isn’t this wee house and little mouse so cute?! He’s the perfect little friend to tote around with his wee house. You could also use the template to make a whole family of mice! There is certainly room for more to live in the house. This tiny house from a small box could also be used for the mouse (or mice) to live in. It’s a present for one of the girls, but I’m tempted to give it to her already. To help fight the temptation, I better wrap it up for Christmas and put it under the tree. This project is a fun one to make and would definitely be a good present to make for Christmas. It’s also a great project to do with older children, and they could make little mice for friends.
Supplies for this project was provided as part of the Michaels Makers series.
 Loading InLinkz ...