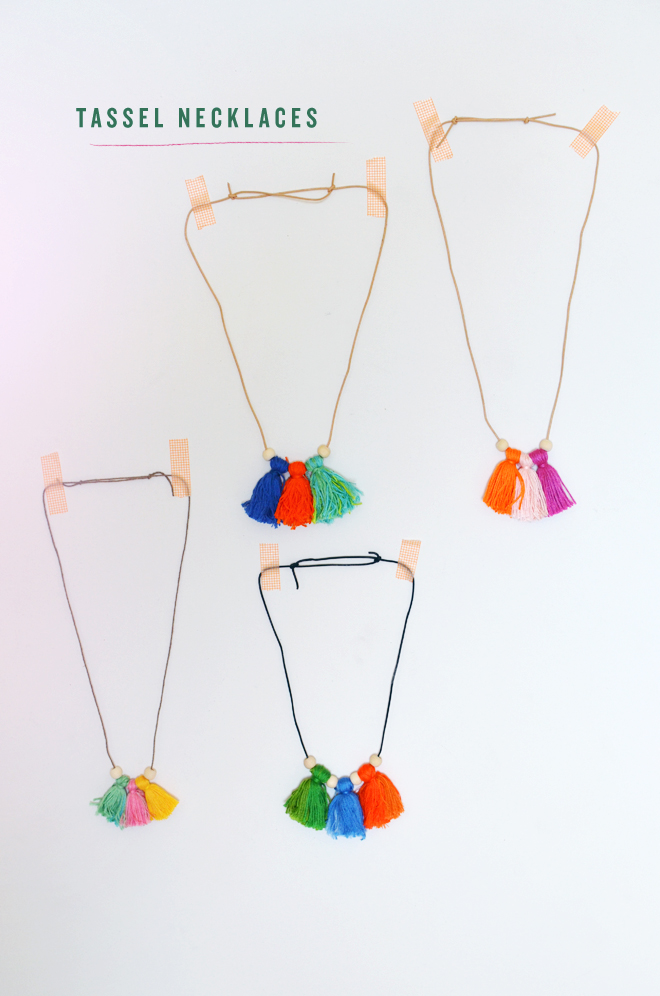
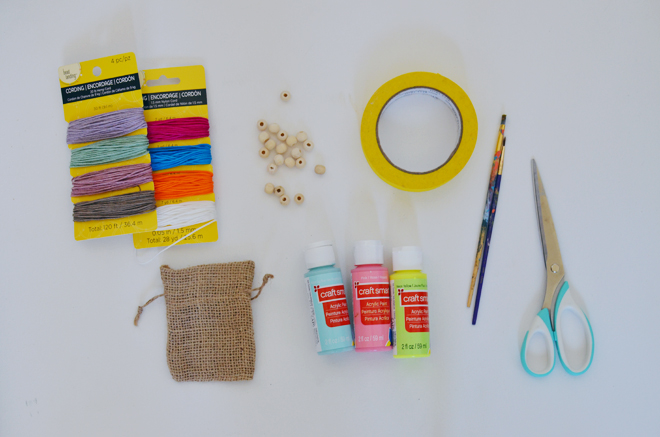
camp home: tassel necklaces

July 29, 2014


tassel necklacetassel necklaceTassel Necklaces

Supplies:
Embroidery floss in various colors
30″ Leather cording (can cut to a length appropriate for the child)
Scissors
3/8″ wooden beads (same ones used for this project)
Lacing needle

Directions:
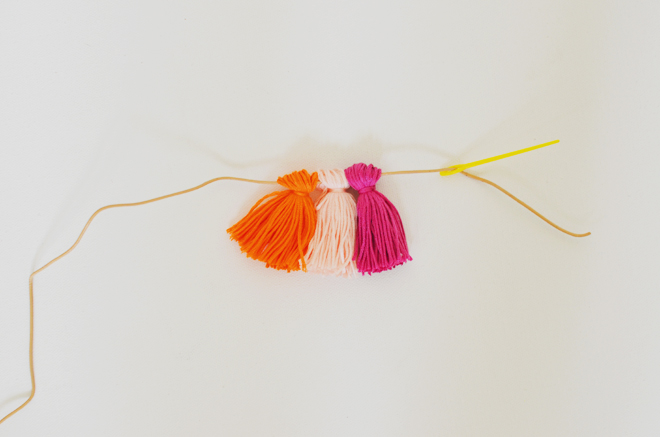
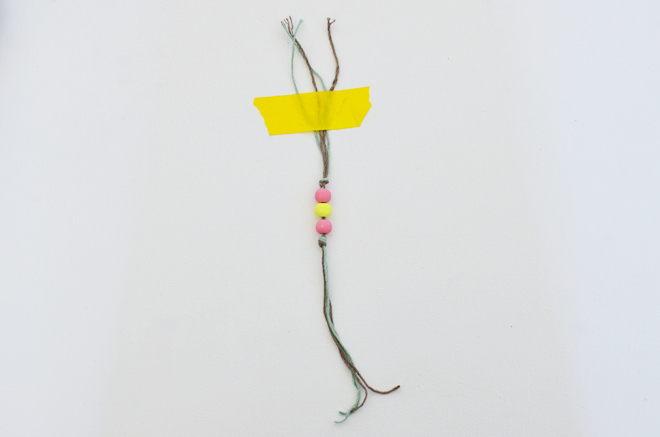
1.Cut about 30 – 6″ strands of embroidery floss (pretty much one skein of embroidery floss), fold it in half, place a 10″ strand of floss about 1/2″ down from the top of the fold, and wrap it around and knot to secure. Trim the bottom of the tassel to even out the length and make more tassels!

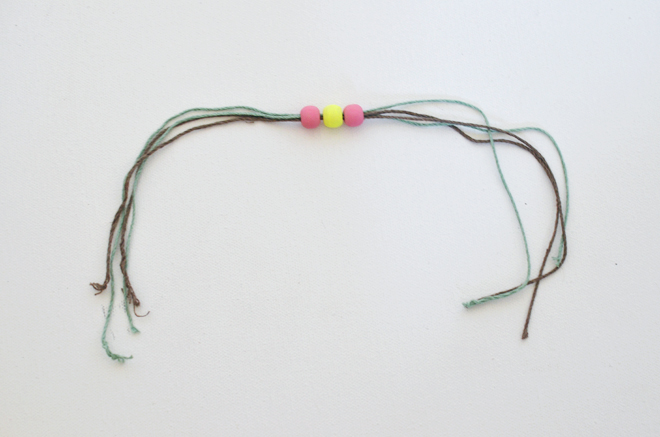
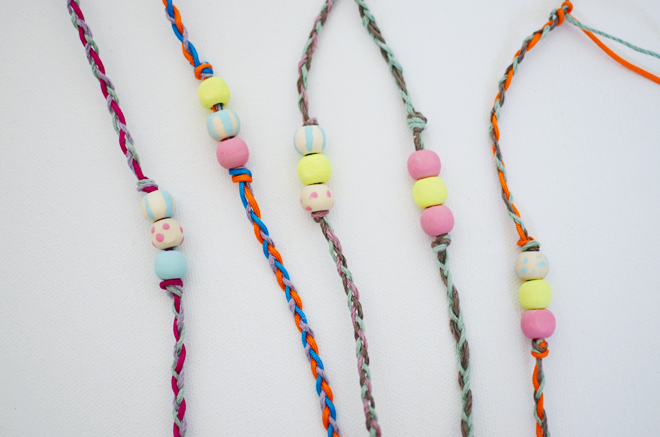
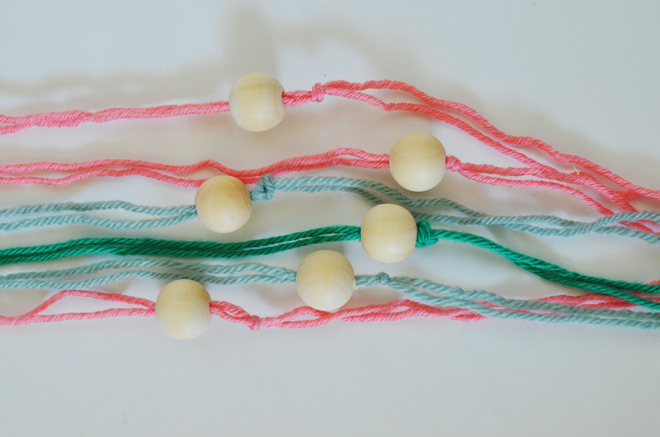
2. Feed your cording through the top of each tassel and add a wooden bead on each end of the cording (or alternate it with the tassels).

tassel necklacetassel necklace
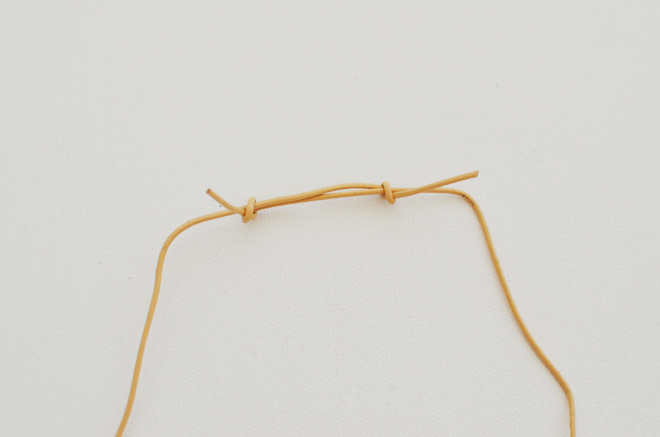
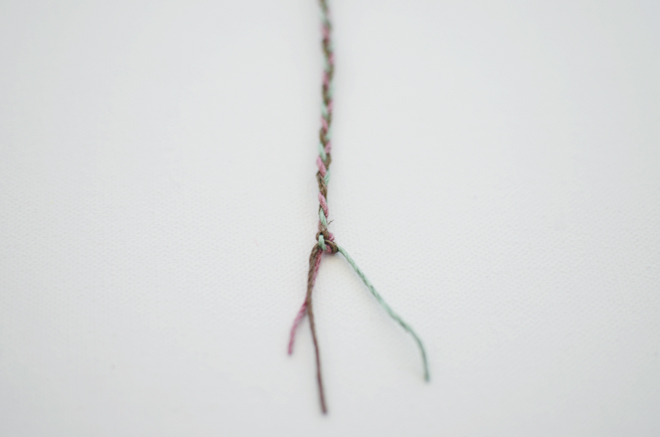
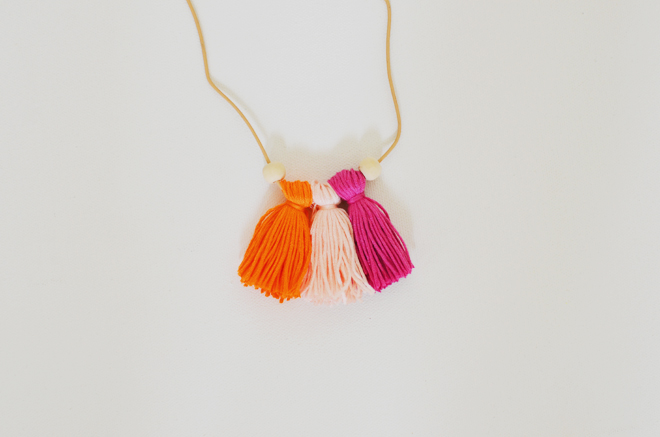
3. Create a sliding knot with each end of the cording (if don’t want the necklace to be adjustable, just knot the ends together) and trim any excess cording.

tassel necklacetassel necklace
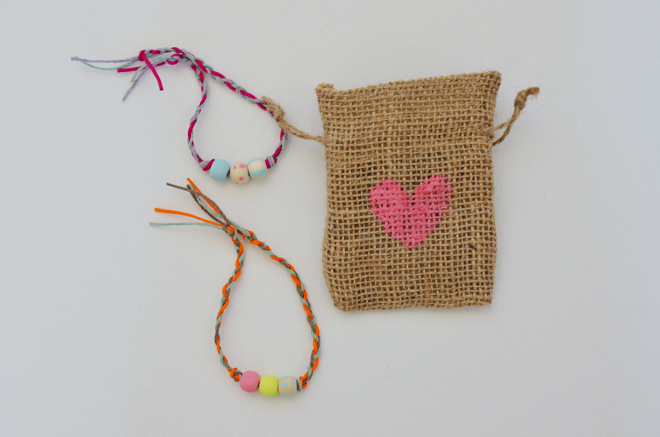
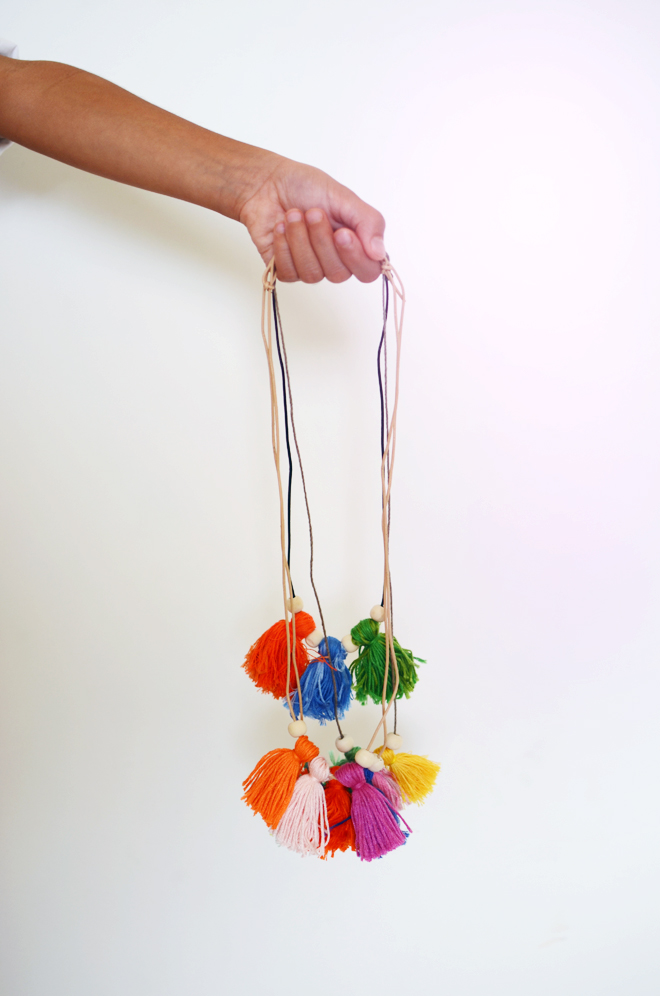
I’d totally wear these tassel necklaces. I want to pick up a few more supplies at the craft store and make another version for me; I think it’s definitely  something children and adults can make and wear!

tassel necklace
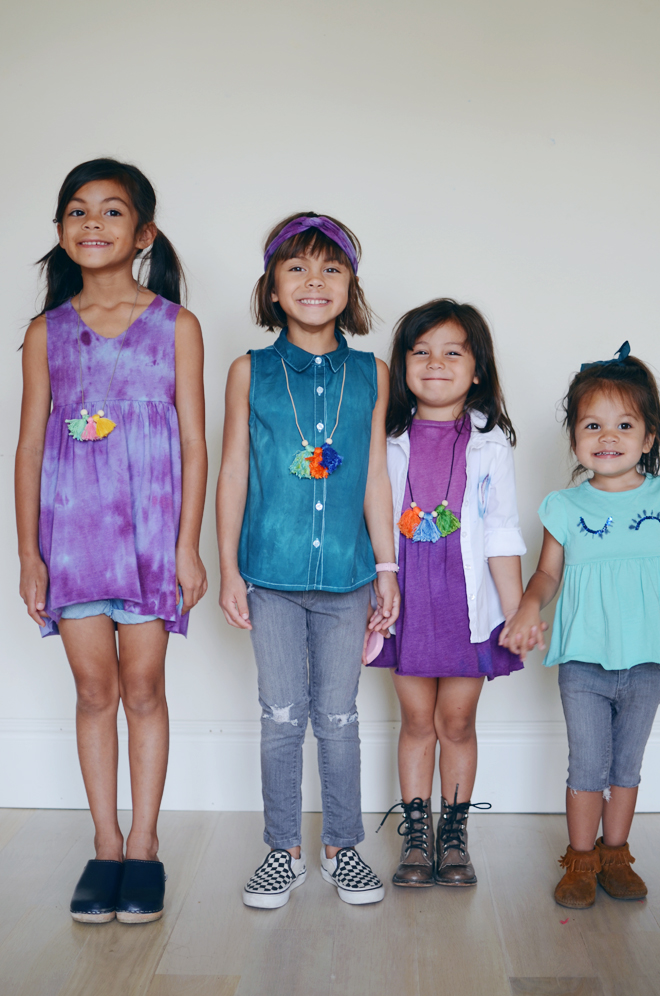
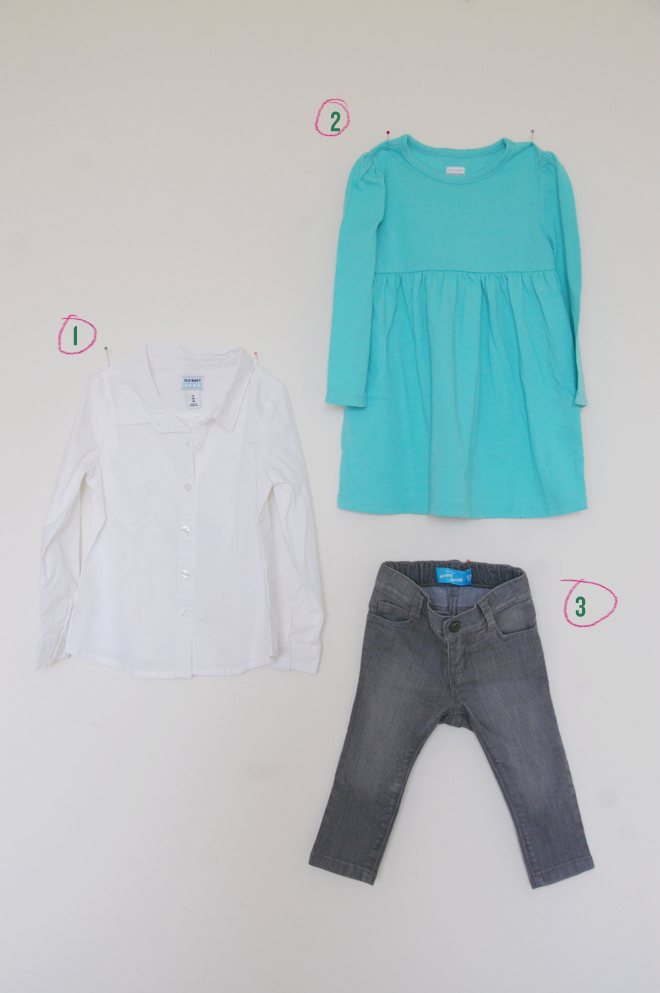
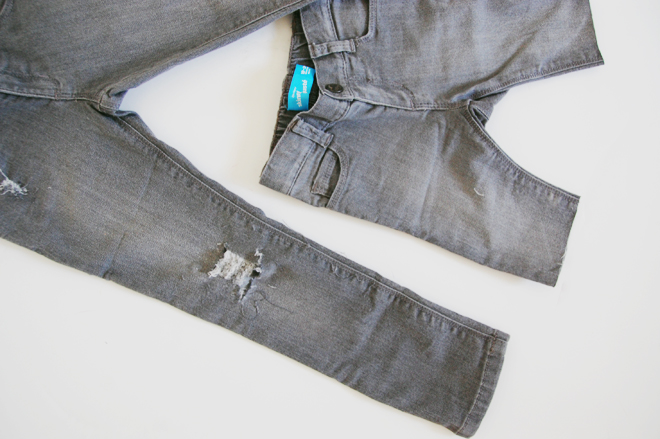
We joined in another P.S. I Made This challenge with Old Navy and they sent us a few items to DIY: 1) Uniform Button Top 2) Long Sleeved Jersey Dress (all in aqua) 3) Gray Skinny Jeans. You can see the last challenged we joined in on here.

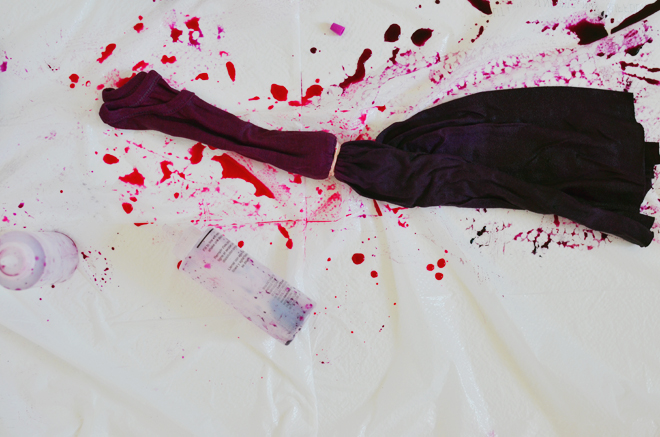
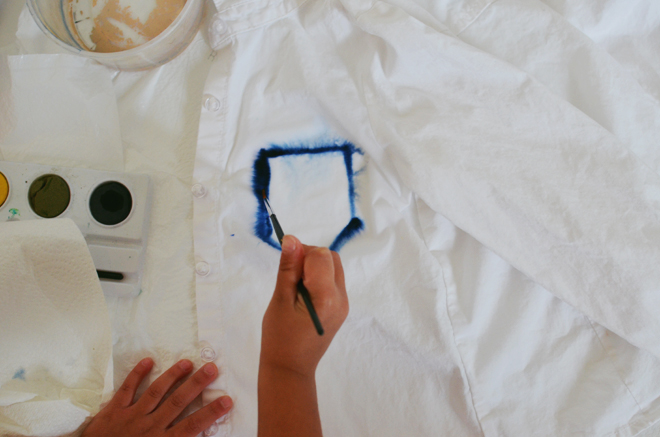
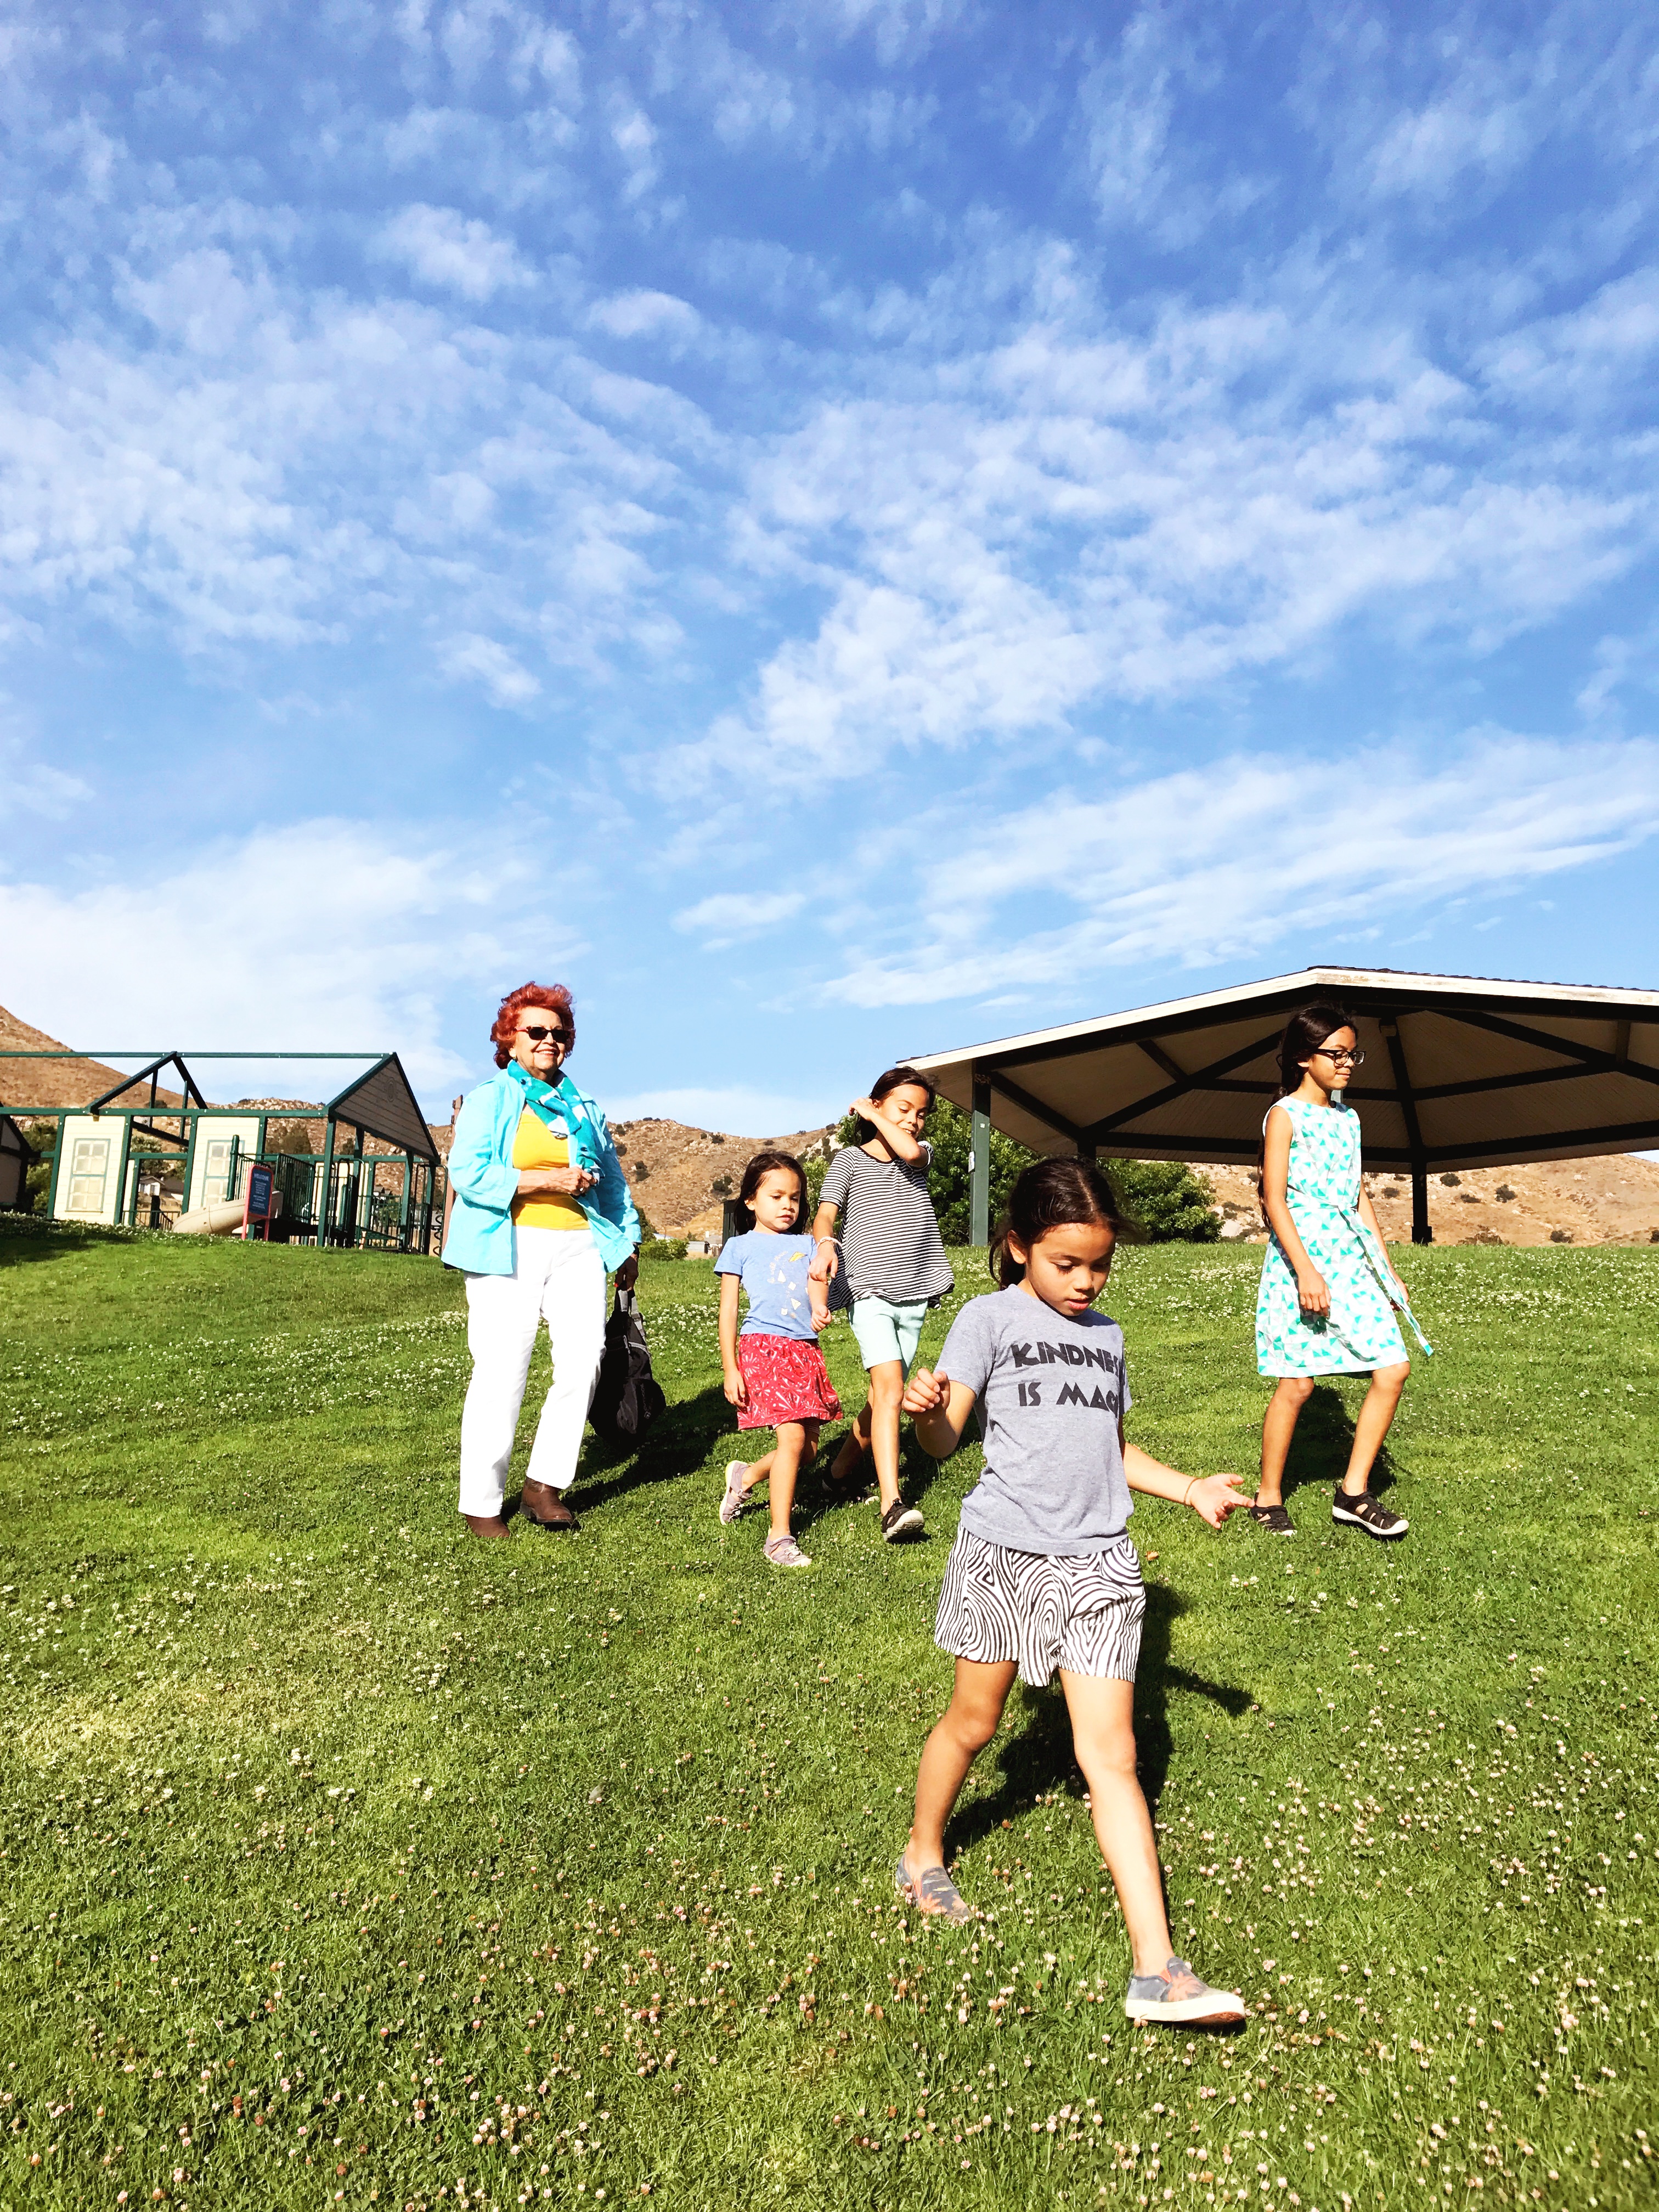
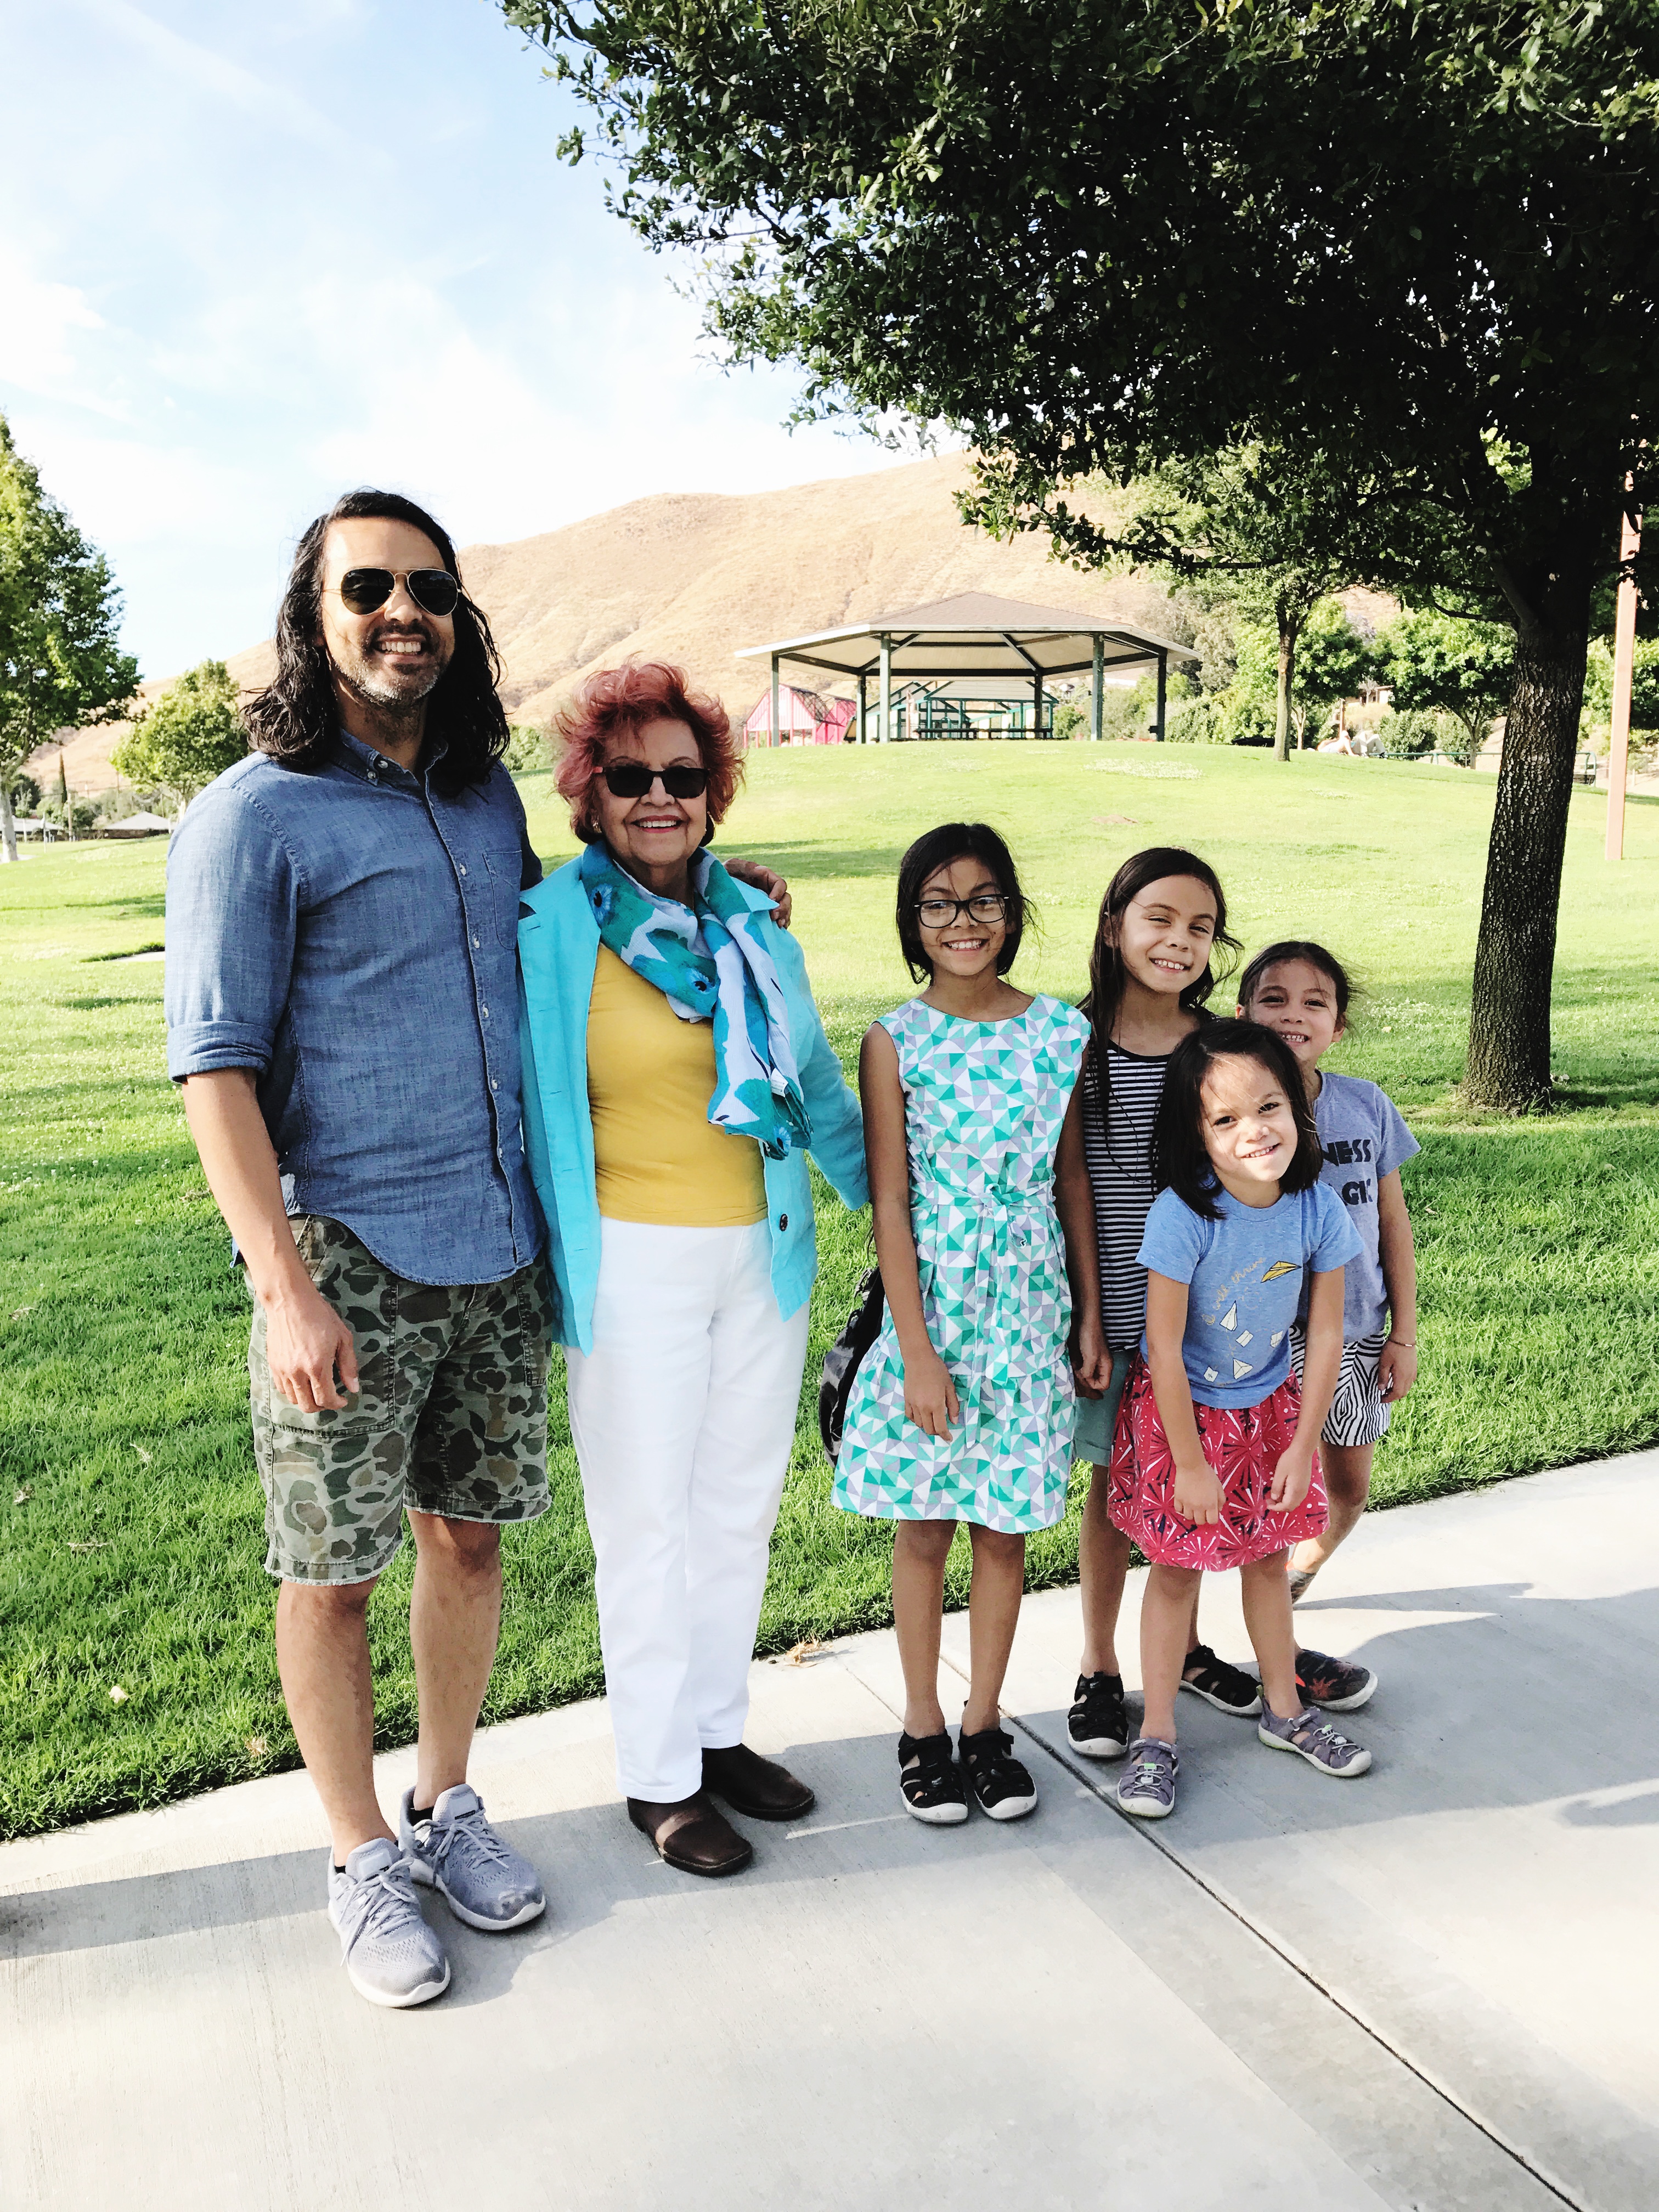
For the denim, we cut one into jorts (jean shorts), and another we distressed a bit in the knees (following this post). We dyed two of the aqua dresses in various shades of purple, with one having a more tie-dye effect, and the other dyed more solid. The aqua dress for Glow, we use sequins for eyes and painted on eyelashes (inspired by this sweater). One button down shirt was dyed teal, and I cut off the sleeves and finished it off on the sewing machine. The other button down Soul painted on a pocket, and we added some glasses hanging off of it. All the dresses got the sleeves cut; True’s got a high-low hem, Soul’s got cut to the length she liked (always short!), and Glow’s got turned into a shirt. We used one of the cut-off sleeves to make Brave a headband. The girls thought it was pretty fun to see how the same three items ended up looking up so differently.

tassel necklacetassel necklacetassel necklacetassel necklacetassel necklacetassel necklacetassel necklace
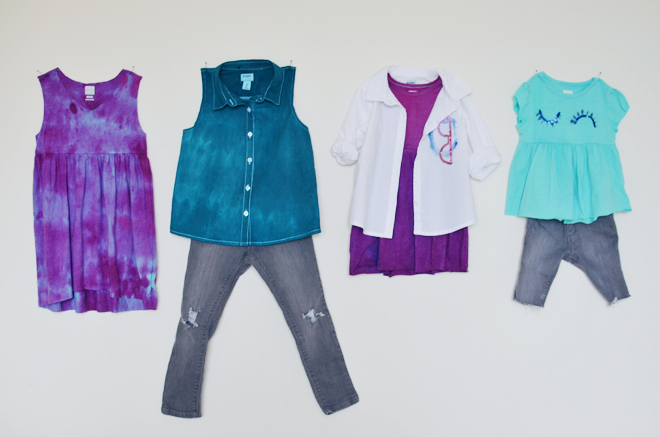
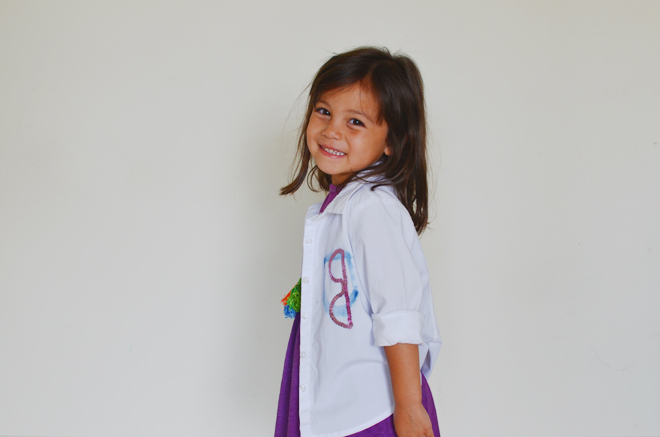
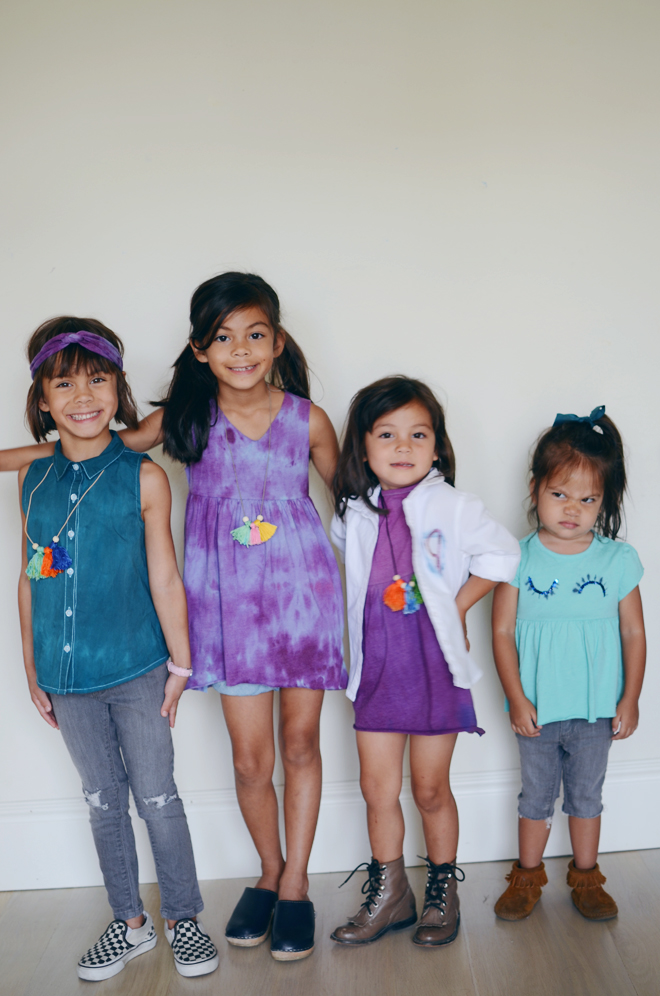
Everyone was pretty happy with how their outfit turned out, well, maybe not Glow seeing how she’s giving that funny face there, though I think it’s her just being a silly goose. That girl always has funny expressions on her face. Later, True ended up wearing Soul’s white shirt because she said she liked the doctor jacket… ha!

This post is sponsored by Old Navy. I’m thankful for your support and the time you take to visit here! 


camp home: tissue paper cheer pom poms

July 23, 2014


tissue paper cheer pom pomsTissue Paper Cheer Pom Poms

Supplies:
3/16″ x 12″ dowel (cut in half, so you end up with two 6″ pieces)
Twelve 16″ x 20″ sheets of tissue paper (the gift assorted packs work well)
Colored masking tape
Scissors
Glue

Directions:
1. Stack 6 sheets of various colored tissue papers together, fold over so that each side is 10″.  Cut 1/2″ slits down toward the fold (stopping 2″ away from the fold), all the way across the sheet.

tissue paper cheer pom pomstissue paper cheer pom poms2. Overlap 2″ of the dowel onto the 2″ of the tissue paper, add a bit of glue, and start rolling the tissue paper (the part that isn’t cut) around the dowel. If needed, continue to add dabs of glue as you roll to secure. Once the entire length is rolled,  wrap the 2″ of the tissue paper, where the dowel is wrapped, with your colored masking tape until the end of the dowel.

tissue paper cheer pom pomstissue paper cheer pom pomscheer pom pomstissue paper cheer pom pomsLet the kids turn your house into their very own cheer camp! Get ready for hootin’, hollerin’, and lots of jumping (possibly, somersaults too!). When I was in the second grade, it was my dream to be a Boston Celtics cheerleader and I distinctly remember drawing a picture of myself wearing a green cheer outfit and waving pom poms. My parents bought me a set of white, plastic, string ones, and I loved those a lot. Then, when I was in 4th grade I started taking private baton lessons and would compete doing baton (complete with sequins outfits, tight bun, and bright make-up). That changed my dream of being cheerleader for a basketball team into a baton twirler for a football team.

I loved the twirling, spinning, and catching the baton after it was spinning in the air. One time, I was practicing late in the backyard, my told me to come in since it was getting dark, but I didn’t listen… I was doing my routine, threw my baton high up in the air to spin, I spun around, then as I was waiting to catch it (it seemed to take a long time to come down and I couldn’t see it when I looked up), then BOING!, it hit me smack dab in the middle of my forehead and I got the biggest bump and bruise. I went to school the next day with a hat on.

tissue paper cheer pom pomstissue paper cheer pom pomstissue paper cheer pom pomsAnyway, you never know what dreams your kids may come up with, and what they eventually will want to pursue. Therefore, it’s fun being able to create with them now and explore things they might fall in love with, you never know when that spark will light up within them and become part of their dreams for their future. Obviously, I never became a cheerleader or baton twirler, but those silly dreams and pursuits all have helped shaped who I am today.

on true: lula gum tunic, misha lulu. pants, fab kids.


camp home: bead & braided friendship bracelets

July 15, 2014


bead & braided friendship braceletBead & Braided Friendship Bracelets

Supplies:
Cording in various colors (I used this; one in hemp and one in nylon)
3/8″ wooden beads
Craft paint
Paintbrushes
Masking tape
Scissors
Small burlap bag (from Michael’s new line called Raw Bar to debut August 8th)
bead & braided friendship braceletDirections:
1. Paint your wooden beads and allow them to dry completely. The little hands may have some trouble with the small size, but it’s still doable, or you can use larger beads for the younger children. Cut out 3 (of 4) 15″ strands of cording and add 3 beads to the center of the bracelet. Using a toothpick helps poke the cording through the hole. The 15″ cording is the size I used for a child’s wrist, but you may need to adjust the size if making for an adult.

DSC_3717bead & braided friendship bracelet2. Knot the cording on both sides of the beads. Using a piece of tape, tape one end of the bracelet onto table (or heavy surface), braid the opposite end. When about 1 1/2″ from the end, knot the cording together to secure braid in place. Repeat for the opposite end. Keep going with the rest of your beads and cording and make a ton more bracelets!

bead & braided friendship braceletbead & braided friendship braceletbead & braided friendship braceletbead & braided friendship braceletIf making for a friend, use this sweet little burlap bags, paint a design in front, allow to dry completely, and slip one (or two) of the bracelets inside.

bead & braided friendship braceletbead & braided friendship braceletbead & braided friendship braceletTraditionally, friendship bracelets use a type macrame, but I went simple since its for my little girls. They’ve been crazy about those Rainbow Loom bracelets (I find those little rubber bands all over the house!), so I knew they would have fun doing a little painting and braiding for these bracelets. They put together a couple in the burlap bag to give to one of their neighbor friends. Making friendship bracelets totally seems like a camp thing to do, so we made our own little version at home!

This is post part of the Michael’s Makers Challenge.


camp home: accordion-fold paper flowers

July 8, 2014


accordion-fold paper flowersaccordion-fold paper flowersAccordion-Fold Paper Flowers

Supplies:
Colored paper (card stock would work too)
Scissors
Yarn
Clear tape
Glue
12″ Wooden skewers

Directions:
Cut your sheet of paper lengthwise into two separate strips. It doesn’t matter if the width of the strips are equal or not, the smaller the width of the strip, the smaller the flower. Start at one end of the strip and accordion fold the entire length of the sheet. If you get to the end and have excess, just trim it off. Fold the accordion folded strip in half, wrap a 8-10″ piece of yarn around the center and knot to secure. Open up the folds so that the ends can be taped (or glued) together to form the circle. Tape the two edges together at the back (I used masking tape so you could clearly see where I taped it, but clear tape would work best. If you’re using colored construction paper (we used card stock), glueing the open ends together to form the circle would work as well. Insert the pointed end of the skewer into the center fold at the back of the flower, use a dab of glue to set the wooden stem in place. Cut out your leaves and glue onto the the wooden stem. Repeat for the remaining strip of paper, and make many more! Play with the different width of the strips, and you can also make some strips with wider accordion folds, and others with narrower ones.

accordion-fold paper flowersaccordion-fold paper flowersaccordion-fold paper flowersYou can get even fancier with accordion paper flowers, but this way is quite simple and my girls had fun making it! After a two week break from projects, they are glad to be doing projects again.


camp home: cardboard dream catchers

June 30, 2014


cardboard dream catcherCardboard Dream Catchers

Supplies:
Cardboard
Scissors
Compass
Paint
Paintbrush
Hole puncher
1/8″ Lacing needle
Yarn (various colors)
Wooden beads

Directions:
1. Choose your desired size for your cardboard hoop (the one pictured is about 6 1/2″ across), and using a compass (or freehand) create your outer circle. Make another circle within the larger one, so that the hoop is about 1″ wide all around. Cut out your cardboard hoop and punch a hole about 1″ apart all the way around.

cardboard dream catchercardboard dream catcher2. Paint your hoop or just leave it as is.

cardboard dream catcher3. With your lacing needle and a long piece of yarn, tie a knot on the back of one hole and go across the front of the hoop into another hole. Pull the yarn across the back of the cardboard into another hole, and stretch it again across the front. Go back and forth until you have gone through all the holes. Tie a knot at the back of the hoop to begin, and another knot to end and secure the yarn. If desired, pick another color yarn and repeat weaving across and back through the hoop again. There’s no wrong pattern when creating your weave, so allow your child create their own pattern by playing connect the dots with the yarn and holes. Tie a small piece of yarn at the top through two holes, so you have a loop for hanging.

cardboard dream catcher4. Attach 6 – 24″ strands (or use whatever length you desire) of yarn to the base of the hoop.

cardboard dream catcher5. Add a wooden bead to the hanging yarn, knot under the bead to secure the bead in place.

cardboard dream catchercardboard dream catchercardboard dream catcherThis project enables children to practice connecting the dots and their hand and eye coordination. You can make this in different sizes and maybe hang fabric strands from the bottom.


camp home: pie pan tambourine

June 23, 2014


pie pan tambourinePie Pan Tambourine

Supplies:
Pie pan (use whatever size you desire, we did regular and mini)
Paint & paintbrush
Permanent marker
1/8″ hole puncher
Chenille stems cut into 2 1/2″ pieces
1″ – 1 1/8″ bells

Directions:
1. Decorate the bottom of the pie pan. We used craft acrylic paint and it took a couple layers, but allow each layer to dry completely before reapplying another coat (it may chip with all the banging, but that just means they are having fun with it). Once the paint is completely dry, draw fun designs on the bottom with a permanent maker.

pie pan tamborines2. Punch holes about 1/4″ in from the rim, and about 1 1/2″ from each other; create holes about three-fourths around the pie pan.

pie pan tamborinespie pan tamborines3. Tie a bell to each chenille stem, insert a stem through each hole around the pie rim, and twist the open ends together to close.

pie pan tamborinespie pan tamborinespie pan tamborinespie pan tamborinespie pan tamborinesHave fun and make some music! Beware, once the children start, they may not stop. Make a bunch in different sizes and start your very own pie pan tambourine band!

on true: dress, huckleberry kids. tulip clips, hello shiso. on soul: dress, vintage. cat headband, hello shiso.


CAKIES
©
Design by Blog Milk